


11Beamage-3 User
’s Manual Revision 4.0
38
Standa Ltd. All rights reserved
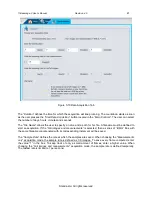
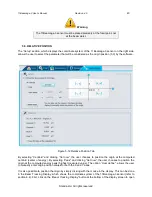
5.2.4. Active Area
The
“Active Area”
function
allows the user to select a region of interest (ROI) on the sensor. This will
increase the frame rate, as fewer pixels need to be transferred from the 11Beamage-3. This can only be
done on small beam sizes, since a cropped beam would invalidate the beam width measurements.
Furthermore, to have an accurate measurement, the active area must be at least 2 times the beam size.
The user can select the desired area from a preset selection or enter a custom size. By default, the area
will be placed at the sensor’s upper left corner pixel (0, 0). This position can be changed by entering the
active area’s upper left position. Checking the “
Center
”
check box will center the active area to the
sensor’s center.
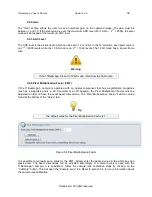
Tip
When working with small beams,
optimize the speed of the data
transfer and still maintain accurate results, by using an
Active Area
that is
twice the size of your beam.
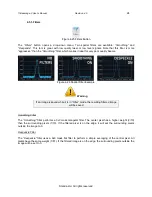
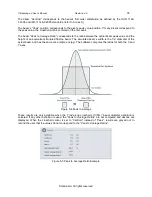
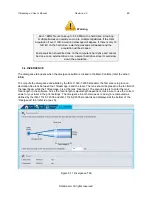
5.2.5. Pixel Addressing
The
“Pixel Addressing”
mode allows the user to downsample the captured image. The
“Average 2x2”
will
take a 2x2 pixel cluster and return its average as one larger pixel.
The “Average 2x2” function is only
available in the 12 bit ADC mode. The
“Decimate 2x2”
will only return 1 out of the 4 pixels. Because the
pixel area is doubled with this mode, it can be used with large beams, where the spatial resolution is not
crucial. It will increase the frame rate because fewer pixels are transferred from the 11Beamage-3.
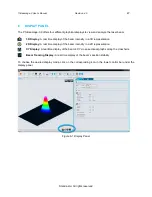
Full Resolution
Average 2x2
Decimate 2x2
Figure 5-7 Pixel Addressing Mode
Tip
When working with large beams,
optimize the speed of the data transfer
by reducing the spatial resolution using the
Pixel Addressing
function.