


- 16 -
EN
6.2.
Electrical connection
The appliance should be connected to an AC power source.
Before connecting the appliance to the mains, make sure that the voltage and frequency values given on the rating plate of the
appliance correspond with the voltage and frequency values at the place of installation.
The electrical outlet should be properly earthed and equipped with a differential current protection device in accordance with
legal provisions in force.
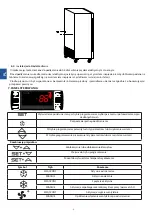
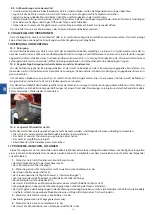
7. CONTROL PANEL
AUX
+
+
+
Display of the setpoint, in the programming mode, parameter selection and confirmation of changes
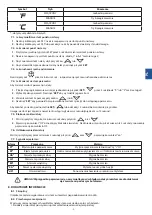
Start manual defrost
AUX
+
+
+
In programming mode, scrolling through the parameter list or increasing the value.
AUX
+
+
+
In programming mode, scrolling through the parameter list or decreasing the value.
Button combinations
AUX
+
+
+
Locking or unlocking the keyboard
AUX
+
+
+
Entry into the programming mode
AUX
+
+
+
Back to the ambient temperature display
7.1.
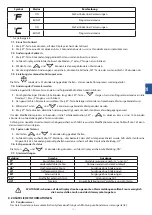
Description of indicator lights
Symbol
Mode
Meaning
ON
Defrost active
FLASHING
Dripping active
ON
Compressor active
FLASHING
Activation of short cycle protection (AC parameter)
*
ON
Activation of the fan output
FLASHING
Delayed fan activation after defrost
ON
Units of measure
FLASHING
Programming mode
ON
Units of measure
FLASHING
Programming mode
* - applies to freezing equipment
7.2.
How to display the setpoint value
1.
Press the SET button briefly, the setpoint appears on the screen.
2.
Press the SET button briefly or wait 5 seconds to return to the standard
7.3.
How to change the setpoint
1.
Hold down the SET button for 2 seconds to change the setpoint value;
2.
The value of the setpoint appears on the screen, the „C” or „F” LED
3.
To change the value, use the buttons
AUX
+
+
+
or
AUX
+
+
+
.
4.
To confirm the changes, press the SET button or wait 10s
7.4.
How to run a manual defrost
Press the
for at least 2 sec - manual defrosting will start
7.5.
How to change the parameter value
To change the parameter value:
1.
Go to programming by simultaneously pressing the buttons SET+
AUX
+
+
+
for 3 sec (“°C” or “°F” LED flashes).
Summary of Contents for 830130V02
Page 19: ......