6
7. Getting to Know Your
ACTOR
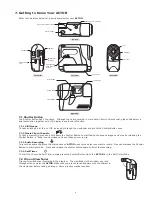
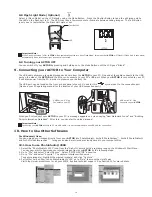
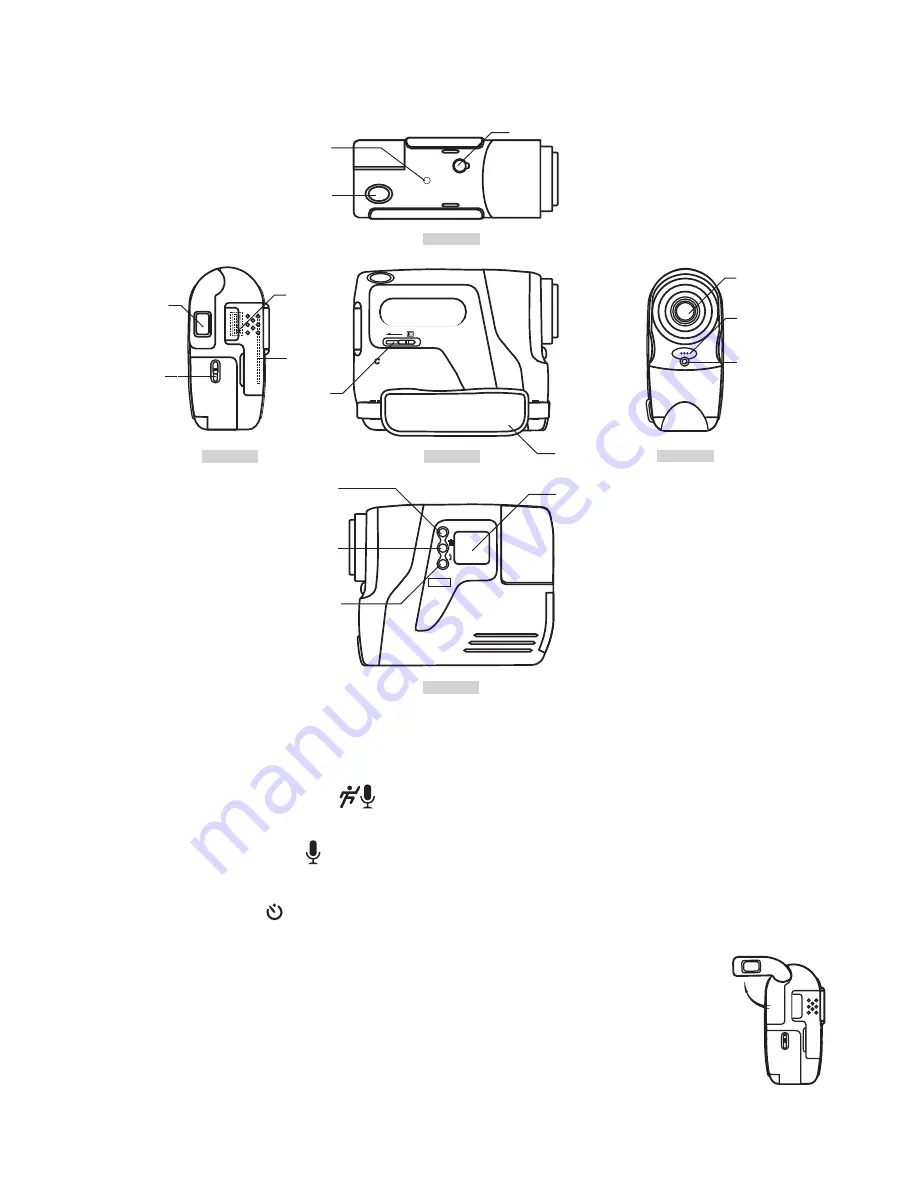
Refer to the picture below for a quick overview for your
ACTOR.
Top View
Left View
Right View
Front View
Back View
F3.
0
f=5
.3m
m
CO
OL
-ICA
M DIGITAL CAM
ER
A
M
Flash Plug Insert Location
Flash Unit Mounting Location
Shutter Button
Microphone
Lens
Power LED
SmartMedia™
Card Release
Button
Hand Strap
SmartMedia™
Card Slot
USB Port
Viewnder
Battery Door
Lock
LCD Display
Flash Button
Mode Button
Delete Button
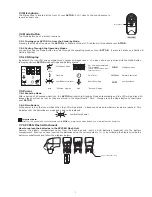
7.1 Shutter Button
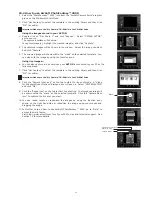
The Shutter Button has 4 functions. Although these are covered in more detail later in this manual, please nd below a
brief description together with LCD display icons for each function.
7.1.1 Still Image
To take an image, aim the
ACTOR
by looking through the viewnder and press the Shutter Button once.
7.1.2 Movie Clip with audio
To take a movie clip, press and hold down the Shutter Button to start taking continuous images and stop by releasing the
Shutter Button, a “beep” sound means you have taken an movie clip.
7.1.3 Audio Recording
To record an audio clip, place the microphone on
ACTOR
close to the object you want to record. Press and release the Shutter
Button to start recording. Press and release the shutter button again to nish the recording.
7.1.4 Self-Timer
To start the 10 second Self-Timer, simply press the Shutter Button when the
ACTOR
is in the Self-Timer Mode.
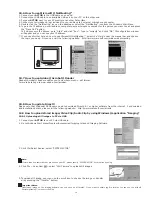
7.2 Flip out Viewnder
Flip your viewnder as illustrated in the diagram. The viewnder is the window you look
through when you aim the
ACTOR
. Make sure you are center and square onto the subject in
the viewnder before taking an image. Some practice maybe required.

