background image

23

Custom User Defined Programs

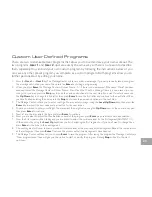
There are two customizable User programs that allow you to build and save your own workout. The 
two programs, 

User 1

 and 

User 2

, operate exactly the same way so there is no reason to describe 

them separately. You can build your own custom program by following the instructions below or you 
can save any other preset program you complete as a custom program. Both programs allow you to 
further personalize it by adding your name.

1. 

Press the 

User 1

 or 

User 2

 key. The Message Center will show a welcome message. If you had previously saved a program 

the message will contain your name. Then press the 

Enter

 key to begin programming.

2. 

When you press 

Enter

, the Message Center will show “Name - A”, if there is no name saved. If the name “David” had been 

previously saved the Message Center will show “Name - David” and the D will be blinking. If there is a name saved you can 

change it or you may press the 

Stop

 key to keep the name and continue to the next step. If you want to enter a name use 

the 

Up

/

Down

 key to change the first letter then press 

Enter

 to save the first letter and continue to the next letter. When 

you have finished entering the name press the 

Stop

 key to save the name and continue to the next step.

3.  The Message Center will ask you to enter your Age. You may enter your age, using the 

Level Up

/

Down

 keys, then press the 

Enter

 key to accept the new value and proceed on to the next screen.

4.  You are now asked to enter your Weight. You may adjust the weight value using the 

Up

/

Down

 keys or the numeric key pad, 

then press 

Enter

 to continue.

5.  Next is Time. You may adjust the time and press 

Enter

 to continue.

6.  Now you are asked to adjust the Max Resistance Level of the program, press 

Enter

 when resistance has been selected.

7.  Now the first column will be blinking and you are asked to adjust the resistance level for the first segment(SEGMENT > 1) 

of the workout by using the 

Level Up

 key. When you finish adjusting the first segment, or if you don’t want to change, then 

press 

Enter

 to continue to the next segment.

8.  The next segment will show the same workload resistance level as the previously adjusted segment. Repeat the same process 

as the last segment then press 

Enter

. Continue this process until all twenty segments have been set.

9.  The Message Center will then tell you to press 

Enter

 to save the program. After saving the program the Message Center says 

“New program saved” then will give you the option to start or modify the program. Pressing 

Stop

 will exit to the start  

up screen.

Summary of Contents for XE895

Page 1: ...XE895 ELLIPTICAL TRAINER OWNER S MANUAL...

Page 2: ...895 ASSEMBLY INSTRUCTIONS 14 CONSOLE OPERATION 21 PROGRAMMABLE FEATURES 30 USING HEART RATE TRANSMITTER 33 GENERAL MAINTENANCE 34 MANUFACTURER S LIMITED WARRANTY Thank you for purchasing our product p...

Page 3: ...ship where you purchased this elliptical trainer is your administrator for all Spirit Fitness warranty and service needs Their responsibility is to provide you with the technical knowledge and service...

Page 4: ...h an approximate measurement in relation to your target heart rate Use of a chest transmitter strap is a much more accurate method of heart rate analysis Various factors including the user s movement...

Page 5: ...tical trainer such as watching television reading etc These distractions may cause you to lose balance which may result in serious injury Do not use excessive pressure on console control keys They are...

Page 6: ...move the tools first Remove the hardware for each step as needed to avoid confusion The numbers in the instructions that are in paren thesis are the item number from the assembly drawing for reference...

Page 7: ...7 SPEAKERS CONSOLE CONSOLE MAST CONNECTING ARM LEVELERS FRONT STABILIZER REAR STABILIZER FOOT PEDALS MAIN FRAME RAILS WATER BOTTLE HOLDER PULSE GRIPS SWING ARM CONSOLE FAN...

Page 8: ...her HARDWARE FOR STEP 1 2 Put the 2 FLAT WASHERS 176 on the 2 HEX HEAD BOLTS 137 and hand tighten them through the TOP of the MIDDLE STABILIZER TUBE into the REAR RAIL ASSEMBLY 2 with the WRENCH 194 3...

Page 9: ...ierce 14P COMPUTER CABLE 68 from bottom of the mast tube through it and pull out of the top Use 4 SOCKET HEAD CAP BOLTS 145 4 SPRING WASHERS 186 and 4 FLAT WASHERS 176 to secure 3 Untie the COMPUTER C...

Page 10: ...WER SWING ARMS 13 14 together with 4 WAVE WASH ERS onto LEFT and RIGHT SHAFTS of the MAST TUBE then tighten with 2 HEX HEAD BOLTS 136 and two FLAT WASHERS 175 by using the WRENCH 194 3 Untie Rod end B...

Page 11: ...ARM 13 and secure with 3 HEX HEAD BOLTS 138 4 FLAT WASHERS 176 2 CURVED WASHERS 187 and 3 NYLOC NUTS 165 by using WRENCH 194 and WRENCH 195 Do it the same way for RIGHT UPPER SWING ARM 11 and RIGHT L...

Page 12: ...on Lower Handle Bar Do it the same way for RIGHT CONNECTING ARM COVER B 122 and RIGHT CONNECTING ARM COVER A 120 on right Connecting Arm and right Lower Handle Bar respectively 3 Secure 2 SLIDE WHEEL...

Page 13: ...SHEET METAL SCREWS 153 by using PHILLIPS HEAD SCREW DRIVER 192 3 Match FRONT HANDLE BAR COVER 100 and REAR HANDLE BAR COVER 101 with each other on LEFT LOWER HANDLE BAR and use PHILLIPS HEAD SCREW DRI...

Page 14: ...of work outs Heart Rate Profile Easy T ouch Control Keys Muscle Activation Profile Swivel Fan to keep you cool Integrated Speakers for MP3 Player Convenient cargo compartment for keys phone or MP3 pl...

Page 15: ...for only a few seconds then the console will go to the start up display The dot matrix display will be scrolling through the different profiles of the programs and the Message Center will be scrolling...

Page 16: ...y your current heart rate in beats per minute during the workout You must use both stainless steel sensors on the stationary grips or the heart rate transmitter chest strap to display your pulse Pulse...

Page 17: ...Green represents minimal muscle involvement yellow represents medium involvement and red represents full or heavy activation These are the different scenarios for lower body muscle activation Levels...

Page 18: ...sy workloads and the changes between levels are set to a good progression for de conditioned users Levels 6 10 are more challenging but the increases in resistance from one level to the next remain sm...

Page 19: ...function This allows you to go back to change programming data Program Keys The program keys are used to preview each program When you first turn the console on you may press each program key to previ...

Page 20: ...kout to workout Entering A Program And Changing Settings When you enter a program by pressing a program key then Enter key you have the option of entering your own personal settings If you want to wor...

Page 21: ...the settings and can begin your workout by pressing the Start key You can also go back and modify your settings by pressing the Stop key NOTE At any time during the editing of Data you can press the S...

Page 22: ...modify your settings by pressing the Enter key 7 If you want to increase or decrease the resistance at any time during the program press the Level Up Down keys onthe console or above the heart rate s...

Page 23: ...the name press the Stop key to save the name and continue to the next step 3 The Message Center will ask you to enter your Age You may enter your age using the Level Up Down keys then press the Enter...

Page 24: ...t the level that you chose before starting this program up to a maximum effort which lasts for 10 of the total workout time then a gradual regression of resistance back to approximately 10 of maximum...

Page 25: ...before beginning a quick cool down This will build up your heart muscle and increase blood flow and lung capacity STRENGTH This program has a gradual progression of resistance up to 100 of maximum eff...

Page 26: ...ops your FastTwitch muscle fibers which are used when performing tasks that are intense and short in duration These deplete your oxygen level and spike your heart rate followed by periods of recovery...

Page 27: ...an be accomplished by using the following formula 220 minus your age This will give you the Maximum Heart Rate MHR for someone of your age To determine the effective heart rate range for specific goal...

Page 28: ...er cardiovascular fitness or weight loss is represented by two different lines that cut diagonally through the chart A definition of the lines goal is in the bottom left hand corner of the chart If yo...

Page 29: ...on of Effort 6 Minimal 7Very very light 8Very very light 9Very light 10Very light 11 Fairly light 12 Comfortable 13 Somewhat hard 14 Somewhat hard 15 Hard 16 Hard 17Very hard 18Very hard 19Very very h...

Page 30: ...utes before your work out Some users because of body chemistry have a more difficult time in achieving a strong steady signal at the beginning After warming up this problem lessens 6 Your workout must...

Page 31: ...ll be oriented so the Spirit Fitness logo is right side up 6 The antenna that picks up your heart rate is very sensitive If there is an outside noise source turning the whole machine 90 degrees may de...

Page 32: ...Up Down keys then press Enter Note The heart rate that appears is based on the you accepted in Step 1 If you change this number it will either increase or decrease the from Step 1 6 Now you are finish...

Page 33: ...maintenance diagnostic software The software will allow you to change the console settings from English to Metric and turn off the beeping of the speaker when a key is pressed for example To enter the...

Page 34: ...that was not part of the elliptical trainer at the time it was shipped from the factory 5 Damages to the elliptical trainer finish during shipping installation or following installation 6 Routine mai...

Page 35: ...question as to where to obtain service contact our service department at 870 935 1107 4 Spirit Fitness obligation under this warranty is limited to repairing or replacing at Spirit Fitness option the...

Page 36: ...800 258 4555 spiritservice spiritfitness com www spiritfitness com Spirit Fitness 3000 Nestle Road Jonesboro AR 72401 XE895 Owners Manual 2015 All Rights Reserved Revision 01 09 2015...

Reviews: