background image

3

Summary of Contents for Intensifier K HTINT59K

Page 1: ...Speco Technologies is constantly developing product improvements We reserve the right to modify product design and specifications without notice and without incurring any obligation Rev 01 01 2018 HT...

Page 2: ...Contents 1 Precautions 2 3 Safety Instructions 4 Package Contents 5 Camera Installation 6 9 Lens Adjustment 10 11 Specifications 12 13 Camera Dimension 14 Features 15 OSD Menu Details 16 38 Trouble S...

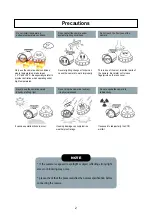
Page 3: ...nd 50 C Be especially careful to provide ventilation when operating under high temperatures This is one of the most important parts of the camera Be careful not to leave fingerprints on the lens cover...

Page 4: ...3...

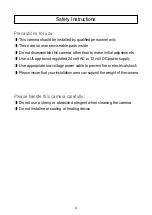
Page 5: ...ssemble this camera other than to make initial adjustments Use a UL approved regulated 24 volt AC or 12 volt DC power supply Use appropriate low voltage power cable to prevent fire or electrical shock...

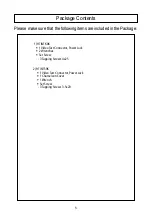
Page 6: ...the following items are included in the Package 1 HTINT60K 1 Video Test Connector Power Jack 2 Wrenches Set Screw 3 Tapping Screws 4x25 2 HTINT59K 1 Video Test Connector Power Jack 1 Chameleon Cover 1...

Page 7: ...N jvuulj Gwv lyGjhislG XUG oluG zpunGXYG vs zGkjGO G G WWG hPG YUG oluG zpunGY G vs zGhjGO WG Gh P ZUGjvuulj G pklvGjhislG T jvuulj GiujGjhislG vG olGiujGqhjrUG kjGXY Gw Gz w Gp Gaylk j GaGORP ishjraO...

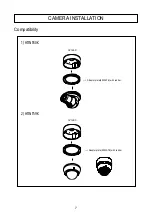
Page 8: ...7 CAMERA INSTALLATION Compatibility 1 HTINT60K CVCJBD Adaptor plate 60PLATE with rubber 2 HTINT59K CVCJBD Adaptor plate 59PLATE with rubber...

Page 9: ...CAMERA INSTALLATION 8 1 HTINT60K BALL DOME BASE BALL DOME BODY BALL DOME SCREW TS T1 4X25 TH SUS 3EA...

Page 10: ...CAMERA INSTALLATION 9 2 HTINT59K JUNCTION BOX ASSEMBLY DOME COVER CEILING TAPPING SCREW 4X25 4EA MACHINE SCREW M4X10 3EA SCREW MS WHT SUS ST_ M3X10 TORX 3EA JUNCTION BASE SPONGE...

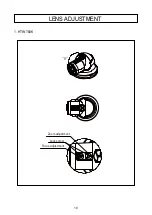
Page 11: ...10 1 HTINT60K LENS ADJUSTMENT Focus adjustment Lock screw Zoom adjustment...

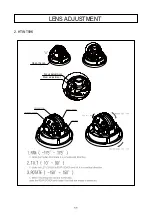
Page 12: ...11 2 HTINT59K LENS ADJUSTMENT Focus adjustment Zoom adjustment Open the cap...

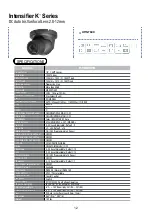
Page 13: ...CVBS 1 0Vp p 75 Ohm 0Lux Intensify x64 DC MANUAL AUTO Manual 1 60Sec 1 60000Sec FLICKER Built in O O ON LOW MIDDLE HIGH OFF ON LOW MIDDLE HIGH OFF Color BW EXTERN Auto ATW AWB AWC SET MANUAL 0 20 Leve...

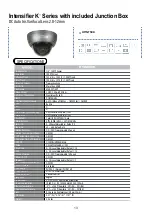
Page 14: ...Ohm 0Lux Intensify x64 DC MANUAL AUTO Manual 1 60Sec 1 60000Sec FLICKER Built in O O ON LOW MIDDLE HIGH OFF ON LOW MIDDLE HIGH OFF Color BW EXTERN Auto ATW AWB AWC SET MANUAL 0 20 Level Adjustable Def...

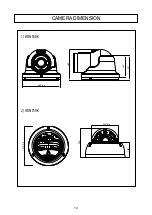
Page 15: ...14 CAMERA DIMENSION 1 HTINT60K 4 65 dia 3 80 2 66 3 01 2 HTINT59K 4 72 dia 3 35 1 82 3 23 dia...

Page 16: ...e scene SMART IR No saturation image vivid image in darkness it makes very sharp video image in darkness This technology eliminates saturation of video image of the closer object in darkness by contro...

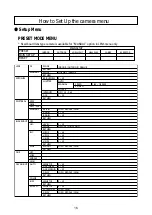
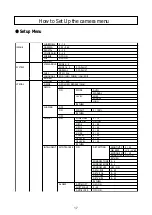
Page 17: ...ZE RETURN WEIGHT RETURN SMART IR AGC THRES AGC MARGIN DELAY RETURN SMART IR RETURN SMART IR EXTERN S W DELAY RETURN INDOOR OUTDOOR DEBLUR NORMAL DEBLUR 0 20 AUTO MANUAL FLICKER OFF X2 X64 0 20 LOW MID...

Page 18: ...FF ON SENSITIVITY OBJ KEEP MOTION EST SIGNAL OUT RETURN 0 6 0 3 OFF ON 0 40 0 32 0 40 0 32 0 20 LV 0 LV 60 0 20 OFF ON DAY NIGHT IMAGE SYSTEM SPECIAL MIDDLE HIGH AUTO COLOR B W EXTERN SMART IR AGC THR...

Page 19: ...RN MOVING ZOOM IN STANDBY SYNCHRONOUS TRACKING REPEAT RETURN DET SETTING WINDOW TONE WINDOW ZONE WINDOW USE DET H POS DET V POS DET H SIZE DET V SIZE RETURN OFF ON 0 20 OFF ON 0 20 0 240 sec 0 240 sec...

Page 20: ...r Outdoor Low light Hallway Lobby Elevator Move OSD joystick into left or right on EXIT then RESET menu shows up Press the button for 2 3 seconds to reset SPECO TECH 1 PRESET 2 MAIN SETUP 3 EXIT INDOO...

Page 21: ...and Down button Move the triangular indicator Up or Down to select the desired feature by pressing the Up or Down button MENU SETUP MENU 1 LENS 2 EXPOSURE 3 WHITE BAL 4 BACKLIGHT 5 SPECO DNR 6 DAY NI...

Page 22: ...sing the Up and Down buttons on the Set Up menu screen 2 Select the desired lens type by pressing the Left of Right button Fixed board lens type camera is available for MANUAL option in LENS menu only...

Page 23: ...n 2 Select the desired mode using the Left or Right buttons 2 EXPOSURE NOTE On DC mode you can select INDOOR OUTDOOR or DEBLUR depending on the installation environment On MANUAL mode you can select N...

Page 24: ...l slow shutter speed in low light environment digital slow shutter x2 x64 default value x16 AGC the brighter image can be displayed by adjusting AGC Auto Gain Control level AGC 0 20 default 15 default...

Page 25: ...or temperature is from 1 800K to 10 500K AWB The function to search for the color which is matched well with the ambient environment This be used when the color temperature is from 3 000K to 7 000K AW...

Page 26: ...irectly or if there is a drastic lighting change The operation of White balance may become unstable 4 BACK LIGHT On this menu back light image can be compensated by users selecting one of modes HLC BL...

Page 27: ...AY IIIIIIIIII IIIIIIIIII 10 Normal HLC BLC V POS H SIZE V SIZE RETURN 7 5 6 4 BLC Back Light Compensation The camera with 3D DNR provides the intelligent light level control to overcome strong backlig...

Page 28: ...ven under back light circumstances where intensity of illumination can vary excessively namely when there are both very bright and very dark areas simultaneously in the field of view of the camera To...

Page 29: ...s OFF LOW MIDDLE HIGH to use DNR by pressing the Right or Left button MENU 1 LENS 2 EXPOSURE 3 WHITE BAL 4 BACKLIGHT 5 SPECO DNR 6 DAY NIGHT 7 IMAGE 8 SYSTEM 9 SPECIAL RETURN DC ATW OFF MIDDLE AUTO NO...

Page 30: ...AY NIGHT using the Up or Down button on the Set Up menu screen 2 Select one of modes EXTERN AUTO COLOR B W using the Left or Right buttons EXT it can change into COLOR or B W mode automatically throug...

Page 31: ...OR FLIP RETURN 0 55 OFF OFF COLOR Making the video output color always B W Making the video output B W always By selecting the color signal On or Off this lets the burst signal be disappeared or not 6...

Page 32: ...st the value to the proper one depending on a sort of image SHARPNESS 0 10 GAMMA Gamma value is adjustable GAMMA 0 45 0 65 PEDSTAL Pedstal value is adjustable PEDSTAL 0 20 COLOR GAIN Color gain value...

Page 33: ...tons MENU 1 LENS 2 EXPOSURE 3 WHITE BAL 4 BACKLIGHT 5 SPECO DNR 6 DAY NIGHT 7 IMAGE 8 SYSTEM 9 SPECIAL RETURN DC ATW OFF MIDDLE AUTO 8 SYSTEM 8 SYSTEM VIEW ANGLE CVBS LANGUAGE RETURN VIEW ANGLE CVBS L...

Page 34: ...can be used when you want to select the additional function control 1 When the SETUP menu is displayed select SPECIAL using the Up and Down button 2 Select one of the mode using the Left or Right but...

Page 35: ...ower the resolution is D WDR This camera which is using 3D DNR DSP provides intelligent light level control to overcome even strong backlight conditions OFF LOW MIDDLE HIGH DEFOG This function helps t...

Page 36: ...HADING WEIGHT RETURN 100 PRIVACY ZONE NUM ZONE DISP H POS V POS H SIZE V SIZE Y LEVEL CR LEVEL CB LEVEL RETURN 0 OFF 12 2 3 3 IIIIIIIIII IIIIIIIIII IIIIIIIIII IIIIIIIIII IIIIIIIIII IIIIIIIIII 10 10 10...

Page 37: ...SIZE DET V SIZE RETURN 0 0 OFF 1 2 16 12 2 ALARM it is used to set ANTI SHIFT or ANTI BLOCK based on motion tracking scale level of these functions are adjustable ALARM ANTI SHIFT SHIFT SCALE ANTI BL...

Page 38: ...ssage BLOCKING DETECTED on monitor 3 QUICK ZOOM Digital zoom in is operated to precisely detect objects when objects get in a designated motion detection area The area setting is available on MTN TRAC...

Page 39: ...ETURN MENU 1 LENS 2 EXPOSURE 3 WHITE BAL 4 BACKLIGHT 5 SPECO DNR 6 DAY NIGHT 7 IMAGE 8 SYSTEM 9 SPECIAL RETURN DC ATW OFF MIDDLE AUTO Press RETURN button to save the current settings and exit the setu...

Page 40: ...et to ON in the menu FHas MD AREA been properly defined FCheck that the AGC setting in the EXPOSURE menu is not set to OFF FCheck the EXPOSURE menu and make sure SHUTTER is set to FMake sure that the...

Page 41: ...40...

Page 42: ......

Page 43: ......

Page 44: ...200 New Highway Amityville NY 11701 631 957 8700 1 800 645 5516 www specotech com...

Reviews: