GUR 12S
EN
6
ƒ 7KHEDWWHU\SDFNXWLOL]HVQLFNHOFDGPLXPFHOOV
Cadmium is considered to be a toxic material.
8VHDQHQYLURQPHQWDOO\VDIHGLVSRVDOXQLWDWD
municipal waste disposal centre to dispose of a
damaged or worn out battery.
FITTING OR REMOVING
THE BATTERY PACK
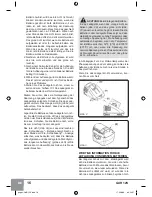
7RUHPRYHEDWWHU\SDFN'HSUHVVWKHEDWWHU\UH
-
lease button and pull battery pack out of tool.
7RLQVWDOOEDWWHU\SDFN3XVKEDWWHU\SDFNRQWRWRRO
XQWLOLWORFNVLQSODFH
Fig. 1
Figure 1
INSTRUCTIONS FOR BATTERY CHARGING:
1. Press down on the battery pack to make sure
the battery contacts are properly engaged with
the charger contacts. The red light should ig-
nite. Red light indicates fast charging mode. If
the red light is flashing, the battery pack is fully
discharged or hot. If the battery pack is hot, the
red light will stop flashing and glow once the
battery pack has cooled down. If the battery
pack is fully discharged, the red light should
JORZDIWHUYROWDJHKDVLQFUHDVHGQRUPDOO\DS
-
SUR[LPDWHO\IRUPLQXWHV,IDIWHURQHKRXUWKH
red light is still flashing, the battery pack is de-
IHFWLYHDQGVKRXOGEHUHSODFHG7KHJUHHQOLJKW
indicates that the battery pack is fully charged
or it is in slow charging mode to maintain bat-
WHU\SDFNFKDUJHOHYHO,IWKH\HOORZOLJKWJORZV
and the red light flashes, the battery is defec-
WLYH5HWXUQEDWWHU\SDFNWRSODFHRISXUFKDVH
2. After your battery pack is fully charged, the red
OLJKWZLOOWXUQ2))DQGWKHJUHHQOLJKWZLOOFRPHRQ
3. After normal use, the battery pack will require
one hour of charging before it will be fully
charged. A completely discharged battery will
require 1½ hours in order to be fully charged.
4. The battery pack will become a little warm while
charging. This is normal and does not indicate
a problem.
5. Do not place the charger in an extremely hot or
cold place. It will work best at room temperature.
0DNH VXUH SRZHU FLUFXLW YROWDJH LV WKH VDPH DV
WKDW VKRZQ RQ WKH FKDUJHU VSHFL¿FDWLRQ SODWH
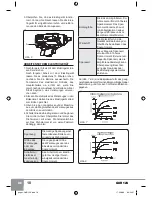
Connect charger to power source. The orange
OLJKW$
Fig. 2
, should light up. This indicates the
charger is ready to begin charging.
Position battery pack on charger; align rails
Fig. 2, D
RQ EDWWHU\ FKDUJHU ZLWK IRXU WDEV
Fig. 3, E
RQEDWWHU\SDFN6OLGHEDWWHU\IRUZDUG
onto charger until it stops.
7KHUHGOLJKW
Fig. 2, B
VKRXOGEHJLQWRJORZFRQ
-
WLQXRXVO\LQGLFDWLQJWKDWWKHEDWWHU\SDFNLVUHFHLY
-
LQJD³)DVW&KDUJH´$IWHUDSSUR[LPDWHO\RQHKRXU
WKH ³)DVW &KDUJH´ LQGLFDWRU OLJKW UHG VKRXOG JR
out indicating that the battery pack is fully charged
and that the charger is now in a “Trickle Charge”
PRGHJUHHQOLJKW7KHEDWWHU\SDFNFDQEHOHIWRQ
“Trickle Charge” until you are ready to use it.
CAUTION:
When inserting battery
SDFNRQWRFKDUJHULIWKHRUDQJHOLJKW
Fig. 2, A
VWDUWVWREOLQNDQGWKHJUHHQOLJKW
Fig. 2, C
EH
-
gins to glow, indicating maybe battery tempera-
WXUHLVWRRKLJKRUWKHEDWWHU\YROWDJHLVWRRORZ
SOHDVHOHDYHEDWWHU\SDFNRQFKDUJHULWZLOOEH
charged automatically when battery tempera-
WXUHLVEHWZHHQ)&DQG)&
RU EDWWHU\ YROWDJH EHFRPHV QRUPDO 7KHQ WKH
red light
(Fig. 2, B)
should begin to glow con-
tinuously, and the green light will turn off.
'HSHQGLQJ RQ URRP WHPSHUDWXUH OLQH YROWDJH
DQGH[LVWLQJFKDUJHOHYHOLQLWLDOEDWWHU\FKDUJLQJ
may take longer than one hour.
Disconnect charger from power source when not
in use.
Figure 2
pages-GUR 12S.indd 6
17.3.2006 . 09:59:24


