background image

Ardumoto Kit Hookup Guide 

Introduction

The Ardumoto Shield is a dual-motor controller for Arduino. Combined with 
an Arduino, the Ardumoto makes a fantastic controller platform for RC 
vehicles or even small autonomous robots. It’s now easier to use, featuring 
control signal LEDs, while also being much more flexible for advanced 
users.

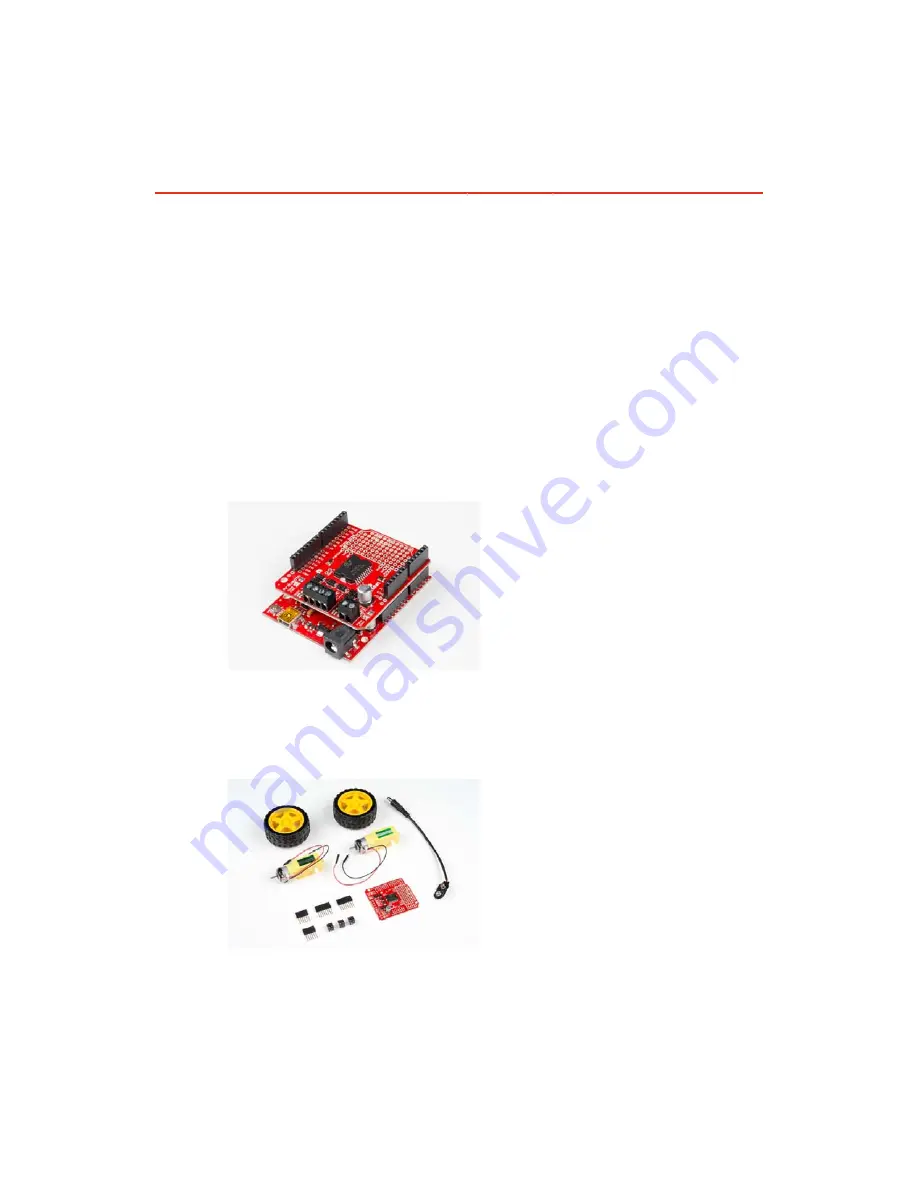
Ardumoto Shield assembled and situated on a RedBoard.

We sell the Ardumoto Shield either alone or with a set of motors and 
wheels in our Ardumoto Shield Kit. This kit includes the shield as well as 
pairs of tires, motors and connectors. And, of course, it’s all stuffed in a 
classic SparkFun red box (which may come in handy as a robot chassis).

Contents of the Ardumoto Shield Kit.

Covered in This Tutorial

This tutorial covers assembly and use of both the Ardumoto Shield and the 
Ardumoto Shield Kit. Digging deeper, we’ll get into some assembly tips and 
an example Arduino sketch. We will also present some additional resources 
that can help you get the most out of your board.

Page 1 of 17

Summary of Contents for Ardumoto Kit

Page 1: ...hield either alone or with a set of motors and wheels in our Ardumoto Shield Kit This kit includes the shield as well as pairs of tires motors and connectors And of course it s all stuffed in a classi...

Page 2: ...gory You ll also need a handful of connectors to get everything wired up together We recommend Stackable Headers to connect your Ardumoto to your Arduino and two or three 3 5mm Screw Terminals to help...

Page 3: ...is a great platform for first time motor users and experienced ones too There are however a few concepts you should be familiar with before clicking over to the next few pages Here are some tutorials...

Page 4: ...means it can individually drive up to two motors So it s perfect for a two wheel drive vehicle But if you have a special four wheel drive platform you might need something else or just two L298s Each...

Page 5: ...es two pins the digital output for direction and the PWM for speed The factory configuration uses Arduino pins 2 3 4 and 11 The alternate configuration uses pins 7 8 9 and 10 If the alternate pins are...

Page 6: ...ilding simple two wheel drive robot platforms connect one motor to port A and the other motor to port B Technically there is no right or wrong way to connect your motor s wires to the two output pins...

Page 7: ...debug your code LEDs in operation Supply Voltage The Ardumoto Shield should be powered through one of two power supply inputs Pick one or the other 1 The barrel jack input on the Arduino 2 The V input...

Page 8: ...r a Project tutorial Ardumoto Shield Assembly Tips Before you can start using the Ardumoto Shield you have to do a little assembly Embrace your inner electronics technician and whip out that soldering...

Page 9: ...looking for lower profile installation If this is your first shield assembly we recommend reading through our shield assembly guide There are all sorts of tricks to installing shield headers and maki...

Page 10: ...otors being driven Disconnect all the jumpers and wire up the L298 in any way you please Unlike other prototyping areas you may have encountered in the past these holes are not wired together You don...

Page 11: ...ell This shape of robot relies mostly on balance and slides across the floor If driving on carpet slick clear tape can be added to the corners to prevent catching Example Code Controlling the Ardumoto...

Page 12: ...to make life easier define MOTOR_A 0 define MOTOR_B 1 Pin Assignments Default pins define DIRA 2 Direction control for motor A define PWMA 3 PWM control speed for motor A define DIRB 4 Direction contr...

Page 13: ...for a second Now spin in place driveArdumoto MOTOR_A FORWARD 255 Motor A at max spe ed driveArdumoto MOTOR_B REVERSE 255 Motor B at max spe ed delay 2000 Drive forward for a second stopArdumoto MOTOR...

Page 14: ...12 LOW digitalWrite 12 LOW Motor A will spin clockwise To make it spin the other way write the pin HIGH digitalWrite 12 HIGH Motor A will spin counter clockwis e Note The rotation direction depends o...

Page 15: ...dumoto Schematic To make the Ardumoto we ve connected the pairs with one of each inverted to allow a direction control The enable pin is then PWM d such that the output goes between drive enabled and...

Page 16: ...ing drive configuration Bridging output and control lines for 4A single drive add a heatsink with thermal tape Resources Ardumoto Shield Schematic A PDF of the shield s schematic Ardumoto Shield Githu...

Page 17: ...is an I2C based low voltage DC motor driver Assembly Guide for RedBot with Shadow Chassis Assembly Guide for the RedBot Kit This tutorial includes extra parts to follow to go along with the RedBot In...

Reviews: