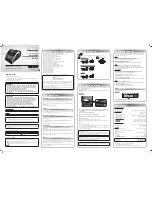
UR2040 / English Manual
3
Assembly Drawing
Install the unit as below 3 steps:
1.
Place the mounting/drill template under the cabinet with tape, so the unit will be located where you want to,
and drill four holes with diameter 1/16 inch drill bit
2.
Fasten the screw as the above drawing with supplied mounting long screw or mounting
b short screw
3.
Push the unit to the mounting bracket
Warning: To prevent damage, do not place any heating or cooking appliance beneath the unit, install the
unit as far as possible from a source of noise such as fridge, microwave oven etc.
2 Getting start
Power Up
When device connect to power and it’s powered up first time, Automatic update function will start
automatically and scrolling text “UPDATE ” is display on LCD,
it may need few minutes depends
signal strength and device working environment , when signal was received, the right time should
be display on LCD accordingly. To terminate it, press any key during the period
When the automatic system setting had been terminate by user or update un-succeed, the date
and clock are defaulted to 01.01.2015 , 0:00
The all alarms are defaulted to 0:00
The unit is switched to clock auto-run mode
Default back light automatically set to dim from 23:00 to 05:59 unless you switch the auto dimmer
to OFF


