Using an Optical Disc Drive
You may use the PCGA-DSM51 CD-RW/DVD Docking Station or the PCGA-DSM5 CD-RW/DVD Docking Station if your computer
came with a docking station. Both Sony docking stations have a built-in optical drive. If your computer did not come with a
docking station or you chose not to utilize the docking station drive, you may connect an external optical drive (such as
PCGA-CRWD2) to the i.LINK port.
Do not use an optional PC Card optical drive while your computer is connected to the docking station.
To insert a disc
When the computer is in Standby or Hibernate mode, you cannot insert a disc because the disc tray will not open. See
Controlling Power Management
for more information.
1.
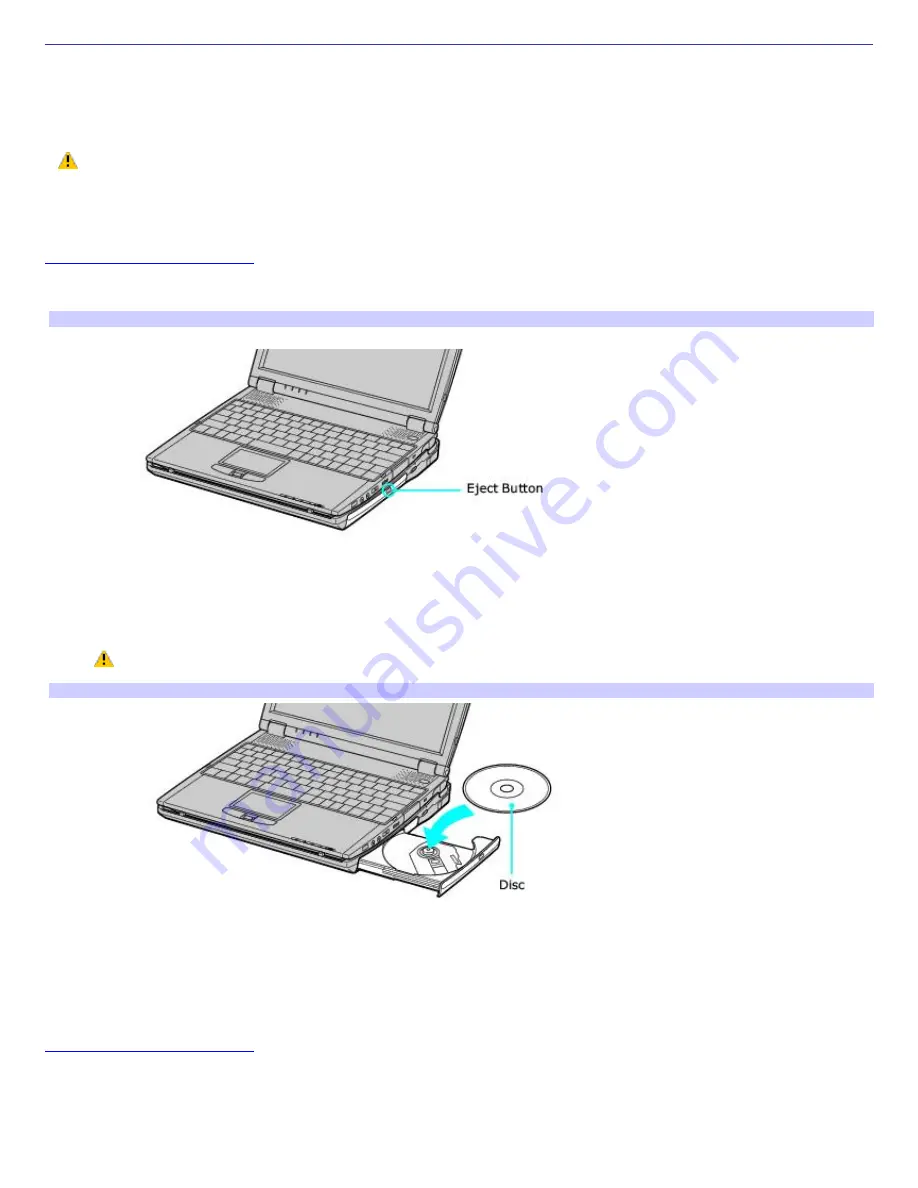
Press the Eject button to open the optical drive. The disc tray slides out.
Ejecting the tray
2.
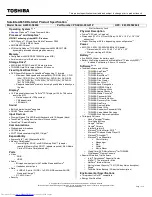
Place the disc on the tray with the label side facing up. For DVDs that can be played on both sides, the side of
the disc facing up is the side that plays.
3.
Push the disc onto the hub until the disc clicks into place.
If the disc is not secured, it could damage the optical drive and you may not be able to open the tray.
Inserting an optical disc
4.
Close the tray by pushing it gently. The LED indicator on the drive flashes while your computer reads data from
the disc.
To remove a disc
When the computer is in Standby or Hibernate mode, you cannot remove a disc because the disc tray will not open. See
Controlling Power Management
for more information.
1.
After you finish using a disc, wait until the LED indicator turns off.
2.
Press the Eject button to remove the disc.
3.
If the disc does not come out when you press the Eject button, turn off the computer and insert a thin, straight
object (such as a paper clip) into the manual eject hole.
Page 50
Summary of Contents for VAIO PCG-R505ELK
Page 109: ...Page 109 ...
Page 123: ...Page 123 ...


