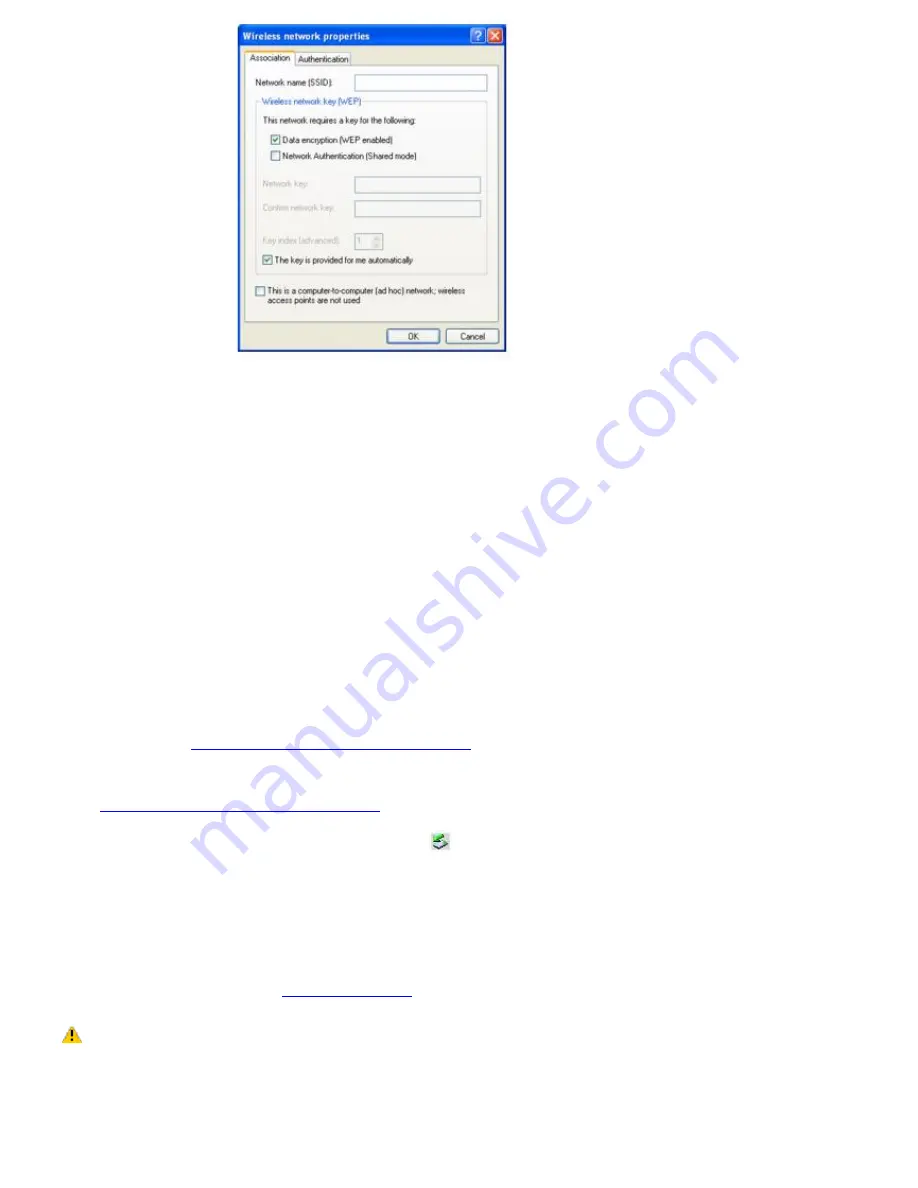
8.
Type the name of the network (access point) you want to connect to in the
Network name (SSID)
box. (The
name should be no more than 32 ASCII characters.)
9.
Click to select the
Data encryption (WEP enabled)
check box.
10.
Click to select the
Network Authentication (Shared mode)
check box.
11.
Click to cancel the
The key is provided for me automatically
check box.
12.
Type a network key in the
Network key
box. (The key should be between 5 and 13 ASCII characters or 10 to 26
hexadecimal characters.)
13.
Retype the network key in the
Confirm network key
box.
14.
Click to select
This is a computer-to-computer (ad hoc) network; wireless access points are not used
.
15.
Click
OK
. The network name appears in the
Preferred networks
list box.
To disconnect from a wireless network
For computers with built-in wireless LAN functionality, open the
Wireless Network Connection Status
window, and
click
Disable
. See
Checking your network connection status.
Move the Wireless LAN switch to
OFF
. The Wireless
LAN indicator turns off.
For Wireless LAN PC Card connections, open the
Wireless Network Connection Status
window, and click
Disable
.
See
Checking your network connection status.
Follow these steps to remove the Wireless LAN PC Card:
1.
Double-click the
Safely Remove Hardware
icon
on the taskbar. The
Safely Remove Hardware
window appears.
2.
Select the
appropriate device name in the Hardware devices window, if it is not already selected
, and
click
Stop
. The
Stop a Hardware device
window appears.
3.
Make sure
the appropriate device name
is selected, and click
OK
.
A message appears stating it is now
safe to remove the hardware device.
4.
Remove the PC Card. See
Removing PC Cards
for more information.
Turning off the wireless LAN functionality while accessing remote documents, files, or resources may
result in data loss.
Page 33
Summary of Contents for VAIO PCG-FR130
Page 21: ...5 Follow the on screen instructions Page 21 ...
Page 38: ...Page 38 ...
Page 41: ...CDs and DVDs Inserting and Ejecting CDs or DVDs Copying and Playing CDs Playing DVDs Page 41 ...
Page 43: ...4 Lift the disc from the drive 5 Push the drive tray gently to close it Page 43 ...
Page 46: ...Page 46 ...
Page 57: ...Printer Connections Printing With Your Computer Page 57 ...
Page 63: ...Computer Features Using the Touch Pad Changing the Window Design of Sony Programs Page 63 ...
Page 69: ...Mice and Keyboards Using the Keyboard Connecting Mice and Keyboards Page 69 ...
Page 72: ...Page 72 ...
Page 80: ...Floppy Disk and PC Card Connections Using the Floppy Disk Drive Using PC Cards Page 80 ...


