INITIAL INSPECTION
1.
Upon arrival of the Photo Ride check for any signs of damage to the packing or ride. Any
damage should be reported to your supplier immediately. Check the mains supply voltage and
coin mechanism are correct.
2.
Prior to operating the ride read this instruction manual and the manuals for the printer, camera
and lens.
3.
PRIOR TO SITING THE RIDE
Before siting the ride make a note of the machine’s serial number. This is situated on the silver
manufacturer’s plate at the rear of the machine. The serial number gives access to essential
manufacturing details of your ride and is vital for the tracing of parts and manufacturing detail,
and spares back up.
4.
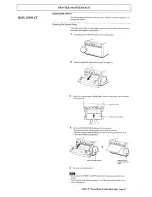
SETTING UP YOUR PHOTO RIDE
For transportation purposes certain Photo Rides are shipped with their printers removed. Prior to
operating the Photo Ride, the printer must be fitted correctly in its printer case. Use the
following procedure:-
a) Completely unwrap your Photo Ride
WARNING:- if your Photo Ride has been shipped with film be careful not to lose the film
when disposing of packing material.
b) Remove the printer from its packing box.
c) Unlock the metal printer case which is situated towards the front of the ride and pull out the
printer tray which is mounted on runners.
d) Place the printer onto the printer tray.
e) Connect the following cables to the rear of the printer.
(i) connect the mains plug to the mains IEC socket on the rear panel.
(ii) connect the 75 OHM coaxial cable with BNC connector to connector marked “video in”.
(iii) connect the 3.5mm stereo jack connector to the “remote” connection.
Now set the DIL switch settings. Please determine the printer type in use before setting DIL
switches.
Sony UP860
DIL switches 1 & 8 off. All others on
Ensure the gamma switch is set to II
On front panel set THRU/EE switch to EE
Set Posi-Mega switch to positive
Sony UP890
DIL switches 1 & 9 off. All others on
Ensure the gamma switch is set to II
On front panel ensure STD/Side switch is set to Std. Ensure THRU/EE switch is set to EE.
Set rotary dial to normal
f) Place printer into its mounting holes on the tray.
g) Secure metal strap over top of printer to stop it moving.
h) Push printer tray back into closed position.
Chuck ‘E’ Cheese Black & White Photo Ride Page 1


