1-14
56
Additional Operations
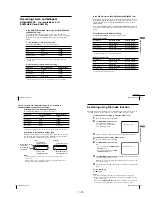
Adjusting the picture
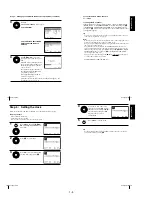
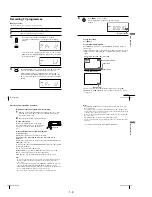
Adjusting the tracking
Although the VCR automatically adjusts the
tracking when playing a tape, distortion may
occur if the recording is in poor condition.
In this case, manually adjust the tracking.
During playback, press TR/
—
on
the VCR to display the tracking meter. The
distortion should disappear as you press one
of the two buttons. To resume automatic
tracking adjustments, eject the tape and re-
insert it.
S E T
M E N U
:
:
O K
:
E N D
S E L E C T
O S D
:
T A P E S E L E C T
O N
:
O F F
:
C O L O U R S Y S T E M
E 1 8 0
: A U T O
N I C A M
P O W E R S A V E
O N
:
A S C
O N
:
:
E X I T
T R A C K I N G
— — — — — —
— — — — — —
Tracking meter
Adjusting the picture sharpness (Auto Sharpness Control)
You can automatically adjust the sharpness of the picture.
1
During playback, press MENU, then press
M
/
m
/
<
/
,
to highlight
USER SET and press OK.
2
Press
M
/
m
to highlight ASC, then press
,
.
3
Press
M
/
m
to set ASC to ON or OFF.
¥
ON: Picture sharpness is automatically
adjusted.
¥
OFF: Adjust the picture sharpness
manually.
To soften the picture, press
<
.
To sharpen the picture, press
,
.
4
Press MENU to return to the original screen.
S E T
M E N U
:
:
O K
:
S O F T E N
A S C : O F F
S H A R P E N
— —
— — — —
— — —
— — —
— — —
— — — — — —
P I C T U R E
E N D
E X I T
O N / O F F
:
57
Additional Operations
Ad
ditional Operations
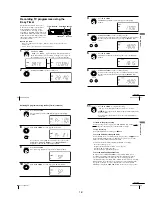
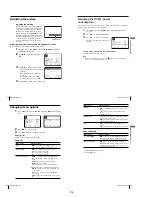
Reducing the VCR’s power
consumption
You can turn off the indicators in the display window when the VCR is off (standby
mode) to reduce the VCR’s power consumption.
1
Press MENU, then press
M
/
m
/
<
/
,
to highlight USER SET and
press OK.
2
Press
M
/
m
to highlight POWER SAVE.
3
Press
,
to set to ON, then press OK.
The power consumption is reduced to a
minimum.
To turn on the indicators in the display window
Set POWER SAVE to OFF in step 3.
Note
• When the VCR stands by for recording, the indicator in the display window
remain lit even when POWER SAVE is set to ON.
SET
MENU
:
:
OK
:
END
SELECT
OSD
ON
:
ON
:
TAPE SELECT
E 1 8 0
:
COLOUR SYSTEM
AUTO
:
NICAM
ON
:
ON
:
ASC
:
EXIT
58
Additional Operations
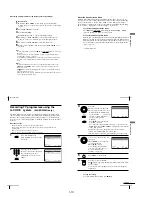
Changing menu options
1
Press MENU, then select USER SET or EASY OPERATION and press
OK.
2
Press
M
/
m
to select the option.
3
Press
,
to change the setting, then press OK.
Menu choices
Initial settings are indicated in bold print.
USER SET
Menu option
Set this option to
S E T
M E N U
:
:
O K
:
E N D
S E L E C T
O S D
O N
:
O N
:
T A P E S E L E C T
E 1 8 0
:
C O L O U R S Y S T E M
A U T O
:
N I C A M
O F F
:
P O W E R S A V E
O N
:
A S C
:
E X I T
E X I T
S E T
M E N U
:
:
O K
:
E N D
S E L E C T
G - C O D E E X T E N D
A U T O P O W E R O F F
O F F
:
O F F
:
:
OSD
¥
ON
to display the menu on the TV screen.
¥
OFF to disappear the menu from the TV screen.
TAPE SELECT
¥
E180
to use an E-180 or shorter type tape.
¥
E240 to use an E-240 type tape.
¥
E260 to use an E-260 type tape.
¥
E300 to use an E-300 type tape.
COLOUR SYSTEM
¥
AUTO
to select the colour system automatically.
¥
PAL to use the tape recorded in the PAL colour
system.
¥
MESECAM to use the tape recorded in the
MESECAM colour system.
¥
B/W to use the tape recorded in black and white.
When using the tape recorded NTSC colour signals:
¥
NT3.58
to use the tape recorded in the NTSC 3.58
colour system.
¥
NT4.43 to use the tape recorded in the NTSC 4.43
colour system.
¥
NTPB to play back an NTSC-recorded tape on PAL
TV.
59
Additional Operations
Additional Operations
Menu option
Set this option to
NICAM*
1
¥
ON
to record NICAM broadcasts on the hi-fi audio
track.
¥
OFF to record standard sound on the hi-fi audio
track.
For details, see page 53.
POWER SAVE
¥
ON to turn off the indicators in the display window
to conserve the VCR s power.
¥
OFF
to turn on the indicators in the display window
while the VCR is standing by.
ASC
¥
ON
to automatically adjust the sharpness of the
picture.
¥
OFF to manually adjust the sharpness of the picture.
EASY OPERATION
Menu option
Set this option to
G-CODE EXTEND*
2
¥
OFF
to deactivate the G-CODE Extend function.
¥
10/20/30/.../60 (minutes) to extend the time of the
G-CODE setting by the selected amount of time.
AUTO POWER OFF
¥
OFF
to deactivate the Auto Power Off function.
¥
2HOUR/3HOUR to turn the VCR off automatically
if no signal is received and you do not press any of
the buttons during this time.
*
1
SLV-ED929MI and ED925PS only
*
2
SLV-ED929MI only
Summary of Contents for RMT-V408A
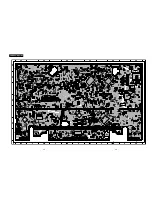
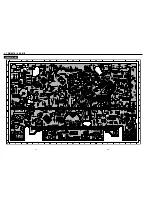
Page 28: ...3 1 MAIN PCB AUS 3 3 3 4 COMPONENT SIDE ...
Page 29: ...3 6 3 5 CONDUCTOR SIDE ...
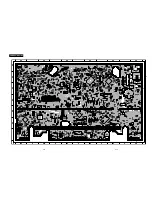
Page 30: ...3 2 MAIN PCB E HK ME 3 7 3 8 COMPONENT SIDE ...
Page 31: ...3 10 3 9 CONDUCTOR SIDE ...
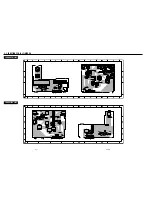
Page 32: ...3 3 FUNCTION PCB Hi Fi MODEL 3 11 3 12E COMPONENT SIDE CONDUCTOR SIDE ...
Page 34: ... BLOCK IDENTIFICATION OF MAIN PCB Component Side Conductor Side 4 3 4 4 ...
Page 35: ...4 1 S M P S AUS PWR OFF PWR ON 1 2 4 6 4 5 ...
Page 36: ...4 2 S M P S E HK ME 4 7 4 8 PWR OFF PWR ON 1 2 ...
Page 37: ...4 3 POWER 4 10 4 9 ...
Page 38: ...6 5 7 3 4 0 8 9 4 4 SYSTEM CONTROL SERVO 4 11 4 12 ...
Page 41: ... VIDEOPROCESS IN VIDEOPROCESS OUT AUDIOPROCESS IN AUDIOPROCESS OUT qj 4 7 TM BLOCK 4 18 4 17 ...
Page 42: ... OSD VIDEO PROCESS IN OSD VIDEO PROCESS OUT qk 4 8 OSD VPS PDC 4 19 4 20 ...
Page 43: ...4 9 A2 NICAM ED925 ED929 EZ725 EZ727 4 21 4 22 ...
Page 45: ...4 11 SUB Hi Fi MODEL 4 25 4 26 ...
Page 48: ...4 32E MEMO ...

