1-12
48
Additional Operations
Additional Operations
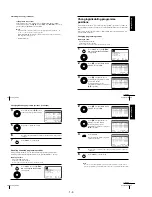
Playing/searching at various speeds
Before you start
¥
Refer to Index to parts and controls for button locations.
Playback options
Operation
View the picture during
fast-forward or rewind
During fast-forward, hold down
M
FF. During rewind, hold
down
m
REW.
Play at high speed
¥
During playback, press
M
FF or
m
REW on the remote
commander.
¥
During playback, hold down
M
FF or
m
REW. When
you release the button, normal playback resumes.
Play at twice the
normal speed
During playback, press
×
2.
Play in slow motion
During playback, press
y
SLOW.
Play frame by frame
During pause, press
M
FF on the remote commander.
To resume normal playback
Press
H
PLAY.
49
Additional Operations
Additional Operations
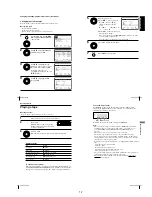
Setting the recording duration time
After you have started recording in the normal way, you can have the VCR stop
recording automatically after a specified duration.
Before you start
¥
Refer to Index to parts and controls for button locations.
1
While recording, press
z
REC.
The indicator appears in the display window.
2
Press
z
REC repeatedly to set the duration time.
In SP mode
Each press advances the time in increments of 30 minutes.
In LP (EP) mode
Each press advances the time as shown below.
0:30
1:00
4:00
4:30
Normal recording
0:30
1:00
4:00
9:00
5:00
Normal
recording
The tape counter decreases minute by minute to 0:00, then the VCR
stops recording and turns off automatically.
To extend the duration
Press
z
REC repeatedly to set a new duration time.
To cancel the duration
Press
z
REC repeatedly until the indicator disappears and the VCR
returns to the normal recording mode.
To stop recording
To stop the VCR while recording, press
x
STOP.
Note
¥
You cannot display the current tape time in the display window when setting the
recording duration time.
50
Additional Operations
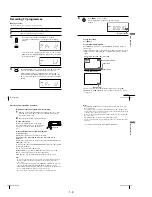
Checking/changing/cancelling timer
settings
Before you start
¥
Turn on your TV and set it to the video channel.
¥
Refer to Index to parts and controls for button locations.
1
Press
?/1
to turn on the VCR.
2
Press MENU, then press
M
/
m
/
<
/
,
to highlight TIMER
PROGRAMMING and press OK.
¥
If you want to change or cancel a
setting, go on to the next step.
¥
If you do not need to change or
cancel the settings, press MENU,
then turn off the VCR to return to
recording standby.
3
Press
M
/
m
to select the setting you
want to change or cancel, then press
,
.
The PR number on the selected row
flashes.
4
¥
To change the setting, press
<
/
,
to select the item you want to
change, then press
M
/
m
to reset it.
¥
To cancel the setting, press CLEAR.
5
Press MENU to exit the menu.
If any settings remain, turn off the VCR to return to recording standby.
S E T
M E N U
:
:
O K
:
E N D
S E L E C T
— —
— — — —
— —
— —
—
— —
—
:
:
P R
D A Y
S T A R T
S T O P
3 5
S A 2 9
1 9
0 0
2
0 0
0
:
:
2 9
S A 2 9
2 1
0 0
2
3 0
1
:
:
3 0
S A
6
1 2
0 0
1
3 0
3
:
:
— —
— — — —
— —
— —
—
— —
—
:
:
— —
— — — —
— —
— —
—
— —
—
SP
—
—
—
—
—
:
:
:
E X I T
S E T
M E N U
:
:
O K
:
E N D
S E L E C T
— —
— — — —
— —
— —
—
— —
—
:
:
P R
D A Y
S T A R T
S T O P
3 5
S A 2 9
1 9
0 0
2
0 0
0
:
:
2 9
S A 2 9
2 1
0 0
2
3 0
1
:
:
3 0
S A
6
1 2
0 0
1
3 0
3
:
:
— —
— — — —
— —
— —
—
— —
—
:
:
— —
— — — —
— —
— —
—
— —
—
SP
—
—
—
—
—
:
:
:
E X I T
51
Additional Operations
Additional Operations
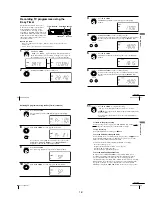
When the timer settings overlap
The programme that starts first has priority and the second programme starts
recording only after the first programme has finished. If the programmes
start at the same time, the programme listed first in the menu has priority.
Programme 1
about 20 seconds
Programme 2
will be cut off
Programme 1
Programme 2
about 20 seconds will be cut off
Summary of Contents for RMT-V408A
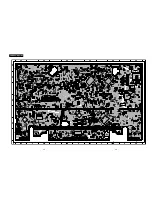
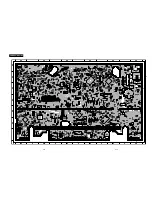
Page 28: ...3 1 MAIN PCB AUS 3 3 3 4 COMPONENT SIDE ...
Page 29: ...3 6 3 5 CONDUCTOR SIDE ...
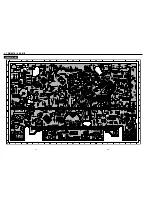
Page 30: ...3 2 MAIN PCB E HK ME 3 7 3 8 COMPONENT SIDE ...
Page 31: ...3 10 3 9 CONDUCTOR SIDE ...
Page 32: ...3 3 FUNCTION PCB Hi Fi MODEL 3 11 3 12E COMPONENT SIDE CONDUCTOR SIDE ...
Page 34: ... BLOCK IDENTIFICATION OF MAIN PCB Component Side Conductor Side 4 3 4 4 ...
Page 35: ...4 1 S M P S AUS PWR OFF PWR ON 1 2 4 6 4 5 ...
Page 36: ...4 2 S M P S E HK ME 4 7 4 8 PWR OFF PWR ON 1 2 ...
Page 37: ...4 3 POWER 4 10 4 9 ...
Page 38: ...6 5 7 3 4 0 8 9 4 4 SYSTEM CONTROL SERVO 4 11 4 12 ...
Page 41: ... VIDEOPROCESS IN VIDEOPROCESS OUT AUDIOPROCESS IN AUDIOPROCESS OUT qj 4 7 TM BLOCK 4 18 4 17 ...
Page 42: ... OSD VIDEO PROCESS IN OSD VIDEO PROCESS OUT qk 4 8 OSD VPS PDC 4 19 4 20 ...
Page 43: ...4 9 A2 NICAM ED925 ED929 EZ725 EZ727 4 21 4 22 ...
Page 45: ...4 11 SUB Hi Fi MODEL 4 25 4 26 ...
Page 48: ...4 32E MEMO ...

