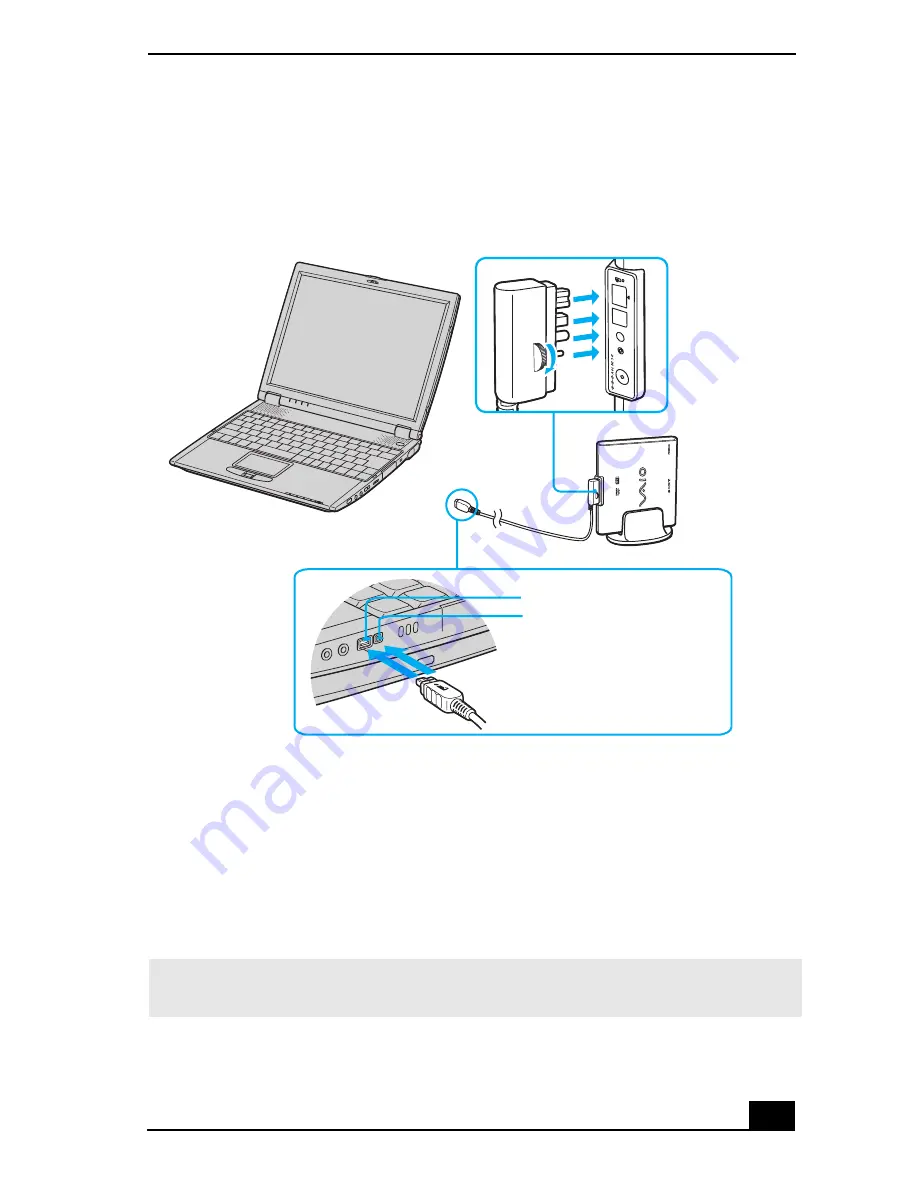
Connecting an i.LINK Optical Disc Drive
59
drive. Secure the plug by turning the screw on the cable connector
clockwise.
2
Insert the straight-shaped, two-prong plug of the VAIO® computer
peripheral cable into both the computer’s i.LINK port and peripheral device
DC Out jack.
3
The i.LINK drive’s power indicator lights up, and the computer will
automatically detect and identify the connected drive.
4
Click My Computer on the desktop to verify that an icon for the i.LINK
optical disc drive has been added in the window.
Connecting i.LINK optical disc drive
✍
The Sony i.LINK optical disc drive is compatible only with certain Sony VAIO® PCG
series computers preinstalled with Microsoft® Windows®.
L-shaped
Peripheral device
i.LINK port
i.LINK cable
cable
connector
DC Out jack
Summary of Contents for PCG-R505ESK VAIO (primary manual)
Page 10: ...VAIO Computer User Guide 10 ...
Page 42: ...VAIO Computer User Guide 42 ...
Page 75: ...Connecting VAIO Computers 75 Set the i LINK network switch to the unmarked side ...
Page 80: ...VAIO Computer User Guide 80 ...
Page 94: ...VAIO Computer User Guide 94 ...
Page 114: ...VAIO Computer User Guide 114 ...
Page 118: ...Change text in this variable definition to document title 26 ...
Page 148: ...Change text in this variable definition to document title 56 ...
Page 156: ...Change text in this variable definition to document title 64 ...
Page 178: ...Change text in this variable definition to document title 86 ...
Page 180: ...Change text in this variable definition to document title 88 ...
Page 190: ...VAIO Computer User Guide 118 ...
Page 212: ...VAIO Computer User Guide 212 ...
Page 221: ...Index 221 ...
Page 222: ...VAIO Computer User Guide 222 ...


