MovieShaker Software
41
3
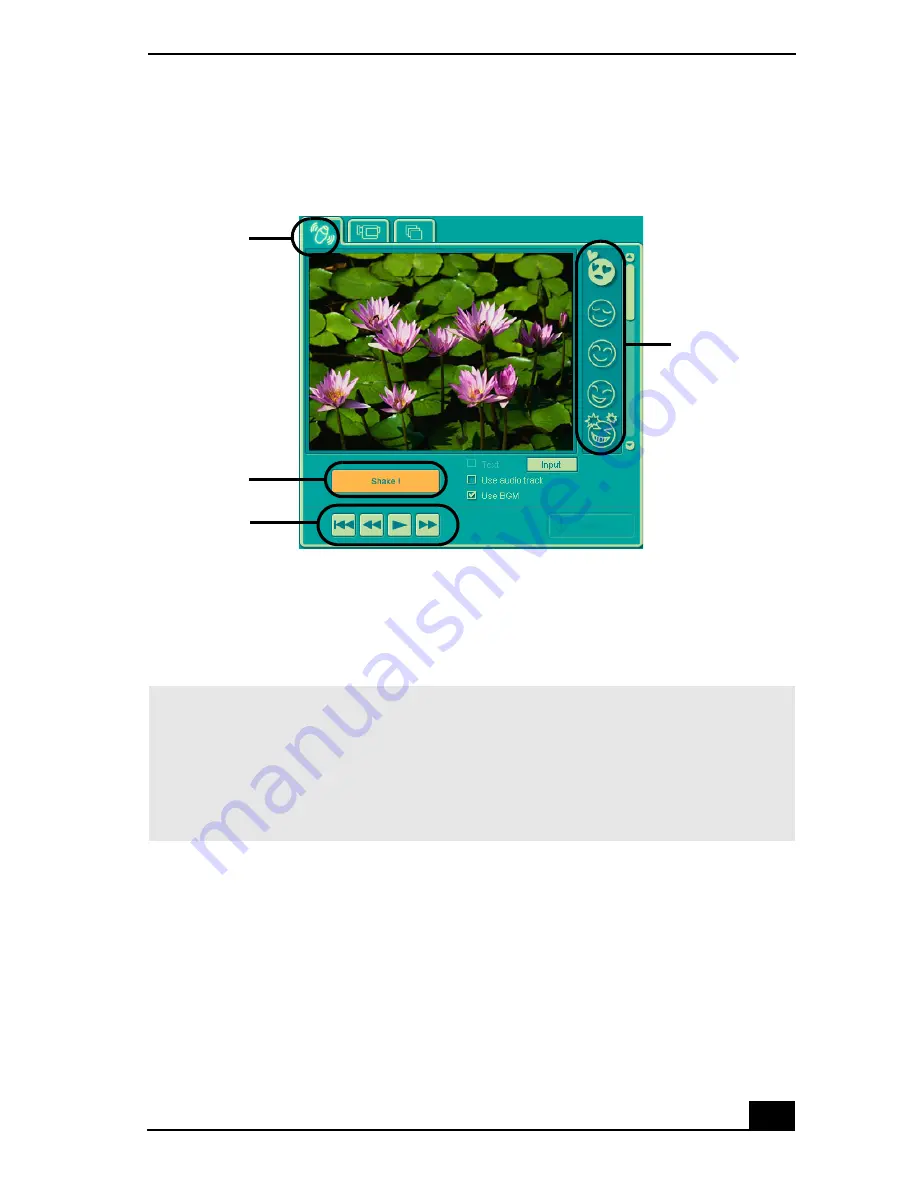
Click the
Shake!
button. A 30-second movie is automatically generated.
4
Optional:
Add text to your new movie by clicking on the
Input
button.
5
To preview, rewind, or fast forward your movie, use the
Playback
buttons.
Adding effects to a scene or a clip
1
Double-click or drag the desired clip or scene to move it to the
Story Board
tray.
2
Click the
Effect
button on the
Effect
tray.
Shake tray
✍
Scenes created with the Shake feature begin with a black screen in the Shake tray
window. Your scenes appear during movie playback.
You can improve the image quality produced by the Shake feature (at the cost of
longer Shake times) by turning off the “Shorten the Shake time” feature in the General
panel of the
Setting
dialog box. See the
Menu reference
section of the online Help file
for details.
Shake tab
Shake
pattern tray
Playback
buttons
Shake!
button
Summary of Contents for PCG-R505ESK VAIO (primary manual)
Page 10: ...VAIO Computer User Guide 10 ...
Page 42: ...VAIO Computer User Guide 42 ...
Page 75: ...Connecting VAIO Computers 75 Set the i LINK network switch to the unmarked side ...
Page 80: ...VAIO Computer User Guide 80 ...
Page 94: ...VAIO Computer User Guide 94 ...
Page 114: ...VAIO Computer User Guide 114 ...
Page 118: ...Change text in this variable definition to document title 26 ...
Page 148: ...Change text in this variable definition to document title 56 ...
Page 156: ...Change text in this variable definition to document title 64 ...
Page 178: ...Change text in this variable definition to document title 86 ...
Page 180: ...Change text in this variable definition to document title 88 ...
Page 190: ...VAIO Computer User Guide 118 ...
Page 212: ...VAIO Computer User Guide 212 ...
Page 221: ...Index 221 ...
Page 222: ...VAIO Computer User Guide 222 ...


