


38
Registering Devices
C
h
a
p
te
r 4
A
ppli
c
at
ion S
e
ttings
C
(Add)
This displays the Add Device dialog box
for
registering a device manually.
D
(Delete)
This deletes a device.
Select the device you want to delete from the tree structure
or device list, and click this button to delete the device.
E
Device List
This displays a list of the devices belonging to the device
group selected in the tree structure on the left.
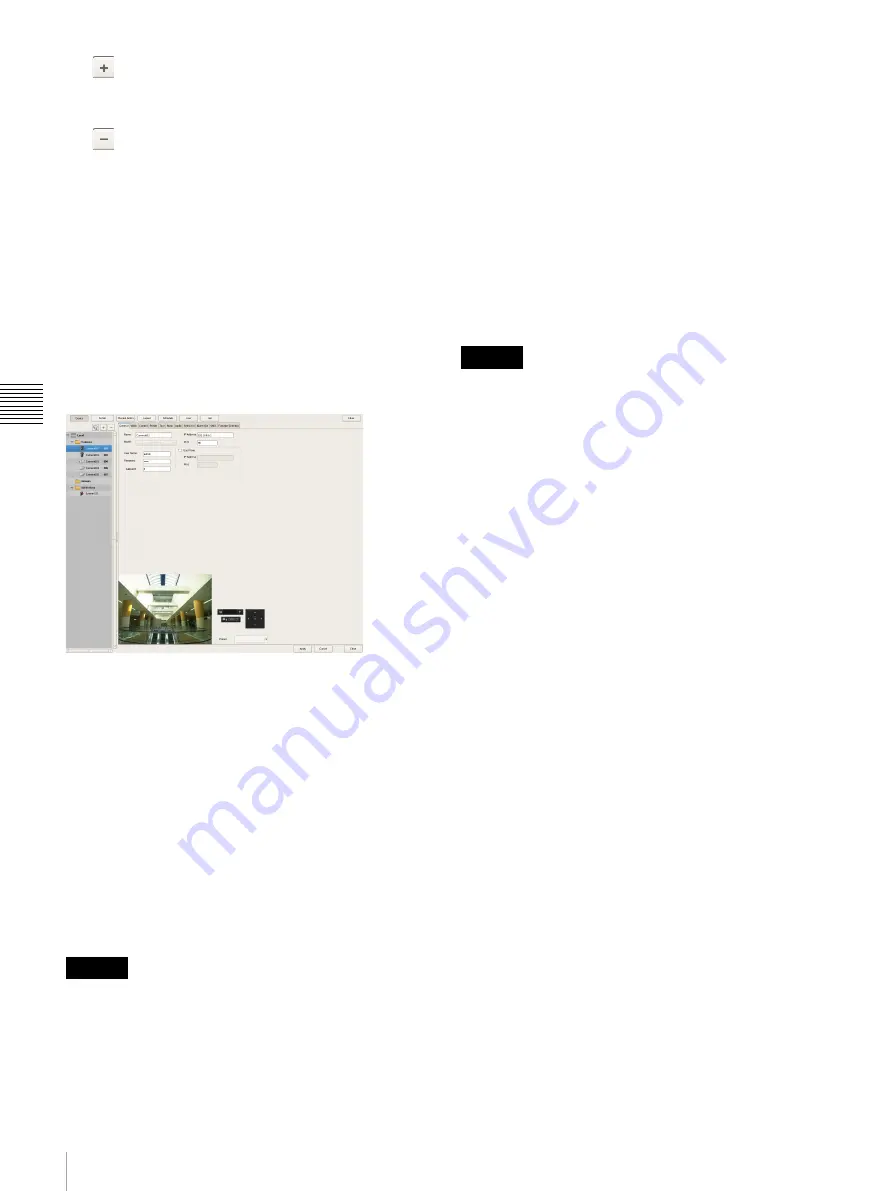
Setting Items of the [General] Tab
This tab allows you to change the settings of the device
selected in the tree structure on the left.
After configuring each item, click [Apply] to save your
settings.
Name
Enter up to 32 characters (excluding \ / : , ; * ? " < > ¦ [ ])
to assign a name to the device to be added.
Model
This item displays the device type. It cannot be changed.
User Name
Enter the user name for connecting to the device. It can be
up to 32 characters and consist of alphanumeric characters.
Password
Enter the password for connecting to the device. It can be
up to 32 characters and ASCII characters (upper or lower
case alphanumeric characters and symbols (! " # $ % & ' (
) * + , - . / : ; < = > ? @ [ \ ] ^ _ ` { | } ~)).
The user name and password for a device cannot be
changed from NSR. To change them, access the device
directly from a Web browser. For details, refer to the
instruction manual of the device to be used. If you change
the user name and password for a device registered to
NSR, you must also change the configurations in NSR.
Global ID
Enter a number for the global ID.
In NSR and RealShot Manager Advanced, cameras are
managed by assigning IDs to the connected cameras
individually.
In addition, in a system in which multiple NSR and
RealShot Manager Advanced are used as servers, all the
cameras connected to each server are assigned an ID that
is unique within the system. You can use a global ID to
specify the cameras to perform monitoring directly from
RealShot Manager Advanced of a remote client without
being aware of each server.
IP Address
Enter the IP address or the host name for the camera.
When specifying host names, be sure to configure DNS
settings so that the host names can be resolved.
Port
Enter the port number on the camera side for when
connecting with the camera. The default setting is “80.”
Proxy
Set this when the camera will be accessed via a proxy
server.
Enable
Select the check box, and configure the following
items.
IP Address
Enter the IP address for the proxy server.
Port
Enter the port number for the proxy server.
Preview
This displays the images from the camera.
Apply
This saves the settings.
Cancel
This cancels the settings.
Close
This closes the screen.
Caution
Caution
Summary of Contents for NSR-500
Page 133: ......


