Chapter 4: the Tape Player
EN
17
3
Press
§
EJECT and insert a blank tape
into deck B with the side you want to
record on facing forward.
Recording starts from the front side of
the tape, unless you change the playing
direction before recording.
Make sure the tabs on the cassette have
not been removed.
4
Select dual or single-sided recording.
* Recording always stops at the end of the
reverse side. Be sure to start from the
front side.
5
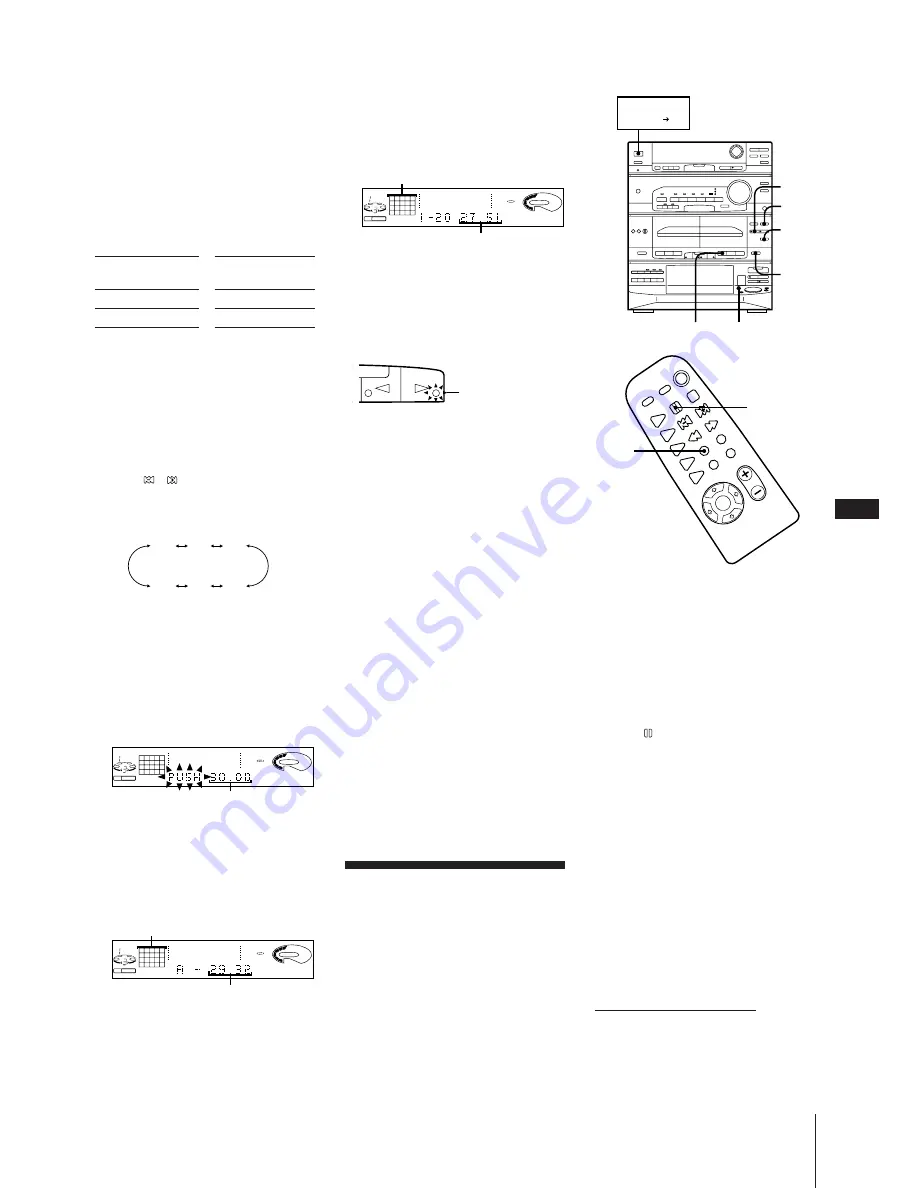
Press EDIT twice.
“TIME EDIT” appears then “SELECT”
and “TIME” appear alternately in the
display.
6
Press
/
on the remote to designate
the tape length or “HALF”.
As you press the button, the display
changes as follows:
Choose “HALF” if you want the CD
player to half of the total playing time of
the CD in original order. You cannot
select “HALF” when recording CDs
with more than 20 tracks.
“PUSH EDIT” and half of the total time
of the tape you selected appears in the
display.
7
Press EDIT.
The CD player determines the tracks to
be recorded on side A automatically.
Total time and tracks to be recorded on
side A appears in the display.
8
When you want to record on both sides,
press EDIT again. The CD player
determines the tracks to be recorded on
side B.
9
Press CD SYNCHRO.
The REC and
∏
(pause) lamps light up
and deck B stands by for recording.
The
·
lamp lights up and the
ª
lamp
flashes for a few seconds, then
disappears.
If you want to start recording from the
reverse side, press
ª
so that the
ª
indicator lights steadily.
10
Press
∏
on the tape player to release
recording pause.
Recording starts. After about 10
seconds, the CD player starts playing.
To stop recording
Press
π
on the tape player.
To cancel time edit
Press CONTINUE on the unit.
To check the order
Press CHECK on the remote repeatedly.
Each time you press CHECK, the number of
the programmed tracks appear in the
display.
To select the desired tracks
beforehand
You can record certain tracks (up to 20) first
by selecting them before time editing. See
“Playing Tracks in the Desired Order
(programme play)”.
Recording a CD:
Specifying Track
Order (programme
edit)
You can adjust the total recording time to
the tape length while making a programme.
To record
One side of the tape
Both sides*
Press DIRECTION
to select
A
ß
or RELAY
Tracks to be recorded on both sides
Total playing time on side B
Side in recording
pause mode
5
4
6
7
CHECK
2
1
Following the procedure “Playing
Tracks in the Desired Order
(programme play)”, programme the
tracks you want to record for side A.
Make sure to programme the tracks so
that the total playing time of the side A
does not exceed the tape length of one
side.
2
Press
on the remote to pause
recording at the end of the side A.
“P” appears in the display.
The total playing time “0.00” is
displayed.
3
Programme the tracks you want to
record for side B in the same way as you
did for side A.
4
Press
§
EJECT and insert a blank tape
into deck B with the side you want to
record on facing forward.
Recording will start from the front side
of the tape, unless you have changed the
playing direction before recording.
Make sure the tabs on the cassette have
not been removed.
continue to next page
➔
CONTINUE
π
Half of the total
time of the tape
Tracks to be recorded on side A
Total playing time on side A
CLIP
DISC
PROGRAM
2
1
3 4 5
7
6
10
11
63
125
250
500
1k
2k
4k
8k
16k
(Hz)
CD
VOLUME
CLIP
2k
4k
8k
16k
(Hz)
CD
VOLUME
CLIP
DISC
PROGRAM
2
1
3 4 5
7
6
8 9 10
11 12 13 14 15
16 17 18 19 20
63
125
250
500
1k
2k
4k
8k
16k
(Hz)
CD
VOLUME
SYSTEM
POWER ON
HALF
C-46
(23.00)
C-54
(27.00)
C-90
(45.00)
C-74
(37.00)
C-60
(30.00)


