Ad
minis
tra
ting t
he Camer
a
Setting the Security — Security setting Page
26
Access right
Select the access right for each user from the drop-down
list. You can select from
Level 1
to
Level 4
. The rights
afforded to each access right are as follows:
Level 1:
Allows monitoring of the camera image
(including some operations for monitoring).
Level 2:
Allows monitoring of the camera image and
camera operations.
Level 3:
Allows monitoring of the camera image,
camera operations and manual application
operations.
Level 4:
Allows all the access right as Administrator.
No access right:
Use this option when you want to
prohibit access to the camera temporarily.
User access right
Select the level of the access right to require user
authentication.
The authentication dialog will appear where user
authentication is required.
Level 1:
Performs user authentication when a user
accesses the following pages: main viewer page
(page 8), Camera control parts (page 10), Trigger
control parts (page 11) or Administrator menu page
(page 13).
Level 2:
Performs user authentication when a user
accesses the following pages: Camera control parts,
Trigger control parts or Administrator menu page.
No user authentication is required to display the
main viewer page.
Level 3:
Performs user authentication when a user
accesses the following pages: Trigger control parts
or Administrator menu page.
No user authentication is required to display the
main viewer page or the Camera control parts.
Level 4:
Performs user authentication when a user
accesses the Administrator menu page only.
No user authentication is required to display the
other pages.
OK/Cancel
See “Buttons common to every setting page” on page
14.
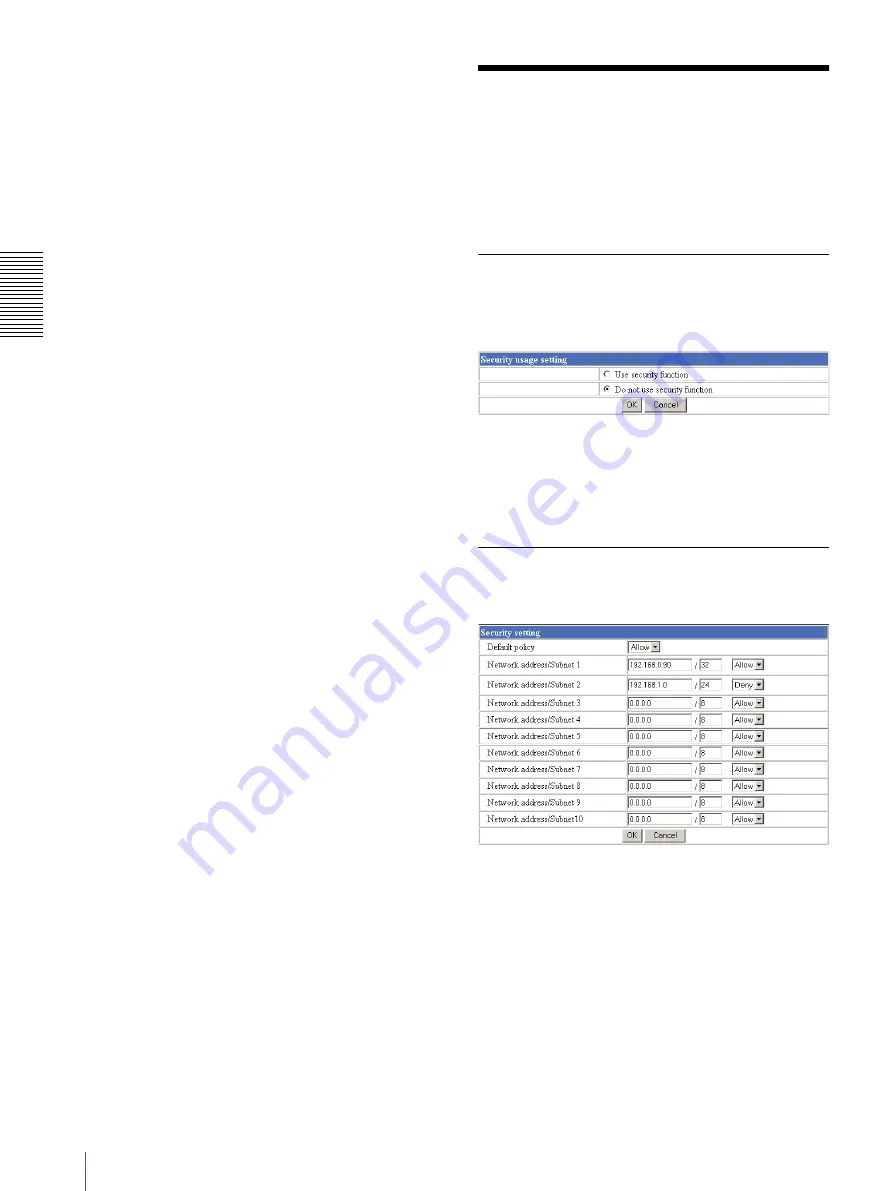
Setting the Security
— Security setting Page
When you click
Security
on the Administrator menu,
the Security setting page appears.
Use this page to limit the computers that can access the
camera.
Activating/Deactivating the
Security Function
— Security usage setting Page
To activate the security function, select
Use security
function
, then click
OK
. The Security setting page
appears.
If you do not use the security function, select
Do not use
security function
, then click
OK
.
Setting the Security Function
—Securing setting Page
Default policy
Select the basic policy of the limit from
Allow
and
Deny
.
If you select
Allow
, you will basically allow access to
the camera and only deny access from the computers
specified on the Network address/Subnet 1 to Network
address/Subnet 10 menus below.
If you select
Deny
, you will basically deny access to the
camera, and only allow access from the computers
specified on the Network address/Subnet 1 to Network
address/Subnet 10 menus.


