background image

134

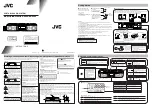
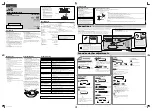
Viewing the Picture from the Unit on a Monitor or Projector

Viewing the Picture from the Unit on a 
Monitor or Projector

When the monitor or projector is connected to the unit, you can view the 
picture from the system.

To connect a monitor or projector

to HDMI OUT

HDMI cable (supplied)

Monitor, projector, 
etc.

Monitor

to HDMI IN

to HDMI IN

Summary of Contents for Ipela PCS-XC1

Page 1: ...14 Sony Corporation 4 545 839 11 1 HD Visual Communication System Operating Instructions Version 1 0 Before operating the unit please read this manual thoroughly and retain it for future reference PCS XC1 ...

Page 2: ...g Batteries into the Remote Commander 19 Pairing the Remote Commander with the Unit 20 Turning the Unit On Off 22 Turning On 22 Standby Mode Function 23 Setting the Unit to Standby Mode 23 Turning Off 24 Adjusting the Volume on the TV Monitor 24 Setting Up the System Immediately after the Installation Initial Setup Wizard 26 Using the Menus 29 Identifying the Home Menu 29 Operation Using the Menu ...

Page 3: ...rk Routing Check 67 Restrictions on the Use of IPv6 68 Setting Up the Network Configurations 69 LAN Connection via DHCP 69 LAN Connection through a Router 70 LAN Connection through a Gatekeeper 71 LAN Connection through NAT 72 LAN Connection with H 460 Firewall Traversal 73 LAN Connection Using PPPoE 75 About the Network Routing Check 76 Adding Optional Software 77 Confirming that the Installation...

Page 4: ...the Sound Momentarily Muting Function 102 Turning Off the Sound on Answering Mic on Answer Function 103 Synchronizing Audio and Video Lip Sync Function 103 Reducing Echo Echo Canceller 103 Adjusting the Camera 104 Adjusting the Camera Angle and Zoom 104 Adjusting the Brightness 105 Using the Preset Function 107 Adjusting the Camera in the Detailed Setup Menu 109 Selecting the Input Picture and Sou...

Page 5: ... SSH 136 Chapter 5 Encrypted Connection Preparing for an Encrypted Connection via LAN 138 Starting an Encrypted Connection 140 Chapter 6 Web Control Function Opening the Web Page 143 Identifying a User 144 Selecting a Menu 146 How to Use Home Menu 147 How to Use Download Menu 148 How to Use Remote Commander Menu 149 Selecting a Tool 150 How To Configure KIOSK Mode 151 How to Use Version Up Page 15...

Page 6: ...67 PCS A1 Microphone Supplied 167 Dimensions 168 Acceptable HDMI Output Signals 169 Acceptable HDMI IN PC Input Signals 169 Pin Assignments 170 Pan Tilt Range 170 List of Port Numbers Used on the PCS XC1 171 Meeting Room Layout 172 USB Storage 172 Glossary 173 Menu Configuration 175 Index 185 IPELA and are trademarks of Sony Corporation ...

Page 7: ...ter guides you through the basic operations and settings for connecting to a remote party You will learn how to start connection to finish it It is recommended that this chapter be read by participants in a communication Chapter 4 Connection with Optional Equipment This chapter shows advanced communication using the optional equipment and functions such as streaming recording presentation and anno...

Page 8: ...computer can be transmitted simultaneously with camera images High transmission speeds and high quality picture capability The unit supports a LAN communication bit rate of up to 4 Mbps Wide range of video audio compression format selectable The unit supports the H 264 H 263 and MPEG4 video compression formats It also supports the MPEG4 AAC G 722 G 728 and G 711 audio compression formats Supports ...

Page 9: ... port on the rear of the unit HD recording Video and audio can be recorded to a USB storage device and can be viewed on a computer later Do not connect small USB devices to the USB port on the front of the unit as they may become impossible to remove Connect small devices to the USB port on the rear of the unit HD streaming You can broadcast streaming video and audio This allows people who cannot ...

Page 10: ... a codec block for processing transmitting and receiving video and audio signals an echo canceller a network interface block and a system control block PCS RFZ1 Remote Commander Use this to control the unit after pairing it with the unit VGP AC19V45 AC adaptor Supplies power to the unit PCS A1 Microphone Omni directional microphone that picks up sound relatively from all directions allowing partic...

Page 11: ...owing optional devices are used to enhance your videoconference Optional Equipment Unit Description PCSA RXC1 HD Upgrade Software Install this to enable transmission and reception of 1920 1080 progressive video at a maximum of 60 frames per second PCSA SAG1 Mobile Access Software Use this to connect the unit to a mobile terminal ...

Page 12: ...ptional equipment This section describes the capabilities and necessary equipment for some typical configuration examples This allows you to Have a point to point HD visual communication over LAN System configuration System Configuration via a LAN T W 1 Unit 2 Remote Commander supplied 3 TV monitor not supplied 4 Microphone supplied ...

Page 13: ...ion This allows you to Have an HD visual communication with an IP telephone etc using SIP System configuration System Configuration via a SIP T W 1 Unit 2 Remote Commander supplied 3 TV monitor not supplied 4 Microphone supplied 5 SIP server 6 IP telephone etc ...

Page 14: ... hand Doing so may result in a camera malfunction Use a screwdriver to tighten the tripod attachment screw while using the following as a guide for the amount of protrusion 4 from the attachment surface 4 4 5 7 mm 4 0 18 0 27 inches Desktop Installation Notes Using a Tripod Do not install the unit in high locations shelves ceilings etc when using a tripod screw Caution ...

Page 15: ...d on the bottom of the unit Use M3 screws with the following specifications to attach the unit to a fitting with a flat surface 4 3 6 mm 4 1 8 1 4 inches Using Fixing Screws M3 screw Fixing plate not supplied Do not use parts that do not match the above specifications Doing so may result in damage to internal parts Caution ...

Page 16: ...s the typical system connections Be sure to turn off all the equipment before making any connections For safety do not connect the 1000BASE T connector to a network that applies excess voltage via the 1000BASE T connector We recommend using Sony HDMI cables Notes ...

Page 17: ...ection via a LAN Unit to a wall outlet to LAN TV monitor not supplied to a wall outlet to DC19 5V AC adaptor supplied UTP cable category 6 straight not supplied Microphone supplied to to HDMI OUT HDMI cable supplied to HDMI IN to MIC to MIC Power cord supplied only in Japan ...

Page 18: ...plied SIP server UTP cable category 6 straight not supplied AC adaptor supplied to a wall outlet to MIC Microphone supplied to to LAN connector to LAN connector IP telephone etc to HDMI OUT HDMI cable supplied to HDMI IN Unit to LAN connector to DC19 5V Power cord supplied only in Japan ...

Page 19: ...mpartment cover 2 Insert two size AA R6 batteries with correct polarities into the battery compartment 3 Replace the cover Be sure to insert the batteries E side first Inserting them forcibly e side first may damage the insulated film covering the batteries and cause a short circuit Battery life When the batteries are exhausted the LED indicator does not light if you press any button and the Remot...

Page 20: ...t are paired to prevent interference from other Remote Commanders and systems Pairing between the Remote Commander and the unit is programmed at the factory When performing a pairing procedure be sure to turn off other HD Visual Communication Systems located nearby that are not targets for pairing If multiple devices are turned on the Remote Commander might pair with a device other than the target...

Page 21: ... on the Remote Commander flashes slowly 5 times and then begins flashing rapidly In this case press the ENTER button on the Remote Commander again To cancel pairing When the LED indicator on the Remote Commander is flashing rapidly press the 1 power switch on the unit When the LED indicator does not flash even if you press any button on the Remote Commander the batteries might be exhausted Replace...

Page 22: ...me menu will appear on the monitor screen and the picture shot by the local camera will also appear in the Home menu Home menu After the power is turned on the camera moves automatically for trial operation Be careful not to catch your finger If you use force to prevent the camera from moving the camera may stop moving and the picture may not be displayed In this case turn off the unit and turn it...

Page 23: ...all the standby mode is automatically released 1 Display the Home menu on the monitor screen then press the 1 button on the Remote Commander The message Power off appears on the monitor screen 2 Press the V v B or b button on the Remote Commander to select OK then press the ENTER button Alternatively you can press the 1 button on the Remote Commander The unit enters standby mode and the POWER indi...

Page 24: ...urned off completely If the unit is left unplugged for about one week or longer the clock setting of the system may reset In such cases set the date and time again in the Clock Set page of the General setup menu The procedure for volume adjustment during system setup differs from the procedure during communication Adjust the volume on the TV monitor during system setup and adjust the system volume...

Page 25: ...tivate the TV s surround sound feature as it may cause the echo canceller of the unit to not function properly and make strange sounds Volume adjustment during communication Press the VOLUME buttons on the Remote Commander to adjust the system volume during communication Note ...

Page 26: ...creen language 1 Use the V v B or b button on the Remote Commander to select Select Language in the setup wizard then press the ENTER button 2 Use the V v B or b button on the Remote Commander to select the language to be used for the on screen menus and messages Select from among English French German Japanese Spanish Italian Simplified Chinese Portuguese Traditional Chinese Korean Dutch Back to ...

Page 27: ...ed Select the display pattern Select the display pattern of year month and day Enter the year Enter the month Enter the day Enter the time Enter the date and time using the number buttons on the Remote Commander For the procedure to enter the numbers using the Remote Commander see Entering Characters Using the Remote Commander on page 38 3 Use the V v B or b button on the Remote Commander to selec...

Page 28: ...interface you use the most here 3 Use the V v B or b button on the Remote Commander to select Save then press the ENTER button The setup wizard appears To set up a LAN connection Select Set up LAN in the setup wizard then set up a LAN connection To set up a SIP Select Set up SIP in the setup wizard then set up a SIP connection Select Line I F Wizard Which is your Line I F Multiple selection availa...

Page 29: ...splays the image shot by the local camera local system name current date and time and buttons to open the menus You can select the items shown in the Home menu using the Home Menu1 to Home Menu3 pages in the Home Menu setup menu The descriptions of the items displayed in the Home menu are given below using the default menu and the menu with all items shown as the examples For details on the Home M...

Page 30: ...mber NAT address etc instead of the IP address E Local system status The status on the local terminal is shown F Date and time The current date and clock are displayed G Camera button The Camera menu opens when you select the button and press the ENTER button on the Remote Commander The Camera menu is used to adjust the camera angle or brightness or to preset the camera adjustments and to move the...

Page 31: ...s on the Tools menu see page 118 For details on the Machine Status menu see page 64 For details on the Setup menu see page 41 I History button The History menu opens when you select the button and press the ENTER button on the Remote Commander The menu is used to check the incoming call and outgoing call histories or to call a remote party from the history list Details Previous Adjustments Brightn...

Page 32: ...IP 192 168 0 11 Home 5 11 2008 13 00 Missed Call Answer Dial Dial History1 111 111 111 112 2008 05 01 00 00 12 34 56 Dial History2 123 123 123 123 2008 05 26 00 00 03 25 45 Dial History3 17 17 17 17 2008 05 26 00 00 01 00 17 Dial History4 18 18 18 18 2008 05 26 00 00 01 00 18 Dial History5 19 19 19 19 2008 05 26 00 00 01 00 19 Dial History6 20 20 20 20 2008 05 26 00 00 01 00 20 Dial History7 66 66...

Page 33: ... page 87 M Instruction display The instructions for the operation in the Home menu are displayed N Line interface select button Selecting the button opens the drop down list of the line interface Select the interface to be used then press the ENTER button O Number input box To call a remote party not registered in the Phone Book select the box and enter the party s IP address Domain name etc Selec...

Page 34: ...he selected video input on the local system is displayed The displayed video input is shown as the label set in Custom Input Label in the Video setup menu 2 Audio input The selected audio input on the local system is displayed 3 LAN status The current status of LAN connection is shown The LAN indicator is shown in white when LAN is enabled for use and in gray when it is disabled 4 Indicators The s...

Page 35: ...plained taking manual brightness adjustment in the Camera menu as an example Buttons used for menu operations Operation Using the Menu F1 F2 F3 F4 T W 1 2 3 4 5 6 7 8 9 0 RFZ GHI JKL MNO PQRS TUV WXYZ ABC DEF PRESENTATION LAYOUT RETURN CONNECT ON OFF MIC BACK SPACE DISCONNECT TONE DOT TOOLS VOLUME ZOOM ENTER VIDEO INPUT CAMERA PCS RFZ1 DOT button Number buttons ENTER button V v B b buttons RETURN ...

Page 36: ...s the ENTER button The Brightness menu appears 4 Press the ENTER button on the Remote Commander Now you can select the adjustment mode 5 Use the V v B or b button to select the desired item from the drop down list then press the ENTER button Connect Camera Dial IP 5 11 2008 13 00 IP XXX XXX XXX XXX Home AAA Ready Details Previous Adjustments Brightness Preset Camera 5 11 2008 13 00 Adjustments Bri...

Page 37: ...r b button on the Remote Commander to select Previous then press the ENTER button You can also use the RETURN button on the Remote Commander The Camera menu is restored When the Save button is displayed in the menu When the setting or adjustment is finished press the V v B or b button on the Remote Commander to select Save and press the ENTER button The setting or adjusted value becomes effective ...

Page 38: ... the number shown on each button by pressing it once To enter a symbol Press the F2 button repeatedly to select the desired symbol Pressing the 0 button repeatedly also enables you to enter a symbol To enter a dot for an IP address Press the b button or DOT button Entering Characters Using the Remote Commander F1 F2 F3 F4 T W 1 2 3 4 5 6 7 8 9 0 RFZ GHI JKL MNO PQRS TUV WXYZ ABC DEF PRESENTATION L...

Page 39: ...Remote Commander even when the on screen keyboard is displayed on the screen To enter letters or numbers 1 Use the V v B or b button on the Remote Commander to select Num or Alpha on the on screen keyboard then press the ENTER button Select Num to enter numbers and Alpha to enter alphabetic letters 2 Use the V v B or b button on the Remote Commander to select the button on the on screen keyboard o...

Page 40: ...ter the input is complete select End then press the ENTER button on the Remote Commander To enter a dot for an IP address Select b or Dot on the on screen keyboard then press the ENTER button on the Remote Commander To enter a space Select Space then press the ENTER button on the Remote Commander To delete a character To erase the last entered character select Back Space then press the ENTER butto...

Page 41: ...us This section describes how to display the Setup menus and gives a introduction to the menus 1 Press the Tools button on the Remote Commander or use the V v B or b button to select Tools in the Home menu then press the ENTER button The Tools menu appears on the monitor screen Chapter 2 Registration and Setup for System Administrators Opening the Setup Menu Machine Status Setup Home Presentation ...

Page 42: ...isplay press the F4 button again For a description of each setup menu see the page for that menu indicated below Line Interface setup menu see page 45 Dial setup menu see page 45 Answer setup menu see page 45 Communication setup menu see page 45 Audio setup menu see page 47 Video setup menu see page 49 LAN setup menu see page 49 QoS setup menu see page 51 TOS setup menu see page 53 SIP setup menu ...

Page 43: ...ER button 5 Select the desired item from the drop down list or enter the characters in the text box For individual items see pages 45 to 63 6 After the selection or character input is completed use the V v B or b button to select Save then press the ENTER button The setting is saved and the Setup menu is restored To cancel the setup Use the V v B or b button on the Remote Commander to select Cance...

Page 44: ...44 Registering Local Information To return to the left column Press the B button or RETURN button on the Remote Commander ...

Page 45: ...the More Options button Off Does not display the More Options button The Answer setup menu is used to set up call reception Answer Auto Answer Allows you to select whether to answer calls automatically On Answers calls automatically When a call comes in the line is automatically connected Off Allows you to answer calls manually When a call comes in the phone rings If you select OK in the Answer me...

Page 46: ...239 presentation data transmissions 1 2 Use 1 2 of the total bandwidth for H 239 presentation data transmissions 1 3 Use 1 3 of the total bandwidth for H 239 presentation data transmissions Screen Size Allows you to select the screen size of the picture to be transmitted or received When Individual Settings for Transmission Reception on the IP page is set to On you can set this item individually f...

Page 47: ...f 30 frames per second 60fps Send pictures at a maximum rate of 60 frames per second AUTO Switch the number of frames automatically The Audio setup menu is used to set various audio items Basic Setup1 Input Select MIC Allows you to select the microphone and or external equipment from which an audio signal is input MIC Select this to use of the microphone supplied connected to the MIC jack on the u...

Page 48: ...istance within 3 m radius This option strikes a balance between pickup range and sound quality Wide and Clear Select this for a wider pickup range than Balance The quality of the picked up sound will be clearer Manual Select this to specify Mic Noise Reduction and Mic AGC manually Mic Noise Reduction This is only available when Adaptive Voice Pickup and Sound is set to Manual and allows you to set...

Page 49: ...inutes after the unit finishes rebooting 1 Press the 1 power switch on the unit 2 Within five seconds after you pressed the switch press the buttons on the Remote Commander described below depending on the desired Frequency 60 Hz VIDEO INPUT button once then Number button 1 three times 50 Hz VIDEO INPUT button once then Number button 2 three times The Frequency setting is changed and the unit shut...

Page 50: ...E for LAN connection Password Enter a password when you use PPPoE for LAN connection Fixed IP for PPPoE Select whether to make a PPPoE connection using a fixed IP address Off Does not use a fixed IP address for a PPPoE connection On Uses a fixed IP address for a PPPoE connection Fixed IP Address for PPPoE Enter an IP address when Fixed IP for PPPoE is set to On DNS Allows you to select whether to ...

Page 51: ...RTP RTCP Enter the RTP RTCP port number MTU Size Enter the MTU size SNMP Web Control Function only SNMP Mode Allows you to select whether the Simple Network Management Protocol SNMP agent is enabled On Enables the SNMP agent Off Disables the SNMP agent Trap Destination Enter the address of the trap destination SNMP manager Community Enter the community name managed by the SNMP manager up to 24 cha...

Page 52: ...fering Time Forward Error Correction FEC Allows you to select whether received packets are identified with an error correction mark On Identifies with an error correction mark Off Not identify with an error correction mark FEC Redundancy Allows you to set redundancy of the packet used for the Forward Error Correction FEC You can select from among 8 4 2 and Auto When you select 8 4 and 2 the commun...

Page 53: ...ecify the High Throughput bit of the TOS field On Specifies the High Throughput bit of the TOS field Off Does not specify the High Throughput bit of the TOS field High Reliability Allows you to select whether to specify the High Reliability bit of the TOS field On Specifies the High Reliability bit of the TOS field Off Does not specify the High Reliability bit of the TOS field Minimum Cost Allows ...

Page 54: ...nput the local terminal name transmitted to a remote party up to 30 characters Standby Mode Allows you to select whether the unit enters standby mode if it is idle for a specified period of time On Allows the unit to go on standby Off Does not allow the unit to go on standby Standby Time Specify the time the unit must remain idle before entering the standby mode This time can be set between 1 and ...

Page 55: ...ems of the Tools and Setup menus Display Time in Communication Off Displays neither the elapsed nor current time during communication Time Display Displays the elapsed time during communication Current Time Displays the current time during communication Display Terminal Name Off Does not display the connected terminal names Always show Always displays the connected terminal names Show temporarily ...

Page 56: ... and No Operation F3 Allows you to select the video input switched by pressing the F3 button on the Remote Commander You can select from among Far Near Camera HDMI IN PC and No Operation F4 Allows you to select the video input switched by pressing the F4 button on the Remote Commander You can select from among Far Near Camera HDMI IN PC and No Operation Home Menu1 Allows you to select the items th...

Page 57: ...y Tools On Displays Tools One Touch Dial On Displays the one touch dial buttons Off Does not display the one touch dial buttons Direct Dial Off Does not display Dial and the text box for direct dialing On Displays Dial and the text box for direct dialing Home Menu3 Allows you to select whether to display the indicators status information in the Home menu Video Input Display On Displays the current...

Page 58: ...sword in addition to the Administrator Password Be aware that registering other passwords but leaving the Administrator Password blank allows for modification and connection from the Web page without password input Make sure to write down the Administrator Password If you should forget the Administrator Password consult your Sony dealer In this case the memory of the unit is initialized before rep...

Page 59: ...dio Port Number Enter the audio port number for streaming broadcasts Video Port Number Enter the video port number for streaming broadcasts HOP Enter a number from 0 to 255 as the HOP for streaming broadcasts Access Permit Depending on the operating environment unauthorized third parties on the network may be able to access the system When you set Web Monitor Web Access Telnet Access or SSH Access...

Page 60: ... Discovery Select whether to export AMX Device Discovery information onto the network Off Disables this function On Enables this function When the AMX system is connected to the unit via serial connection AMX Device Discovery information is output via that serial connection AMX systems are external control devices that can be used to control the unit When the AMX system receives Device Discovery i...

Page 61: ...storage device inserted into the system Software Option Screen Allows you to enter the key of the optional software you want to add in Software Option input boxes 1 to 8 For details on how to add optional software see Adding Optional Software on page 77 Administrator7 Setup Password1 Admin Set1 Web Control Function only Allows you to select whether to require Save Settings Password when saving eac...

Page 62: ...isabled Does not require the password when saving the General setup settings Home Menu Enabled Requires Save Settings Password when saving the Home Menu setup settings Disabled Does not require the password when saving the Home Menu setup settings Administrator Enabled Requires Save Settings Password when saving the Administrator setup settings Disabled Does not require the password when saving th...

Page 63: ... or with the encryption feature set to off Encrypt Priority Connects only to a remote party with standard encrypted connection enabled This menu is used to configure the settings when using the Shared Phone Book located on the server For details on the Shared Phone Book see Using the Shared Phone Book on page 100 Shared Phone Book SPB Mode Selects whether to use the server managing the Shared Phon...

Page 64: ...s the ENTER button The Machine Status menu appears Information screens enabled for display by the Machine Status menu Machine Information see page 66 Peripheral Status see page 66 Communication Mode Status see page 66 LAN Line Status see page 67 Network Routing Check see page 67 Displaying the Machine Status Menu Machine Status Setup Home Presentation Streaming Recording Annotation Suspended Suspe...

Page 65: ...chine Status Chapter 2 Registration and Setup for System Administrators 3 Use the V v B or b button on the Remote Commander to select the information to be displayed then press the ENTER button The selected display appears ...

Page 66: ...ion Requested and Unregistration Confirmed The Communication Mode Status menu shows the status of current communication when communication is in progress and the status of previous communications when communication is not in progress The LAN Line Status or LAN Connection Status will also be displayed depending on the line interface used Communication Mode Status The current communication status wi...

Page 67: ...y audio video and H 239 presentation the number of lost packets that were recovered with the system s QoS function Number of received packets Displays by category audio video and H 239 presentation the number of packets received during communication The Network Routing Check menu is used to check the network routing and it shows the checking results You can start the network routing check by selec...

Page 68: ...ions on the Use of IPv6 The functions of the unit are restricted as follows when using the IPv6 Internet Protocol Unusable functions with IPv6 SNMP Mode NTP Shared Phone Book TOS Network Routing Check AMX Device Discovery PPPoE Streaming NAT SIP ...

Page 69: ... configurations consult with the system administrator Configuration example Set DHCP Mode to Auto under the Basic Setup page in the LAN setup menu The setting has been configured properly if the IP address appears in the Home menu To connect to a remote party Select IP under Line I F enter the remote party s IP address and dial LAN Connection via DHCP LAN A LAN B DHCP Server 1 Setup Basic Setup LA...

Page 70: ...f the correct IP address appears in the Home menu To connect to a remote party Select IP under Line I F enter the remote party s IP address and dial LAN Connection through a Router LAN A LAN B 192 100 10 1 Virtual Private Network VPN 192 100 20 1 Router 192 100 10 10 192 100 20 20 Router Setup Basic Setup LAN Host Name DHCP Mode IP Address Network Mask Gateway Address Primary DNS Secondary DNS Off...

Page 71: ...Address User Alias and User Number The IP address registered is displayed in the Home menu LAN Connection through a Gatekeeper User number 100 LAN B 192 100 10 10 User alias PCS A User number 200 LAN A 192 100 10 1 192 100 20 20 Gatekeeper 192 100 10 20 192 100 20 1 User alias PCS B Router Router Setup Basic Setup LAN Host Name DHCP Mode IP Address Network Mask Gateway Address Primary DNS Secondar...

Page 72: ...ter a name in Host Name under the Basic Setup page in the LAN setup menu and enter the appropriate values for IP Address Network Mask and Gateway Address 2 Set NAT Mode to On in the NAT Setup page of the LAN setup menu and enter the appropriate IP address in WAN IP Address LAN Connection through NAT Internet 210 10 10 1 210 20 20 2 Global address 192 100 10 10 192 100 10 1 210 20 20 1 Router Route...

Page 73: ...ettings in the NAT Setup page of the LAN setup menu as they are not in a NAT environment To connect to a remote party Select IP under Line I F enter the remote party s IP address and dial When using the terminal in the NAT environment you can connect to a remote party global IP but for a remote party to connect to you you must configure your router settings For details on router settings consult w...

Page 74: ...d is displayed in the Home menu To conduct a video conference Select IP under Line I F enter the remote party s IP address and dial 210 20 20 10 Global address 192 100 10 1 Traversal server Router Internet 192 200 20 1 192 100 10 10 User Alias PCS A User Number 100 192 200 20 10 Router Setup Basic Setup LAN Host Name DHCP Mode IP Address Network Mask Gateway Address Primary DNS Secondary DNS Off S...

Page 75: ...he LAN setup menu The setting has been configured properly if the correct IP address appears in the Home menu If the fixed DNS server address is specified by the provider set DNS to Specify and enter the specific addresses in Primary DNS and Secondary DNS 3 Remote parties must configure in the same way To connect to a remote party Select IP under Line I F enter the remote party s IP address and di...

Page 76: ...he local system that performs the routing check then set the necessary items on the menu Select Start Measurement to start the network routing check For the procedure how to open the Network Routing Check menu see Displaying the Machine Status on page 64 While the network routing check is being performed you cannot use any other functions including communication When the routing check is complete ...

Page 77: ... Sony dealer You can register up to eight optional software Optional software keys cannot be deleted after they are recognized by the system Optional software installation will be retained even after updating the system software version Adding Optional Software in the Web Page 1 Access the system from a Web browser on your computer For details on accessing this system see Chapter 6 Web Control Fun...

Page 78: ...ional software keys will not appear in system logs or configuration files Optional software installation will be retained even after updating the system software version The installed software is indicated in Software Option under the Machine Information page of the Machine Status menu For details see Machine Information on page 66 Notes Confirming that the Installation of the Optional Software is...

Page 79: ...ll and start communication You can call a remote party using the various methods described below Use any one depending on the settings in the Home menu or connecting status To call a remote party by using the Connect menu page 80 To call a remote party by entering their address or number directly Direct Dial page 81 To call a remote party by using the one touch dial buttons page 83 To call a remot...

Page 80: ... automatically for trial operation Be careful not to catch your finger This method is available when the Connect button is displayed in the Home menu 1 Use the V v B or b button on the Remote Commander to select Connect in the Home menu then press the ENTER button The Connect menu appears Note Calling a Remote Party by Using the Connect Menu 1 power switch Connect Camera Dial IP 5 11 2008 13 00 IP...

Page 81: ...lowed see Calling a Remote Party Registered in the Phone Book on page 85 Select from History The history list appears on the screen For the procedure to be followed see Calling a Remote Party by Selecting Them in the History List on page 84 When Direct Dial is set to On in the Home Menu setup menu the number input box Dial button etc are displayed in the Home menu allowing you to use the direct di...

Page 82: ... then press the ENTER button The format of the address for a SIP connection is the following 4000 number assigned by the SIP server 4000 sip com 192 168 1 1 when the IP address and SIP server are not used 5 Press the CONNECT button on the Remote Commander Or use the V v B or b button on the Remote Commander to select Dial then press the ENTER button The system begins dialing the IP address or tele...

Page 83: ...Remote Commander then press the ENTER button Select Connect from the displayed submenu with the V v B or b button and press the ENTER button The system begins dialing the selected remote party Dialing appears on the monitor screen When the system connects to the remote system Session Connected appears on the screen and the picture on the remote site is displayed Now you can start communication wit...

Page 84: ...g appears on the monitor screen When the system connects to the remote system Session Calling a Remote Party by Selecting Them in the History List Note Detailed Dial History Phone Book IP 192 168 0 11 Home 5 11 2008 13 00 Missed Call Answer Dial Dial History1 111 111 111 112 2008 05 01 00 00 12 34 56 Dial History2 123 123 123 123 2008 05 26 00 00 03 25 45 Dial History3 17 17 17 17 2008 05 26 00 00...

Page 85: ...then press the ENTER button Or select Connect in the Home menu with the V v B or b button and the ENTER button to display the Connect menu then select Select from Phone Book The Phone Book appears on the monitor screen 2 Use the V v B or b button on the Remote Commander to select the Group in which the remote party you want to call is registered then press the ENTER button 3 Use the V v B or b but...

Page 86: ... is pressed the display changes between the list of remote parties names in ascending alphabetical order and that list in descending alphabetical order To display the Phone Book during communication Press the button on the Remote Commander during communication To call a remote party registered in the Private Phone Book 1 Insert the USB storage device that contains the Private Phone Book into a USB...

Page 87: ...or b button to select the line interface to be used to connect to the remote party then press the ENTER button IP Connects to a remote party via a LAN connected to the LAN connector When a checkmark is put to SIP under Line Interface of the Line Interface setup menu you can select SIP from Line I F 3 Configure the LAN to be used for connection 1 Enter the IP address of a remote party to connect in...

Page 88: ...the IP address entered in step 3 Dialing appears on the monitor screen When the system connects to the remote system the message Session Connected appears on the screen and the picture on the remote site is displayed Now you can start communication with the remote party To cancel dialing before connecting While Dialing is displayed on the monitor screen press the DISCONNECT button or the ENTER but...

Page 89: ...ll unless the power switch on the unit is on Make sure that the TV monitor is turned on For setting of the answer mode see Auto Answer in the Answer setup menu on page 45 To receive a call in manual answer mode When you receive a call the unit rings and the message Incoming call Answer appears on the monitor screen Press V v B or b to select OK then press the ENTER button The system is then connec...

Page 90: ...ppears on the monitor screen The system is automatically connected and the picture of the remote party is displayed on the local monitor screen and the sound is heard The picture and sound on the local site will be enabled on the remote site at the same time The message Session Connected appears on the monitor screen You are now ready to start communication See pages 102 to 111 to adjust the sound...

Page 91: ...ion of the system Select Cancel with the V v B or b button on the Remote Commander then press the ENTER button To register the connected remote party in the Phone Book You can easily register the remote party who has just disconnected If you set Last Number Registration to On on the Device Setup page of the General setup menu the message Register this participant in the list appears after a commun...

Page 92: ...b button on the Remote Commander to select Phone Book in the Home menu then press the ENTER button Or select Connect in the Home menu with the V v B or b button and the ENTER button to display the Connect menu then select Select from Phone Book The Phone Book opens The Phone Book can be displayed by selecting Phone Book in the History or Detailed Dial menu 2 Use the V v B or b button on the Remote...

Page 93: ...t When you select IP from Line I F Enter the remote party s IP address Enter the host name and domain name ex host domain when using the DNS server or enter the party s user name and user number when using the gatekeeper page 51 When you select SIP from Line I F Enter the address of a remote party or the number assigned by the SIP server The format of the address is the following 4000 number assig...

Page 94: ...te Phone Book is registered 4 Use the V v B or b on the Remote Commander to select Save then press the ENTER button The settings are registered in the Phone Book When a connection with a remote party not registered in the Phone Book is terminated you can register this remote party to the Phone Book In this case the IP address or line number is shown in Index as the name of the remote party Modify ...

Page 95: ...Use the V v B or b button on the Remote Commander to select Save then press the ENTER button The modification is completed 1 Open the Phone Book 2 Use the V v B or b button on the Remote Commander to select the remote party to be copied then press the ENTER button The submenu appears 3 Press the V v B or b button on the Remote Commander to select Copy then press the ENTER button The items for the ...

Page 96: ...press the ENTER button The selected party is deleted To cancel deleting Select Cancel in step 4 then press the ENTER button You can create groups into which the registered remote parties are grouped To register a new group 1 Open the Phone Book 2 Use the V v B or b button on the Remote Commander to select Group Edit then press the ENTER button The Phone Book Group Edit menu appears 3 Use the V v B...

Page 97: ...Save then press the ENTER button The registered group button is displayed 6 Use the V v B or b button on the Remote Commander to select Previous then press the ENTER button The Phone Book is restored To modify the group name 1 Open the Phone Book Group Edit menu select the group button you want to modify using the V v B or b button on the Remote Commander and press the ENTER button The submenu app...

Page 98: ...remote parties are registered You can create your own Phone Book Private Phone Book on a USB storage device Once the Private Phone Book is registered inserting the USB storage device into the unit changes the Phone Book to the Private Phone Book You can also activate the Auto Dial feature allowing you to automatically start dialing one of the remote parties registered in the Private Phone Book sim...

Page 99: ... in the Phone Book Proceed with steps 2 to 4 in Registering a New Remote Party on page 92 The procedures for how to edit the contents of the Private Phone Book how to delete the registered remote party or how to copy one of the registered parties in the Private Phone Book are the same as those for the Phone Book Open the Private Phone Book and proceed with the steps described on pages 95 to 95 To ...

Page 100: ...the V v B or b button on the Remote Commander to select the remote party to dial automatically then press the ENTER button 3 Press the V v B or b button on the Remote Commander to select Edit then press the ENTER button The List Edit menu appears 4 Use the V v B or b button on the Remote Commander to select Auto Dialing then press the ENTER button The setting is registered and AUTO appears in the ...

Page 101: ... press the ENTER button The display switches to the Shared Phone Book To restore the Phone Book select Phone Book in the menu and press the ENTER button The procedure for dialing the registered remote party in the Shared Phone Book is the same as that for the Phone Book For details on dialing see Calling a Remote Party Registered in the Phone Book on page 85 Setup Shared Phone Book SPB Mode SPB Se...

Page 102: ...curs decrease the volume You can momentarily turn off the sound to be sent to the remote party during communication Press the MIC ON OFF button on the Remote Commander The sound of the local party is not heard by the remote party The indicator appears on the monitor screen of the local site The indicator appears on the monitor screen of the remote site indicating that the sound of the local party ...

Page 103: ...ure to be sent to the remote party which prevents smooth communication Using the Lip Sync function adjusts to synchronize audio and video However this may delay transmission of audio synchronized with video The Lip Sync function is enabled if you set Lip Sync to Auto on the Basic Setup1 page in the Audio setup menu For the setting see Lip Sync in the Audio setup menu on page 47 To enable the Lip S...

Page 104: ... angle and zoom 1 Press the CAMERA button on the Remote Commander or press the V v B or b button to select Camera in the Home menu and press the ENTER button The Camera menu appears 2 Select the camera to be adjusted During communication pressing the F1 button on the Remote Commander switches between the camera on the local site and that on the remote site 3 Use the V v B or b button on the Remote...

Page 105: ...f the remote control format of the remote camera is not H 281 If you cannot control the remote camera ask the remote party about the remote control format of his camera If the local and remote parties try to control the same camera at the same time the camera may not operate correctly Normally the brightness is automatically adjusted to obtain optimum levels You can also adjust it manually It is r...

Page 106: ...ess the ENTER button The Brightness adjustment menu appears 4 Press the ENTER button on the Remote Commander 5 Use the V v B or b button on the Remote Commander to select Manual Adjustment then press the ENTER button The brightness adjustment bar is selected Details Previous Adjustments Brightness Preset Camera 5 11 2008 13 00 Adjustments Brightness Auto Adjustment Previous 5 11 2008 13 00 Adjustm...

Page 107: ... to 6 settings for the remote camera To register the preset setting 1 Press the CAMERA button on the Remote Commander or press the V v B or b button to select Camera in the Home menu and press the ENTER button The Camera menu appears 2 Select the camera whose angle and zoom setting you want to preset During communication pressing the F1 button on the Remote Commander switches between the camera on...

Page 108: ...nu is displayed and you can adjust the zoom and angle For the adjustment procedures see Adjusting the Camera Angle and Zoom on page 104 7 After the adjustment is finished press the RETURN button or the ENTER button on the Remote Commander The Preset Save menu is restored 8 When you want to register a thumbnail use the V v B or b button on the Remote Commander to select Thumbnails and press the ENT...

Page 109: ...or b button on the Remote Commander to select the preset number you want to recall then press the ENTER button You can also recall the preset numbers 1 to 6 by pressing the number buttons 1 to 6 on the Remote Commander The submenu appears 4 Press the V v B or b button on the Remote Commander to select Load then press the ENTER button The camera moves to the selected preset position You can select ...

Page 110: ...matically Indoor Select when shooting the subject indoors Outdoor Select when shooting the subject outdoors ONE PUSH Select when adjusting the white balance by shooting a white object in the center of the screen To adjust the focus automatically Select Auto in the Focus drop down list and press the ENTER button The focus is automatically adjusted To adjust the focus manually 1 Select Manual in the...

Page 111: ...s within a single captured scene and brightens the dark areas while reducing flared highlights in the light areas When using wide dynamic range set WDR View DR to Low Mid or High based on the shooting environment To disable wide dynamic range set WDR View DR to Off To set WDR View DR to Low Mid or High you must set Brightness to Auto Adjustment and Shutter Speed to Auto To set the shutter speed To...

Page 112: ...put Near menu appears 2 Use the V v B or b button on the Remote Commander to select the video input on the local site then press the ENTER button The picture input from the selected equipment is displayed on the monitor screen CAMERA Selects the picture from the unit s camera HDMI IN PC Selects the picture from the equipment second camera etc connected to the HDMI IN PC connector 3 To store the se...

Page 113: ...only by pressing one of the F1 to F4 buttons For details see Function Keys in Communication in the General setup menu on page 56 You can switch the picture output from the remote system during communication Press the VIDEO INPUT button then F1 button on the Remote Commander The Video Input Far menu appears Use the V v B or b button on the Remote Commander to select the picture output from the equi...

Page 114: ...isplays the remote picture in full screen PandP Displays the remote picture on the left of the screen in large size and the local picture on the right in small size If a computer is connected to the system the computer screen will appear at the bottom right Side by Side Displays the remote and local pictures side by side PinP Displays the local window picture in the remote full picture You can sel...

Page 115: ...button on the Remote Commander displays the indication F1 Switches the monitored picture between the remote and local sites at the bottom of the monitor Each press of the F1 button on the Remote Commander swaps the location of both pictures To switch the display to the remote picture while receiving pictures from a computer When receiving a computer picture from a remote party pressing the LAYOUT ...

Page 116: ...he monitor screen For details on adjusting the camera see Adjusting the Camera on page 104 3 Press the TOOLS button on the Remote Commander or press the V v B or b button to select Tools in the Home menu and press the ENTER button The Tools menu appears 4 Press the b button on the Remote Commander and select Execute for Screen Capture with the V v B or b button then press the ENTER button The imag...

Page 117: ... during communication For details on adjusting the remote camera see Adjusting the Camera on page 104 2 Press the TOOLS button on the Remote Commander to display the Tools menu 3 Use the V v B or b button on the Remote Commander to select Execute for Screen Capture then press the ENTER button The remote picture is captured and stored on the USB storage device ...

Page 118: ...ton enable the following operations Presentation Pressing the ENTER button on the Remote Commander allows you to transmit an HDMI picture input from a connected computer to a remote party During transmission the message Executing appears and the selectable item changes to Stop To stop transmitting the HDMI picture select Stop and press the ENTER button For details on presentation see Using the Com...

Page 119: ...ENTER button stops recording For details on recording see Recording a Visual Communication on page 124 Annotation Pressing the ENTER button displays the Annotation Start menu You can transmit the picture with letters and graphics overwritten with a commercially available pen tablet or display a pointer on the screen Annotation function While the annotation function is being executed the message Ex...

Page 120: ...olution to 1920 1080 The Presentation screen may appear small when using other resolutions To configure the presentation mode When you transmit an HDMI picture from a computer etc and a camera picture simultaneously to a remote party the remote party can view both pictures simultaneously This function is called to make a presentation using Connecting a Computer Note Making a Presentation HDMI cabl...

Page 121: ...y While presentation is being executed the message Executing appears on the screen You can also transmit the computer picture to the remote party by pressing the PRESENTATION button on the Remote Commander instead of performing steps 1 and 2 above To stop the presentation Select Stop for Presentation in the Tools menu and press the ENTER button on the Remote Commander Transmission of the computer ...

Page 122: ... or b button to select Execute for Streaming then press the ENTER button The streaming broadcast starts and the communication in progress can be watched from a computer over the Web While the streaming broadcast is running the message Streaming Executing is displayed in the Tools menu and the menu item changes to Stop If you start streaming before a communication begins the broadcast will continue...

Page 123: ...l Equipment To stop a streaming broadcast Selecting Stop for Streaming in the Tools menu and pressing the ENTER button stop the streaming broadcast Even if the unit is turned off while the streaming broadcast is being executed the streaming broadcast continues Note ...

Page 124: ...ding 1 Insert a USB storage device into the USB port 2 Press the TOOLS button on the Remote Commander to open the Tools menu 3 Press the b button on the Remote Commander and press the V v B or b button to select Execute for Recording then press the ENTER button The message Start recording appears 4 Use the V v B or b button on the Remote Commander to select OK then press the ENTER button Recording...

Page 125: ... device is no longer enough for storage during recording the recording stops automatically and a notification message appears You can store up to 2 GB or 12 hours of video for a single recording If the maximum size for files is reached during recording the recording stops automatically and a notification message appears Although the recorded MPEG4 files have the same file names as the MPEG4 files ...

Page 126: ...uch small consult with a Sony dealer The communication using a pen tablet is only available for communication between the PCS XG80 XG80S XG55 XG55S XA80 XA55 XL55 G60 G60D G60DP XG100 XG77 XG100S XG77S XC1 Communication Systems A pen tablet cannot be used for communication with other Sony communication systems Graphics written using the annotation function will not appear in recorded or streamed v...

Page 127: ...round Local Picture Selects the picture on the local site as the background Received Computer Picture Selects the computer picture received from the remote site as the background Transmitting Computer Picture Selects the computer picture on the local site as the background Received Computer Picture can be selected only when the computer picture is being received from the remote site Using the Anno...

Page 128: ... the V v B or b button on the Remote Commander to select Start and press the ENTER button The indicator indicating that the local party uses annotation appears When the Drawing mode is selected pen indicator appears on the monitor screen and pointer appears when the Pointing mode is selected 7 Write letters or graphics on the screen with a pen supplied with the pen tablet or move the pointer on th...

Page 129: ...ng touch operations place one finger on the tablet screen and tap to the right of that position with a second finger To change the line density Press the upper pen button Each press changes the line density You can select from three different line densities To perform this using touch operations place one finger on the tablet screen and tap to the left of that position with a second finger To eras...

Page 130: ... and graphics on the screen To save the drawings written using annotation 1 Insert a USB storage device on which you want to save the drawings using annotation into the unit 2 Press the TOOLS button on the Remote Commander to open the Tools menu 3 Select Execute for Screen Capture in the Tools menu The drawing using annotation on the screen is saved to the USB storage device as a still image To en...

Page 131: ... microphone about 50 cm 1 6 ft away from the participants Place the microphone in a quiet echo free location Install the speakers so that the participants do not come between it and the microphone Install the microphone away from equipment that may cause noise Avoid covering the microphone with paper for example or carrying the microphone and moving it If you do either extreme noise and echo may b...

Page 132: ...a camcorder to a remote party To connect the video equipment for input The unit is equipped with one video input To input video from external equipment To input video Press the VIDEO INPUT button on the Remote Commander to open the Video Input Near menu then select the video you want to input HDMI cable not supplied to HDMI IN PC VTR etc to HDMI OUT Save Cancel CAMERA Video Input Near HDMI IN PC ...

Page 133: ...quipment connected to each video input on the unit then press the ENTER button The picture from the selected equipment is displayed CAMERA Video shot by the unit s camera HDMI IN PC Video of the camera or video equipment connected to the HDMI IN PC connector To save the selected input press the V v B or b button on the Remote Commander to select Save then press the ENTER button ...

Page 134: ...ing the Picture from the Unit on a Monitor or Projector When the monitor or projector is connected to the unit you can view the picture from the system To connect a monitor or projector to HDMI OUT HDMI cable supplied Monitor projector etc Monitor to HDMI IN to HDMI IN ...

Page 135: ...numbers for dialing 0 9 1 Press the TONE button on the Remote Commander during communication The DTMF menu appears on the monitor screen 2 Press one of the number buttons 0 9 on the Remote Commander corresponding to the tone signal you want to transmit to the remote party The tone signal will be transmitted when the button is pressed 3 To stop transmitting the tone signal press the ENTER button on...

Page 136: ...cessing it from a Web browser To access the unit from a Web browser set Web Access to Enabled on the Access Permit page of the Administrator setup menu page 59 For details on Web operation see Chapter 6 Web Control Function You can control or set up the unit by accessing it with Telnet To access the unit from Telnet set Telnet Access to Enabled on the Access Permit page of the Administrator setup ...

Page 137: ... A connection conducted using this feature is known as an encrypted connection This chapter describes how to conduct an encrypted connection The unit is equipped with standard encryption which complies with the H 235 standardized by the ITU T The encryption function may not be available in some countries or regions Chapter 5 Encrypted Connection Note ...

Page 138: ... with standard encrypted connection enabled Connects without encryption to parties unable to connect with standard encryption or parties with encryption set to off Setup Encryption 5 11 2008 13 00 IP 192 168 0 11 Encryption Mode Connect Priority Cancel Save Encryption Connect with encryption Local system Standard encrypted connection available Remote system Standard encrypted connection available ...

Page 139: ...o remote parties with standard encrypted connection enabled Do not connect Connect with encryption Local system Standard encrypted connection available Remote system Standard encrypted connection available Local system Standard encrypted connection available Remote system Standard encrypted connection unavailable ...

Page 140: ...ryption feature The encryption feature on a far end system is disabled The encryption feature on a remote system is turned off or the signal encryption method setting on the remote system is different from that on the local system The encryption feature on a far end system is enabled The encryption feature on a remote system is turned on The conference could not start because the encryption featur...

Page 141: ...g an Encrypted Connection Chapter 5 Encrypted Connection The standard encryption videoconference with SIP connection is not available You are connected to the remote system via SIP connection Error Messages Causes ...

Page 142: ...nit The Web Control Function helps you control the unit or change its setup configuration using a Web browser installed on your PC such as Internet Explorer Internet Explorer is a product of the Microsoft Corporation Please use Version 7 0 or above Chapter 6 Web Control Function ...

Page 143: ...xx xxx xxx xxx xxx xxx xxx xxx represents the IPv4 address Example For IPv6 addresses http xxxx xxxx xxxx xxxx xxxx xxxx xxxx xxxx xxxx xxxx xxxx xxxx xxxx xxxx xxxx xxxx represents the IPv6 address When a proxy server in an external network segment has been set the Gateway address in the unit LAN setup must also be set Or set your Web browser proxy setting to No Proxy for the unit Note ...

Page 144: ...are made three times an error message appears on the screen You can select a user name from the following and enter the password for the selected user name remote Enter the Remote Access Password set in the Administrator setup menu You can access and check the Phonebook and Setup pages address Enter the Phone Book Modification Password set in the Administrator setup menu You can access the Phonebo...

Page 145: ...lick the OK button The Administrator Password Phone Book Modification Password Save Settings Password Remote Access Password and Streaming Broadcast Password are registered in the Password page of the Administrator setup menu When you enter a password to access the Web page the password authorization will be valid until you quit the Web browser If you simply close the Web browser without quitting ...

Page 146: ... remote party enter the address of the remote party and dial The information icons for this system are also displayed Download Displays the Download menu to download logs Control Pad Displays the control panel to control the system Remote Commander Displays the image of the Remote Commander supplied with the unit It allows you to perform the same operations as those on the Remote Commander Menu it...

Page 147: ...left part of the page the Home menu appears You can also display the Home menu by entering the correct password on the name entry screen To dial by entering a number 1 Select the line interface IP or SIP 2 Enter the telephone number or address of a remote party into the text box 3 Click the Connect button ...

Page 148: ...Download Menu When you click Download on the left part of the page the Download menu appears Various log files can be shown Select the log file you want to display and click the Download button You can check the log files in a separate window ...

Page 149: ...der Menu When you click Remote Commander on the left part of the screen the Remote Commander image appears Click the various buttons on the Remote Commander image to perform operations identical to those on the supplied Remote Commander such as controlling the camera dialing phone numbers etc ...

Page 150: ...all history lists Dials from the history Deletes an unnecessary history record Setup Confirms or modifies the setup Information Confirms the machine information peripheral status and communication mode You can also check the network routing and can display the recorded files on a USB storage device Monitor You can monitor the picture on the unit When Web Monitor is set to Off on the Access Permit ...

Page 151: ...ormation on the KIOSK Mode setting consult your Sony dealer 1 Click Setup at the top of the screen 2 Click Admin Etc that appears on the left side of the screen The Admin Etc screen appears You can only configure this setting when sonypcs has been entered as the user name 3 Set KIOSK Mode to On 4 Click the Save button After saving is complete the page display is refreshed To turn the power off dur...

Page 152: ... the Version Up page Click Reference and select the software you want to upgrade then click the Upload button When upload is complete a message appears and the version upgrade begins After the upgrade is complete the system reboots Do not turn off the power until rebooting is complete You can also upload Phone Books and configuration files by selecting them with Reference Version Up ...

Page 153: ...me version 6 0 or above is required to view a communication If QuickTime is not installed on your computer download it for free from the following Web site http www apple com quicktime download When Streaming is Disabled on the Streaming Recording page of the Administrator setup menu the communication cannot be watched Depending on Web access limitations about 10 terminals can view a streaming bro...

Page 154: ...lick Monitor of the tools buttons the Monitor page opens You can monitor the picture on the unit When Web Monitor is set to Off on the Access Permit page of the Administrator setup menu or while the encrypted connection is made you cannot use the Monitor page Note ...

Page 155: ...lso connect a pen tablet not supplied for annotation here Do not connect small USB devices e g pen tablet receivers here as they may become impossible to remove Connect small devices to the USB port on the rear of the unit Rear a Kensington Security Slot Connect an anti theft security cable here b HDMI IN PC connector Connect to the HDMI output connector of a computer We recommend using Sony HDMI ...

Page 156: ...egory 6 cable For safety do not connect the connector for peripheral device wiring that might have excessive voltage to this port Follow the instructions for this port g MIC jack minijack Connect the microphone supplied Power is supplied to the microphone by the unit h DC 19 5V jack Connect the supplied AC Power Adaptor Bottom a Tripod screw hole 1 4 20UNC When you use a tripod screw use this scre...

Page 157: ...he menu f ENTER button Executes the selection or setting in the menu and goes to the next step g RETURN button Used to return to the previous step h CONNECT button Used to connect a remote party for communication i Number 0 9 buttons Used to enter the letters or numbers of a telephone number etc j Battery compartment rear Insert two size AA R6 batteries k 1 power on off button Sets the unit to sta...

Page 158: ...OOLS button Displays the Tools menu p DISCONNECT button Used to disconnect a remote party in communication q BACK SPACE button Deletes the letter entered last r MIC ON OFF button Turns off the local sound to be sent to a remote party To restore the sound press the button again ...

Page 159: ...on or not in communication Volume Volume of remote party s voice being adjusted Audio level monaural Audio input level of monaural sound Character input mode Character input available LAN status LAN LAN connected via the connector using Internet Protocol version 4 IPv4 LAN status LAN IPv6 LAN connected via the connector using Internet Protocol version 6 IPv6 Audio input Selected audio input exampl...

Page 160: ...esentation data from a remote party Streaming Stream broadcast in progress Recording Recording in progress Tablet Pen tablet connected Drawing near Drawing rights belong to the local party Drawing far Drawing rights belong to the remote party Pointer near Local party s pointer Pointer far Remote party s pointer Encryption Connected with encryption Packet loss Packet loss occurring Indicator Name D...

Page 161: ...est Try again later 27 Remote system out of order Check if the remote system is operational 28 Invalid number entered Check the number and try again 31 41 43 47 Network not available Try again later 33 34 Line is busy Try to dial again later 44 Network not available Line is busy Try again later 50 Not a Subscriber Check the remote party s facility contract 57 58 Bearer capability not authorized Ch...

Page 162: ... Connection to the remote party via DNS disabled Dial using IP address 234 Dialing the same address is invalid 235 Regarded as a secondary terminal as the number of lines for ISDN configuration is different 236 Regarded as a secondary terminal as Far End Camera Control is set to Off 237 Check the line interface or the IP address is set correctly 238 The conference could not start because the encry...

Page 163: ...Select MIC on the Basic Setup1 page of the Audio setup menu properly page 47 The microphone or external equipment is not connected correctly Check the connection pages 131 and 132 Picture is blurred Manual focus is selected but picture remains blurred Adjust the focus page 110 When auto focus is selected the background is too bright contrast is too high or the background or the participants clothe...

Page 164: ...e you can reconnect Turn off the power of the system and wait for a few minutes before turning it on again If you repeat plugging unplugging or turning on off you may not connect to the network for a while Turn off the power of the system and wait for a few minutes before turning it on again LAN connection timeout Try again later Packet for communication is not acceptable under the current LAN env...

Page 165: ...saved to the USB storage device The USB storage device has already been recorded to full capacity Use another USB storage device The Internal Temperature is High message appears and the system shuts down automatically The internal temperature of the unit is high Check that the ambient temperature is within the specified operating temperature range Request an inspection to check whether the fan is ...

Page 166: ...T Recommendation 48 Kbps 56 Kbps 64 Kbps G 722 compliant with ITU T Recommendation 64 Kbps 96 Kbps MPEG4 AAC 16 Kbps G 728 compliant with ITU T Recommendation Network Multiplexing Video audio data Frame format H 225 compliant with ITU T Recommendation Interface LAN standard 64 Kbps to 4 Mbps LAN protocol supported HTTP Telnet RTP RTCP TCP UDP SNMP SSH Remote control Far end camera control H 281 co...

Page 167: ...s 74 mm 16 mm 93 mm W H D 3 inches 21 32 inches 3 3 4 inches Mass Approx 170 g 6 0 oz Power Plug in power Cable length 8 m 26 2 ft Design and specifications are subject to change without notice The terms HDMI and HDMI High Definition Multimedia Interface and the HDMI Logo are trademarks or registered trademarks of HDMI Licensing LLC in the United States and other countries PCS RFZ1 Remote Commande...

Page 168: ... and distribution of MPEG 4 AVC 3 1 encoders decoders THIS PRODUCT IS LICENSED UNDER THE AVC PATENT PORTFOLIO LICENSE FOR THE PERSONAL AND NON COMMERCIAL USE OF A CONSUMER TO i ENCODE VIDEO IN COMPLIANCE WITH THE AVC STANDARD AVC VIDEO AND OR ii DECODE AVC VIDEO THAT WAS ENCODED BY A CONSUMER ENGAGED IN A PERSONAL AND NON COMMERCIAL ACTIVITY AND OR WAS OBTAINED FROM A VIDEO PROVIDER LICENSED TO PR...

Page 169: ...ency fH kHz Vertical sync frequency fV Hz 1024 768 Progressive XGA VESA 60 Hz 48 4 60 Progressive XGA VESA 70 Hz 56 5 70 Progressive XGA VESA 75 Hz 60 75 Progressive XGA VESA 85 Hz 68 7 85 1280 1024 Progressive SXGA VESA 60 Hz 63 98 60 Progressive SXGA VESA 75 Hz 79 98 75 1280 720 Progressive HD 60 Hz 45 60 Progressive HD 59 94 Hz 44 96 59 94 Progressive HD 50 Hz 37 5 50 1920 1080 Progressive FHD ...

Page 170: ...jack Modular jack Setting the range of LEFT RIGHT movement Setting the range of UP DOWN movement Pin Assignments Pin 10BASE T 100BASE TX 1000BASE T 1 TD TP0 2 TD TP0 3 RD TP1 4 TP2 5 TP2 6 RD TP1 7 TP3 8 TP3 Pan Tilt Range 1 8 100 100 CENTER 0 25 25 0 ...

Page 171: ...719 UDP Gatekeeper Discovery 224 0 1 41 1718 UDP Multicast Q 931 dial 2253 2269 TCP Q 931 answer 1720 TCP H 245 2253 2269 TCP Audio RTP 49152 49159 UDP Audio RTCP 49152 49159 UDP Video RTP 49152 49159 UDP Video RTCP 49152 49159 UDP FECC RTP 49152 49159 UDP FECC RTCP 49152 49159 UDP 2nd Video RTP 49152 49159 UDP 2nd Video RTCP 49152 49159 UDP SIP 5060 UDP TCP Auto bandwidth detection 51234 51235 UD...

Page 172: ...ke sure that the POCKET BIT is in standby mode i e the indicator is off before removing it Usage precautions Do not apply excessive force on the POCKET BIT while it is connected to a device Damage to the USB connector may result in malfunction of the POCKET BIT as well as the connected device Be aware that the surface of this product may become hot after extended periods of access or use If the co...

Page 173: ...ssion from the transmitter Frame rate The number of frames which can be encoded decoded in one second G 711 Audio encoding decoding format recommended by the ITU T A phone bandwidth audio signal is converted to a digital signal with a data rate of 64 Kbps It can be transmitted with a data rate of 56 Kbps G 722 Audio encoding decoding format recommended by the ITU T A 7 kHz bandwidth audio signal i...

Page 174: ...vice QoS reserves a bandwidth for specific communication in the network and guarantees a given communication speed SIP An acronym for Session Initiation Protocol SIP is a communication control protocol used for Internet telephony instant messaging etc SNMP An abbreviation for Simple Network Management Protocol This protocol is for management information between the management station and the manag...

Page 175: ...f Backlight Off On White Balance Auto Indoor Outdoor ONE PUSH Focus Auto Manual Focus Adjustment WDR View DR Off Low Mid High Shutter Speed Auto 1 100 Tools Presentation Execute Stop Streaming Execute Stop Recording Execute Stop Annotation Execute Background Screen Stop Annotation Mode Start Icon Display On Off Screen Capture Execute Machine Status Machine Information Peripheral Status Communicati...

Page 176: ...ry Detailed Dial Detailed Dial One Touch Dial F1 F2 F3 F4 Direct Dial Line interface IP SIP IP address Dial Connect Enter Number Address Detailed Dial Select from Phone Book Phone Book Select from History History Detailed Dial Detailed Dial Dial to Line I F Communication Bit Rate Phone Book Phone Book History History More Options Enable List Edit page 81 page 92 page 80 page 87 page 84 page 83 A L...

Page 177: ...ff On Communication1 Transmission Reception IP Mode Communication Bit Rate 1 128Kbps 384Kbps Communication2 3 512Kbps 768Kbps 1Mbps 2Mbps 3Mbps 4Mbps Other Audio Mode1 G 711 G 722 G 728 MPEG4 H 239 Ratio 2 3 1 2 1 3 IP Mode Screen Size1 1080 2 720 W4CIF Communication3 3 W432P WCIF 4CIF CIF QCIF AUTO Video Mode 1 H 263 H 264 Video Frame 1 15fps 30fps 60fps AUTO SIP Mode Communication Bit Rate 128Kb...

Page 178: ...ault 50ms Default 100ms Custom Audio Output Delay Adaptive Voice Pickup Close and Natural Balance and Sound Wide and Clear Manual Mic Noise Reduction High Mid Low Mic AGC High Mid Low Sound Effect Beep Sound Loud Medium Quiet Off Audio3 Sound Effect Loud Medium Quiet Off Dial Tone Loud Medium Quiet Off Ringer Tone Loud Medium Quiet Off page 47 F Video Basic Setup Video Input Camera HDMI IN PC Vide...

Page 179: ...lex PPPoE PPPoE Off On LAN User Alias Password Fixed IP for PPPoE Off On Fixed IP Address for PPPoE DNS Obtain automatically Specify Primary DNS Secondary DNS NAT Setup NAT Mode Auto On Off LAN WAN IP Address Gatekeeper Gatekeeper Mode Auto On Off LAN Gatekeeper Address User Alias User Number H 460 On Off Used Port Q 931 Number H 245 RTP RTCP Setup RTP RTCP LAN MTU Size SNMP SNMP Mode On Off LAN T...

Page 180: ...QoS2 Re Order Buffer Auto 1 2 Custom Re Order Buffer Rate Shaping On Off page 51 I TOS TOS Data Type Video Audio Data Presentation TOS Off IP Precedence DSCP Precedence Low Delay On Off High Throughput On Off High Reliability On Off Minimum Cost On Off DSCP page 53 J SIP Basic Setup SIP Server Mode On Off SIP Transport Protocol TCP UDP Port Number SIP Domain Registered User Name Password SIP Serve...

Page 181: ...ary NTP Server Time Zone Clock Display Pattern Year Month Day Month Day Year Day Month Year Year Month Day Day Month Year Date Time Time Update Execute Menu Screens Display Time in Off Time Display Current Time General3 Communication Display Terminal Name Off Always Show Show Temporarily Guide On Off Display Indicator On Off Communication Mode On Off Display Display On Screen On Off Keyboard Menu ...

Page 182: ...Terminal Status On Off Warning Messages On Off Home Menu2 Connect Button Display Simple Individual Off Home Menu2 Phone Book Button On Off History Button On Off Detailed Dial Button On Off Camera Button On Off Tools Button Off On One Touch Dial On Off Direct Dial Off On Home Menu3 Video Input Display On Off Home Menu3 Audio Input Display On Off Audio Level Meter On Off Volume On Off LAN Status On ...

Page 183: ...led Disabled Other Use History On Off Administrator4 Save Setup Execute Load Setup Execute AMX Device Discovery Off On HOP Internet Protocol IPv4 IPv6 Phone Book Save Phone Book Execute Administrator5 Load Phone Book Execute Clear Phone Book Execute Auto Dialing On Off Create Private Phone Book Execute Delete Private Phone Book Execute Copy to Private Phone Book Execute Software Option Software Op...

Page 184: ...N Enabled Disabled QoS Enabled Disabled TOS Enabled Disabled SIP Enabled Disabled Setup Password3 General Enabled Disabled Administrator9 Home Menu Enabled Disabled Admin Set3 Administrator Enabled Disabled Annotation Enabled Disabled Camera Enabled Disabled Encryption Enabled Disabled Shared Phone Book Enabled Disabled O Encryption Encryption Mode Off Connect Priority Encrypt Priority page 62 P S...

Page 185: ...reen 127 Backlight compensation 110 Basic connections 79 Beep Sound 48 Bit rate Decode 67 Bit rate Encode 67 Brightness 106 C Camera 62 Camera Button 57 Camera button 30 Camera Control 67 Camera menu 31 Cameras 104 Check Code 67 Clear Phone Book 61 Clock Display 56 Clock Display Pattern 55 Clock Set 55 Color 54 Communication Bit Rate 46 47 Communication Mode Display 55 Communication Mode Status 66...

Page 186: ...on 56 G Gatekeeper 66 71 Gatekeeper Address 51 Gateway 67 Gateway Address 50 General 62 General setup menu 54 Group Edit 96 Guide 55 H H 239 Ratio 46 H 245 51 H 460 51 73 H239 67 High Reliability 53 High Throughput 53 Histories 84 150 History Button 57 History button 31 History menu 32 Home Menu 62 Home menu 29 36 56 57 Home Menu setup menu 56 HOP 59 60 Host Name 49 66 Host Version 66 I Icon Displ...

Page 187: ...34 More Options Enable 45 MTU Size 51 Multicast Address 59 Muting function 102 N NAT 72 NAT Mode 50 NAT Setup 50 Network Mask 50 Network Routing Check 67 76 New Entry 92 NTP 55 Number Display 56 Number input box 33 Number of lost packets 67 Number of received packets 67 Number of recovered packets 67 O One Touch Dial 57 83 One touch dial buttons 34 On screen keyboard 8 Option I F 66 Optional softw...

Page 188: ...13 18 SIP Domain 53 SIP Mode 61 SIP Server Address 54 SIP Server Mode 53 SIP Server Port 54 SIP setup menu 53 SIP Mode 47 SNMP 51 SNMP Mode 51 Software Option 66 Software Option Screen 61 Sound Effect 48 SPB Mode 63 SPB Server Address 63 SPB Server Password 63 SSH Access 60 Standby Mode 23 54 Standby Time 54 Start Measurement 67 Streaming 9 58 59 119 122 150 153 160 Streaming Broadcast Password 58...

Page 189: ...deo 59 62 Video Frame 46 47 Video Input 49 66 Video Input Display 57 Video Mode 46 47 66 Video Output 66 Video Port Number 59 Video setup menu 49 Volume 57 Volume adjustment 24 102 W WAN IP Address 50 Warning Messages 57 Web Access 59 136 Web browsers 136 142 Web Control Function 142 Web Monitor 59 150 154 White balance 110 ...

Page 190: ...Sony Corporation ...

Reviews: