background image

9

SoloProtect ID Pro Start Guide v1.02

 © SoloProtect Ltd, 2019

Using the Correct Adapter to Charge the SoloProtect ID Pro

In order to ensure the ID Pro reaches 100% charge within 3 hours you must ensure you’re using the supplied Adapter and USB-C cable which are specially selected to ensure 
compatibility with your device.

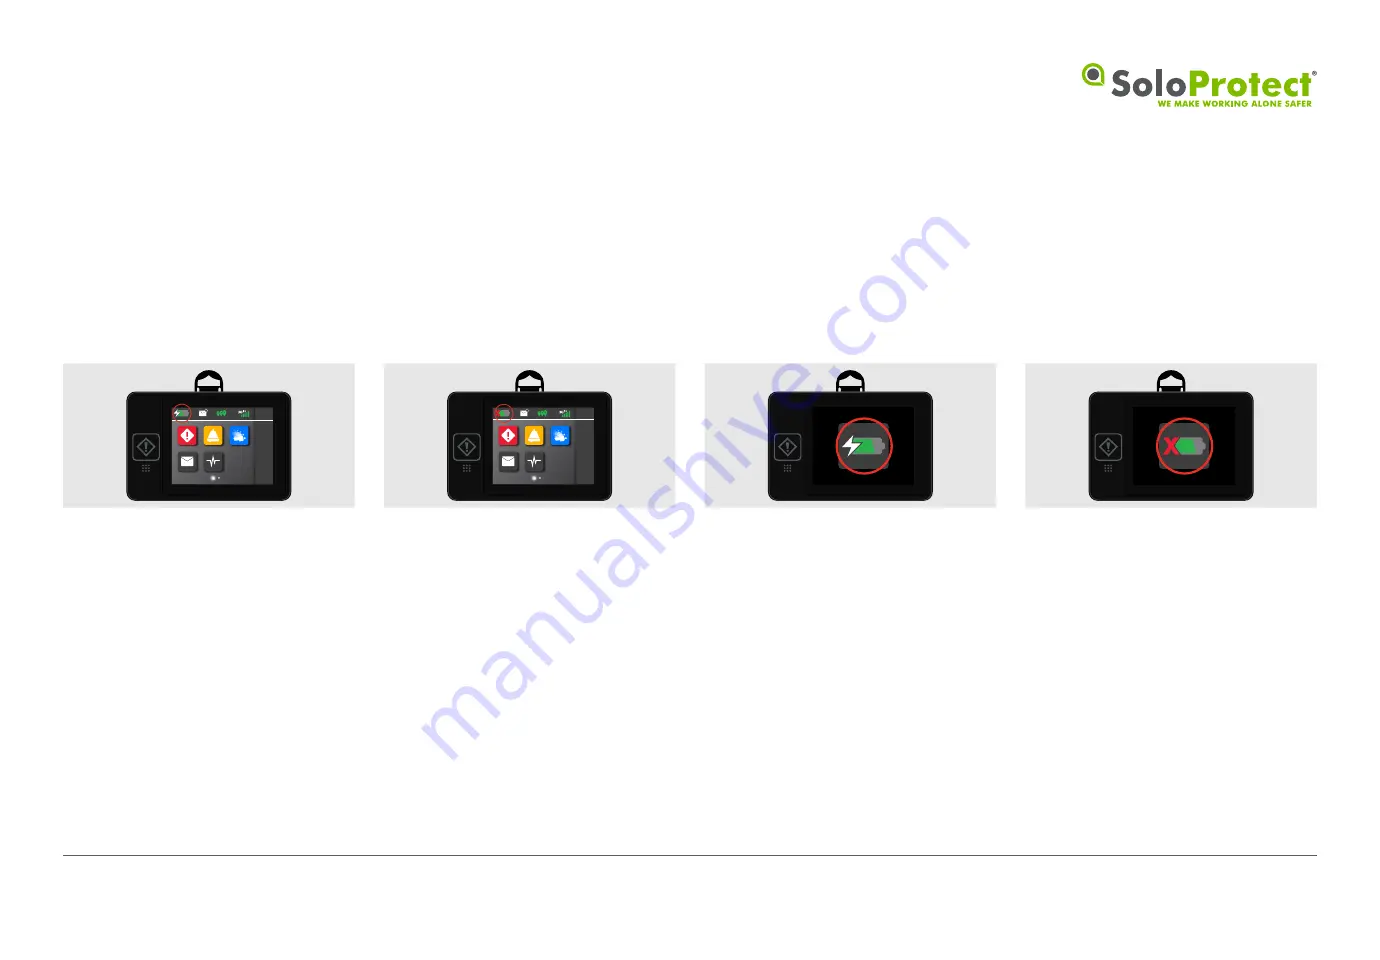
Your device will notify you if the adapter you’re using isn’t providing the right amount of power to charge your device up. These are as below:

If  your  device  is  powered  on  and  a 
charger  with  the  correct  power  output 
is used (1 Amp), the status bar will show 
the battery icon as the image above.

If  your  device  is  powered  down  and  a 
charger with the correct power output is 
used (1 Amp), the device’s charge screen 
will show the battery icon as the image 
above.

If  your  device  is  powered  on  and  a 
charger  without  appropriate  power 
output  is  used,  the  status  bar  will  look 
like the image above.

If  your  device  is  powered  down  and 
a  charger  without  appropriate  power 
output  is  used,  device’s  charge  screen 
will look like the image above.

10:30

1

10:30

1

Summary of Contents for ID Pro

Page 1: ...Start Guide SoloProtect Ltd 2019 v1 02 v1 02 ...

Page 2: ... Initial Set Up 5 5 How to Use your SoloProtect ID Pro 8 5 1 Charging Powering your Device 8 5 2 PoweringyourSoloProtectIDProonandoff 9 5 3 AlertsandAlarms 10 5 4 AmberAlert 11 5 5 Red Alert 12 5 6 Incapacitation Alarm 14 5 7 Closing your Red Alert or Incapacitation Alarm 16 5 8 Location 16 5 9 Risk Messaging 18 5 10 Settings 19 SoloProtect ID Pro Start Guide v1 02 SoloProtect Ltd 2019 ...

Page 3: ...to and watching where Video Verification is enabled a potentially abusive or violent situation on your behalf and recording for future use if necessary as potentially admissible evidence in court proceedings etc The event handler will then escalate the situation in line with what is an appropriate response including alerting the Emergency Services through the appropriate channels This Start Guide ...

Page 4: ... ID Pro device Charger and cable including adapter for your region Lapel clip 10 30 1 Rip Plug Lanyard attachment K Roberts 2645 3874 6530 K Roberts 2645 3874 6530 Insert bung for use in either landscape or portrait clip attachment that isn t used SoloProtect ID Pro Start Guide v1 02 SoloProtect Ltd 2019 ...

Page 5: ...otect ARC In addition the Red Alert function will also activate Video Verification if enabled Video Verification is an optional function on the SoloProtect ID Pro which streams video of a live incident in near real time which aids a faster understanding of the situation for a quicker escalation and response and an improved quality of evidence captured To understand if your device has been enabled ...

Page 6: ...n The function can be enabled automatically by pre defined message settings which are linked to the breaching of a Geofence For SoloProtect customers this is driven by a pre defined schedule in SoloProtect Insights to reflect a worker s calendar or delivered directly by a lone worker s manager again through SoloProtect Insights For SoloProtect s channel partners they will need to develop their own...

Page 7: ...e determined the orientation of your device at specification stage Start by inserting the rip plug into the SoloProtect ID Pro as shown This is done by inserting the rip plug into the dedicated slot on the device Its best to locate one side of the clip first into the device and then press down to click in the other side Then simply clip the lanyard attachment or lapel clip into the rip plug Ensure...

Page 8: ...ly We recommend leaving the device on charge for a minimum of 2 3 hours the first time you charge it and that it is only charged using the SoloProtect supplied charger Setting up your ID Card to facilitate Video Verification K Roberts 2645 3874 6530 Please ensure your ID card has been correctly modified in order to facilitate video verification on ID Pro Please contact your lone worker manager if ...

Page 9: ...Moisture Resistance SoloProtect ID Pro is water resistant but not waterproof and you should take care not to immerse the unit in any form of liquid Impact Damage SoloProtect ID Pro is made from a tough ABS plastic case It is designed to resist a certain amount of damage typical with general use but the device will not withstand heavy impacts The touch screen is manufactured from toughened glass bu...

Page 10: ...terface on the display will reflect this As the battery charges the battery symbol shows more cells When you place your device onto charge or remove it the screen will wake up to indicate the change If you put the device on charge while it is powered off it will display a charging screen which disappears once the device is removed from charge SoloProtect ID Pro is charged via a USB Type C connecti...

Page 11: ...your device up These are as below If your device is powered on and a charger with the correct power output is used 1 Amp the status bar will show the battery icon as the image above If your device is powered down and a charger with the correct power output is used 1 Amp the device s charge screen will show the battery icon as the image above If your device is powered on and a charger without appro...

Page 12: ...t up Followed by a spinning wheel icon as loading progresses Once completed the home screen will be displayed Typically this sequence should take no longer than 60 seconds When your SoloProtect ID Pro is on it registers with the cellular network and is ready to communicate to the Alarm Receiving Centre Please remove your ID card and press and hold the button shown to power off the device You will ...

Page 13: ...th America Australia 10 30 1 10 30 1 You can get a snapshot of your device functionality by viewing the status bar on ID Pro To carry out the Device Check function press the highlighted button 5 3 Alerts and Alarms You can use the Device Check function on SoloProtect ID Pro to get visual feedback on several things including Battery life Geolocation Mobile Signal strength 11 01 02 SoloProtect ID Pr...

Page 14: ... let you know by giving one long vibration 12 02 04 10 30 1 20s This is the point at which a user s message should commence The timer will count down from 20 to 0 at which point the message recording has finished The device will then vibrate twice to confirm completion of the Amber Alert On the ID Pro s home screen push the Amber Alert icon highlighted to enter the correct menu Then swipe the icon...

Page 15: ...l feel a single long vibration rather than three short vibrations This long vibration indicates that your Red Alert call has not successfully connected This applies regardless of how a Red Alert has been activated Once a call is live you will feel three short vibrations You will then feel a heartbeat vibration every ten seconds to reassure you that an ARC Operator is listening on your behalf This ...

Page 16: ... of the alert button will wake the screen if needed The red bar phone icon and call timer on the right of the screen indicate that the Red Alert is now live 10 30 1 10 30 1 10 30 1 3s 01 02 03 Via the Rip Plug K Roberts 2645 3874 6530 If the SoloProtect ID Pro is removed forcibly from a user s wear specifically by pulling the Rip Alarm plug out of the device then a Red Alert will be triggered 04 V...

Page 17: ...pen and that someone is listening to and or recording events If an Incapacitation call is closed accidentally then your device allows an ARC Operator to dial back into your device discreetly you will feel 5 short buzzes This gives reassurance that the Red Alert situation is again being monitored Activating Incapacitation Alarm Unlike previous SoloProtect lone worker devices the Incapacitation Alar...

Page 18: ...y The Incapacitation Alarm is cancelled by sliding the Incapacitation slider as shown back to the left If your device recognises Incapacitation while the Timer is active it will raise an Alert into our ARC when an operator will begin attempting to establish the degree of assistance you require You can also manually activate an Incapacitation Alarm by sliding the Incapacitation slider as shown to t...

Page 19: ...functions are described below GNSS Global Navigation Satellite System Your SoloProtect ID Pro is configured so that a GNSS Location request is made in the following situations When you press any of your SoloProtect ID Pro buttons When you check the status of your SoloProtect ID Pro When you enter an Amber Alert state When you enter a Red Alert state In the event of a serious incident transmission ...

Page 20: ...ork of beacons supplied through SoloProtect In the event of a Red Alert an Alarm Receiving Centre operator can utilise the nearest beacon in order to inform the best possible response for the lone worker This technology is beneficial where traditional location technologies such as GPS or GNSS are ineffective due to a worker being located indoors in a multi story building or on a particularly large...

Page 21: ...pointment 10 30 1 01 12 19 10 30am Ms Smith Appointment You should be cautious and aware of your surroundings at this address It has been reported that non residents outside the property are often verbally abusive 02 03 04 19 5 9 Risk Messaging The SoloProtect ID Pro comes equipped with our Risk Messaging function which allows the Account Administrator s within your organisation to send messages t...

Page 22: ... the Brightness Setting Icon as highlighted You can adjust the device s Brightness using the slider highlighted at the bottom of this screen In the Settings page select the Tone Volume Setting Icon as highlighted You can adjust the device tones volume using the buttons highlighted in the middle of this screen 10 30 1 10 30 1 30 10 30 1 10 30 1 20 01 02 01 02 Brightness 10 30 1 SoloProtect ID Pro S...

Page 23: ...T 0114 399 6000 E info SoloProtect com www SoloProtect com ...

Reviews: