All rights reserved
Shenzhen SOFARSOLAR Co ., Ltd.
C
31
All rights reserved
Shenzhen SOFARSOLAR Co ., Ltd.
C
32
Set the match resistor by the SWT2, the corresponding list as follows (0 OFF, 1 ON).
0
1
Reserve
SWT2_1
SWT2_2
State
Reserve
No connect
Connect
S
This topic describes the functions of the RS485 and WIFI ports.
R
485
By RS485 interface, transfer the inverter power output information, alarm information,
operation state to the PC terminal or local data acquisition device , then uploaded to the
server (such as S-WE01S).
USB
RS
-
485
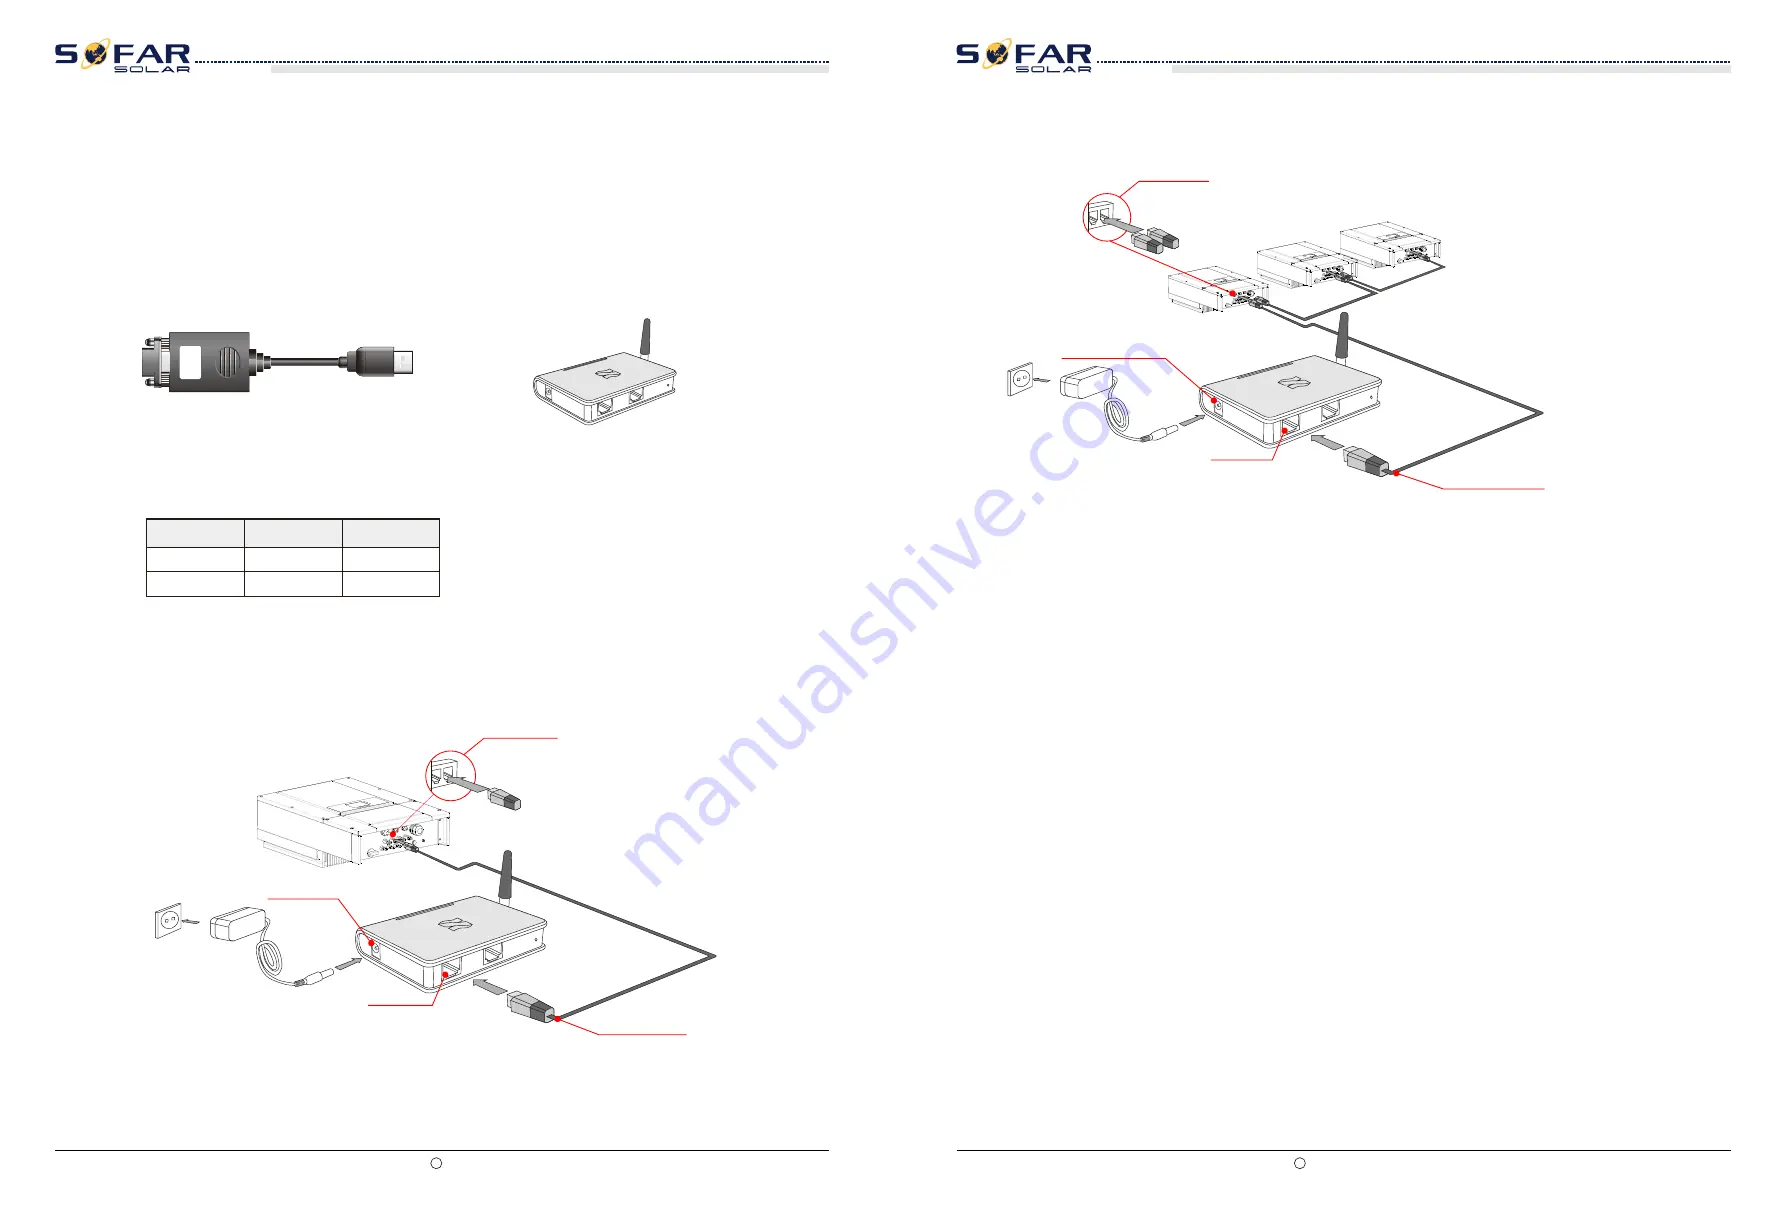
1. USB-RS485
2. S-WE01S
If only one SOFAR 10-20KTL is used, use a communication cable with waterproof RJ45
connectors, and choose either of the two RS485 ports and need to set the RS485 address
according to chapter
6.3 “Set address” part and SWT2(Match Resistance as shown in Figure
Figure 4-16 A single SOFAR 10-20KTL connecting Communications
RS485/422
电适配器接口
RS485/422
USB/485
接口
Figure 4-17Multi SOFAR 10-20KTL connecting Communications
WIFI
By the WIFI interface, transfer the inverter power output information, alarm information,
operation state to the PC terminal or local data acquisition device , then uploaded to the
server (such as S-WE01S).
If multiple SOFAR 10-20KTL are used, connect all SOFAR 10-20KTL in daisy chain mode over
the RS485 communication cable. First,set the RS485 address according to chapter
6.3 “Set
address” part and SWT2(Match Resistance).
According to the manufacturers to provide SN number can register remote monitoring of
SOFAR 10-20KTL
through http://www.solarmanpv.com/portal/LoginPage.aspx.
RS485/422
RS485/422
USB/485 Interface
Adapter Interface
SOFAR 10K~20KTL
User manual
SOFAR 10K~20KTL
User manual
Communications Port Description
Configuration of the WiFi dongle via the web interface
Please ensure that the WiFi dongle is properly installed and secured with the supplied screws,
as well as the inverter is powered on.
1) Use your smartphone, tablet or computer and connect to the Wifi dongle. Scan the local
SSIDs for a network starting with “AP” followed by the serial number of the dongle. Connect
to the network, if asked the password, it is printed on the dongle under “PWD:”
2) Open up an internet browser and enter the address 10.10.100.254, Recommended
browser: Google Chrome 15+, Firefox 10+
3) It will prompt for a login and password, both are “admin” by default
4) On the left hand side, select “Wizard” to configure the dongle
5) Refresh the networks and select your local home Wifi, NB: the wifi dongle requires a
network with Wifi4(2.4GHz to operate).
6) Enter your Wifi password and follow the wizard to configure your internet gateway
7) The dongle should reboot and start sending generation data to SolarMAN
8) Please visit https://home.solarman.cn/login.html and register your plant. It will require
the serial number found on your logger next to the “SN: ”
9) You can also view your plant statistics through the “SOLARMAN” app on GooglePlay or
the iOS storefronts.


