IQH3A IQ 3U Modular Enclosure
www.snellgroup.com
Installation
Issue 2 Rev 2
Page 28
©
2014 Snell Limited
3.13.2 Installing a New Module
Before installing a new module consult section 3.13.1 on page 27 and ensure there is
adequate power available for the module to be added.
To install a new module:
1.
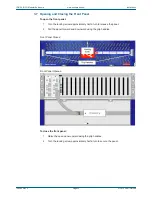
Open the front panel.
2.
Remove the module retaining bar.
3.
Choose an empty slot position for the module.
4.
At the rear of the enclosure remove the screws securing the blanking plate associated
with the chosen slot position. Store the blanking plate in a safe place for future use.
5.
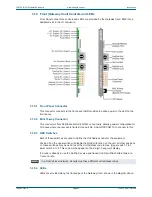
Ensuring correct orientation, fit the rear connecting panel (supplied with the new
module) to the rear of the enclosure in the vacant aperture and secure with the fixing
screws provided.
6.
At the front of the enclosure, (ensuring correct orientation) carefully slide in the new
module until it fully mates with the rear connector panel.
7.
Refit the module retaining bar.
8.
Close the front panel.
9.
Update the Power Rating table in section 3.13.1.3 on page 27.
3.13.3 Removing a Module
To remove a module:
1.
Open the front panel.
2.
Remove the module retaining bar.
3.
Carefully slide out the desired module.
If a different type of module is to be installed in this position proceed as in Installing a New
Module item 1 and items 4 to 11.
If the slot is to be left vacant, proceed as follows:
1.
Refit the module securing bar.
2.
Close and secure the front panel.
3.
At the rear of the enclosure fit the blanking plate in the associated position using two
screws.
4.
Update the Power Rating table in section 3.13.1.3 on page 27.
Ensure that the power supply is switched OFF and the mains power connection at the rear
of the unit is removed before this operation is performed.
Ensure that the power supply is switched OFF and the mains power connection at the rear
of the unit is removed before this operation is performed.


