


63
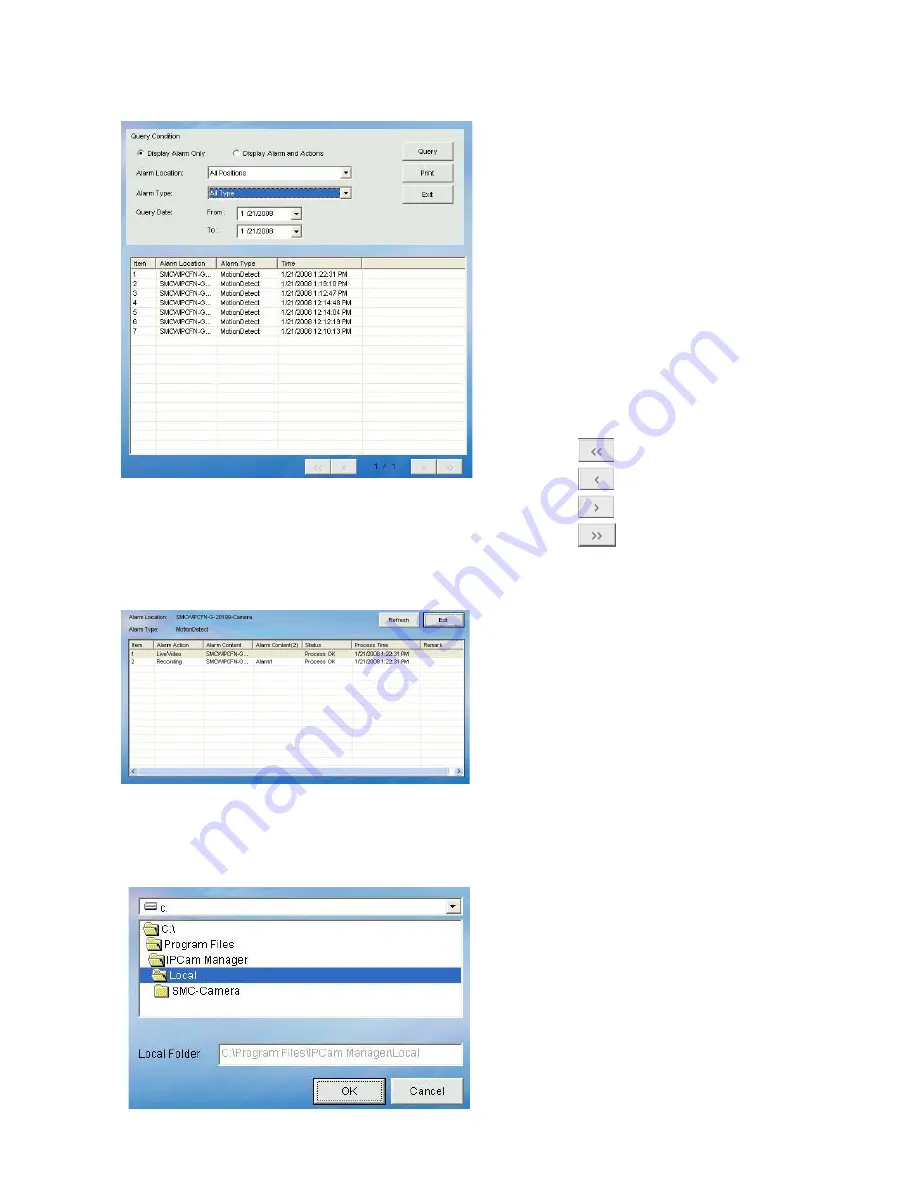
E.2.7.2. Query Alarm
STEP 1:
Click “Query Alarm” button.
STEP 2:
Open a window to set query
criteria.
Query Alarm Log via criteria
setting of:
1. Display Alarm Only or
Display Alarm and Actions
2. Alarm location
3. Alarm Type
4. Query date
STEP 3:
A query result will appear in
the lower spreadsheet. You
can use the arrow button to
navigate the page of the
spreadsheet, and print the
selected page.
:
Home
:
Page Up
:
Page Down
:
End
STEP 4:
You can print out the query
by clicking the “Print” or
“Export” button.
STEP 5:
Select an alarm log and
double click it to bring up a
window to view the alarm
action detail.
E.2.7.3. Snapshot
Saves snapshot of selected video source in JPEG format.
STEP 1:
Select a camera from Video
Display Area.
STEP 2:
Click “Snapshot” button to
get a still image of the
camera.
STEP 3:
Click the “Save” to save a
still image in your computer
in JPG format.


