background image

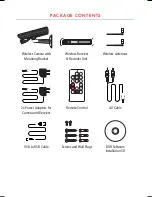
PACKAGE CONTENTS

Wireless Antennas

AV Cable

Wireless Receiver  

& Recorder Unit

Wireless Camera with 

Mounting Bracket

2x Power Adaptors for 

Camera and Receiver

Screws and Wall Plugs

Remote Control

Enter

R

ec

or

d

AV

1

3

Volume

Quad

2

+

4

-

Menu

Motion

Scan/

Del

A

M

USB to USB Cable

DVR Software  

Installation CD

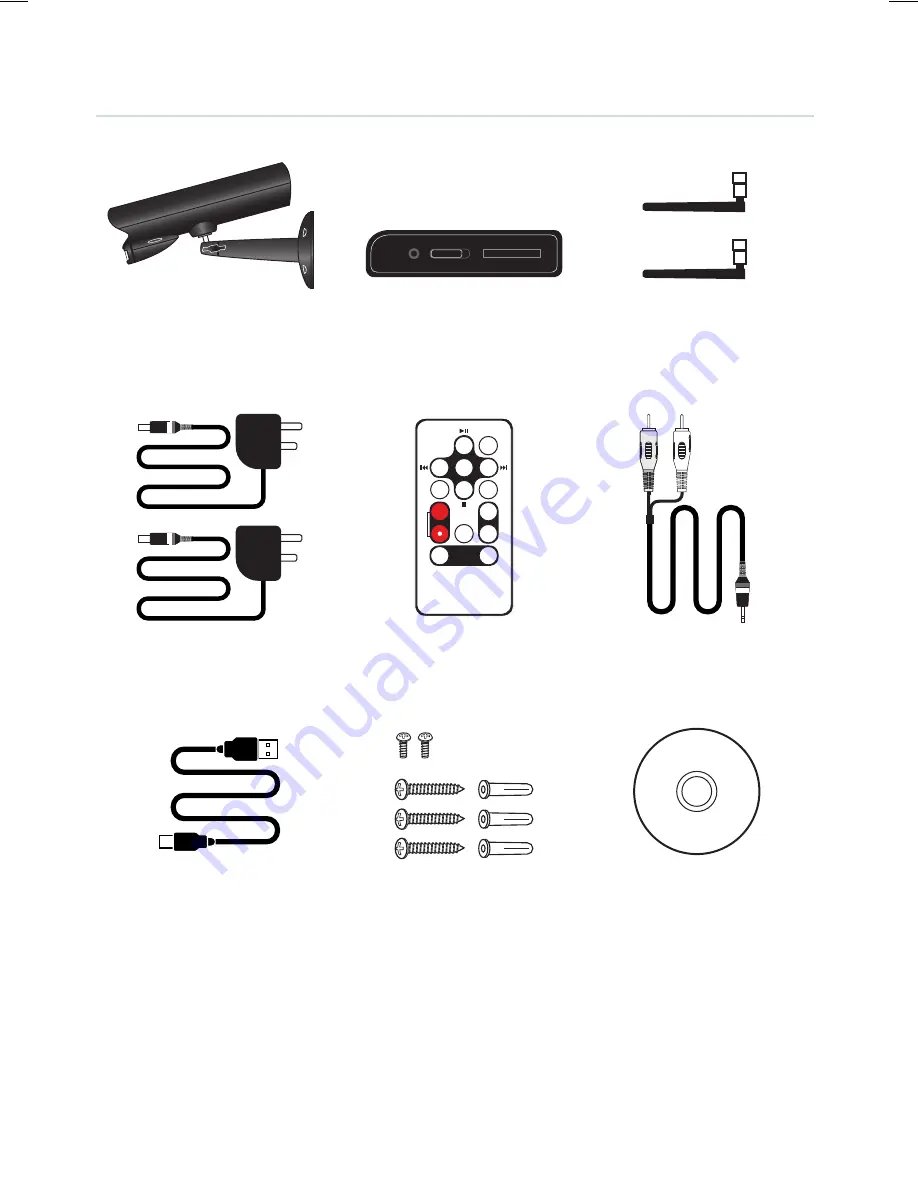
Summary of Contents for SWC201S

Page 1: ... Camera or Receiver by incorrect voltage is not covered by the warranty Do not attempt to open the casing to access the Camera or Receiver Damage caused to the products by tampering with the casing is not covered by the warranty Ensure the camera and receiver are positioned in an area free from dust Do not aim the camera at the sun or similar intense light Avoid installing the camera where there a...

Page 2: ...ny time by adding up to 3 additional cameras View up to 4 cameras in Quad view or watch the camera detecting movement in full screen Cameras can be mounted indoors or outdoors and up to 200m from the receiver Through walls ceilings the wireless range is reduced by 50 Optional Accessory not supplied IR Extension Unit allows the Receiver unit to be placed in a hidden location and still be controlled...

Page 3: ...ess Receiver Recorder Unit Wireless Camera with Mounting Bracket 2x Power Adaptors for Camera and Receiver Screws and Wall Plugs Remote Control Enter Record AV 1 3 Volume Quad 2 4 Menu Motion Scan Del A M USB to USB Cable DVR Software Installation CD ...
Page 4: ...signals to the receiver Power Input Socket Plug the 9V power adaptor here Wall Mounting Bracket Use the bracket to mount the camera on a wall or other flat surfaces IR LEDs Provides up to 10m Night Vision viewing Lens Captures video images PIR Sensor Detects motion in front of the lens and emits detection signal to the transmitter Microphone Receives sound which will be transmitted from the camera...

Page 5: ...ort Connect the A V cable to view video on a TV or monitor or record to a VCR DVR USB Port Connect the included USB cable to view video from the receiver on your computer The software CD is included for the viewing and playback on a PC Alarm Volume Control Turn the dial to increase or decrease the volume of the audio alarm IR Extension Input Connect the IR Extension Unit optional The IR Extension ...

Page 6: ...e on Record A Press the button to switch to Automatic Recording mode Motion Activated Recording In auto recording mode the A light will be on and the receiver will start recording when motion is detected by a camera The recording time can be set to 5 15 or 30 seconds Press the button again to cancel Automatic Recording Quad Press to view the images in quad mode Press Quad to exit this mode Press t...

Page 7: ...nds In Viewing mode press to enter Playback mode Press to enter exit Menu mode Used to control the receiver functions in Quad Menu and Playback Modes Press to delete recorded files from the SD card in playback mode Scan function is not available Activates Quad screen viewing Press the navigation buttons 1 4 to view the corresponding camera in full screen Activates recording Press again to stop rec...

Page 8: ...sitioned Ensure the power adaptor cable is able to connect back to the camera It is recommended the performance of the wireless connection is verified at the selected location area before the camera is permanently installed 1 The system comes with a Camera that has already been paired to the Receiver If you are adding a camera to the system pair the camera with the receiver before installing the c...

Page 9: ... IR Extender Unit 1 Install and power the Receiver and Camera 2 Insert the small socket from the IR Extension cable into the IR Extension Input on the Receiver 3 The Receiver can be placed in a hidden location ensure the IR Extension unit is in view of the Remote Control when in use You should be able to operate the Receiver using just the Remote Control TV Monitor Place this side in view of the R...

Page 10: ... highlighted ie 010024_1 3 SD Card Icon The icon will show on screen when an SD card is inserted into the Receiver s SD card slot 4 New Recording Icon When there is new recorded file a flashing file icon will be shown on screen to alert you The NEW indicator light will also flash on the receiver 5 Channel Indicator Displays the current channel number Press the Channel M button on the remote contro...

Page 11: ...o far from the receiver the NO SIGNAL warning message will be displayed It appears when the receiver can t get access the camera Reposition the camera closer to the receiver or check the camera s power connection when this occurs VIEWING MODE continued ...

Page 12: ... motion is detected a bleeping alarm will sound from the Receiver unit Control the volume using the Volume dial on the Receiver unit or the Volume control on the Remote control In Quad mode when motion is detected by a camera the Receiver will switch to display the image from the camera in full screen and will automatically start recording After recording it will automatically switch back to Quad ...

Page 13: ...r 2 You will see some folders named by DATE For example 080102 means the videos in this folder were recorded on 2nd January 2008 Select a folder and press Enter or OK to enter its submenu To return to the previous menu select the folder named at the top of the folder list 3 You will see the recorded files named by TIME For example 101024_1 means the video was recorded at 10 10 24 from Camera 1 Sel...

Page 14: ...exit Menu mode Use the navigating buttons to navigate up down left right in the Menu Press the Enter button to confirm a setting or selection The Main Menu The Main Menu contains 4 submenus Camera On Off Use this submenu to switch ON or OFF a specified camera Record Use this submenu for SD Card Recording settings Pairing Use this submenu to assign camera s to the Receiver Setting Use this submenu ...

Page 15: ...rted into the Receiver You can set up the following parameters using this submenu Quality Set the resolution of recorded videos There are two options 320 x 240 pixels and 640 x 480 pixels Recorded videos will be much clearer better image detail in 640 x 480 pixel mode Recorded videos will be much smoother less choppy in 320 x 240 pixels mode Trigger Record Set the length of recording time when the...

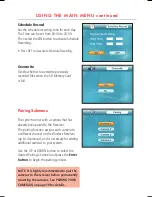
Page 16: ...iring Submenu The system comes with a camera that has already been paired to the Receiver The pairing function assigns each camera to a different channel on the Wireless Receiver up to 4 cameras and is necessary for adding additional cameras to your system Use the UP or DOWN button to select the desired Pairing Channel and press the Enter button to begin the pairing process NOTE It is highly recom...

Page 17: ...n use the UP and DOWN buttons to set the digits for the Date and Time required Brightness Adjust the brightness by using the LEFT and RIGHT buttons to change the bar from DARKEST left to LIGHTEST right Press the Enter button to confirm the adjustment AV Out Select PAL for outputting the video audio to TV DVR VCR or other viewing recording devices ...

Page 18: ...reful when using this function Zoom Set the image at original size or double size by selecting either ZOOM x1 or ZOOM x2 In double size mode use the navigation buttons to view areas of the screen Default Select Yes to reset the Receiver to the factory defaults All Menu settings will be reset Select No to exit the menu without changing any settings ...

Page 19: ...ext to the receiver when you pair it 2 Press the Menu button on the receiver or remote controller Go to the Pairing submenu using the navigation buttons on the remote controller or Receiver Press Enter or OK button to enter the Pairing submenu 3 Use the UP or DOWN buttons to select the desired Pairing Channel and press the Enter button to begin the pairing process 4 A message will be displayed on ...

Page 20: ...me and Date is set on the Receiver before using the software for recording use the AV Output to connect a TV to display the on screen menu See page 17 for details To connect the Receiver to a PC 1 Insert the Software CD into your PC or Mac and double click the installation file located inside the main folder on the CD select the relavant PC or Mac folder 2 Follow the on screen instructions and ins...

Page 21: ...iew live in the viewing screen Viewing Screen To turn ON OFF live viewing on screen go to Preview and select either Start Preview or Stop Preview 2010 06 02 16 56 34 File Display Area Viewing Screen Time Date ensure this is set before PC connection as it cannot be changed within the software Signal Level Save Save All Snapshot button Record ON OFF Channel Select menu ...

Page 22: ...g press the button again The video clips taken will appear in the File Display Area alongside any other snapshots taken Movie files will be highlighted with a small icon in the bottom left hand corner Files will be in avi file format To play any movie file double click on the image and your default media application will be used to play the video Save Save All To save an individual file or movie c...

Page 23: ... the Device Setup window screen and no pairing will take place To exit the pairing function press the Exit button Once the camera has been paired it will immediately be viewable in the Viewing Screen Exit To close the application go to File Exit Note On closing the application ALL image movie files will automatically be deleted unless they have been manually saved using the Save or Save All functi...

Page 24: ... lower frame rate i e 10 frames per second vs a higher 20 frames per second 1 Try moving the camera closer to the Receiver 2 Remove any obstructions between the Receiver and Camera The picture is dropping 1 Move the camera closer to the Receiver 2 Try repositioning the Camera Receiver or both to improve the reception The picture appears to be grainy 1 For best performance use with the TV Monitor P...

Page 25: ...NOTES ...

Page 26: ...ecording Resolution Recording Speed 640 x 480 up to 9 fps 320 x 240 up to 25 fps Remote Control Yes Mounting Free Standing or Wall Mount Internal use only Operating Voltage 9V DC 350mA Max Power Requirements 9V DC 600mA supplied Power Input DC Socket Audio Video Output AV Output Phono Plugs to TV USB Socket to PC Built in Audio Alarm Operating Temperature 10 to 50 C Dimensions 110 x 22 x 80mm SWC2...

Page 27: ...This product is supplied with a 1 Year warranty The Warranty excludes products that have been misused including accidental damage and damage caused by normal wear and tear In the unlikely event that you encounter a problem with this product it should be returned to the place of purchase WARRANTY ...

Page 28: ...Smart Witness is a Division of Manufactured exclusively for www smartwitness com ...

Reviews: