background image

| 1

   | 

E5024 ECDIS Installation Manual

Preface

As Navico is continuously improving this product, we retain the right to make changes to the 
product at any time which may not be reflected in this version of the manual. Contact your 
nearest distributor if you require any further assistance.
It is the owner’s sole responsibility to install and use the instrument and transducers in a 
manner that will not cause accidents, personal injury or property damage. The user of this 
product is solely responsible for observing safe boating practices.
NAVICO HOLDING AS AND ITS SUBSIDIARIES, BRANCHES AND AFFILIATES DISCLAIM ALL 
LIABILITY FOR ANY USE OF THIS PRODUCT IN A WAY THAT MAY CAUSE ACCIDENTS, DAMAGE 
OR THAT MAY VIOLATE THE LAW.
Governing Language: This statement, any instruction manuals, user guides and other 
information relating to the product (Documentation) may be translated to, or has been 
translated from, another language (Translation). In the event of any conflict between any
Translation of the Documentation, the English language version of the Documentation will be 
the official version of the Documentation.
This manual represents the product as at the time of printing. Navico Holding AS and its 
subsidiaries, branches and affiliates reserve the right to make changes to specifications 
without notice.

Copyright

Copyright © 2015 Navico Holding AS.

Warranty

The warranty card is supplied as a separate document.
In case of any queries, refer to the brand web site of your display or system:

http://pro.simrad-yachting.com

Declarations and conformance

This equipment is intended for use in international waters as well as coastal sea areas 
administered by countries of the E.U. and E.E.A.

Compliance Statements

The Simrad E5024 ECDIS system;
• 

complies with CE under EMC directive 2004/108/EC

• 

complies with the requirements of level 2 devices of the Radio-communications 
(Electromagnetic Compatibility) standard 2008

For more information refer to our website:

http://pro.simrad-yachting.com

The Wheelmark

The Simrad E5024 ECDIS system is produced and tested in accordance with the European 
Council Directive 96/98/EC of December 1996 on marine equipment, as last amended by 
directive 2013/52/EU. This means that the system complies with the highest level of tests for 
nonmilitary marine electronic navigation equipment existing today.
The Marine Equipment Directive 96/98/EC (MED), as amended by 2013/52/EU for ships 
flying EU or EFTA flags, applies to all new ships, to existing ships not previously carrying such 
equipment, and to ships having their equipment replaced.
This means that all system components covered by annex A1 must be type-approved 
accordingly and must carry the Wheelmark, which is a symbol of conformity with the Marine 
Equipment Directive.
Navico has no responsibility for the incorrect installation or use of the ECDIS system, so 
it is essential for the person in charge of the installation to be familiar with the relevant 
requirements as well as with the contents of the manuals, which covers correct installation 
and use. 

Summary of Contents for E5024 ECDIS

Page 1: ...ENGLISH E5024ECDISSystem Installation Manual...

Page 2: ......

Page 3: ...e of any queries refer to the brand web site of your display or system http pro simrad yachting com Declarations and conformance This equipment is intended for use in international waters as well as c...

Page 4: ...t and receiver Connect the equipment into an outlet on a circuit different from that of the receiver Consult the dealer or an experienced technician for help Trademarks NMEA 2000 is a registered trade...

Page 5: ...g the charts from the NavStick 18 Installing charts from other suppliers 18 Selecting charts to display 19 ECDIS Software setup 19 Chart settings 19 Vessel settings 23 Websocket interface connection 2...

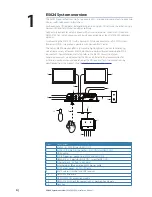
Page 6: ...g video from a variety of sources M5024 monitors are color calibrated according to ECDIS requirements For installation and setup refer to the M5000 Series User Manual Separate documents are delivered...

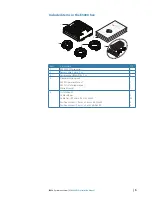
Page 7: ...I S s y s t e m I n s t a l l a t i o n M a n u a l s im ra d y a c h ti n g c o m EN G LI SH E 5 0 2 4 E C D I S s y s t e m I n s t a l l a t i o n M a n u a l s im ra d y a c h ti n g c o m Item D...

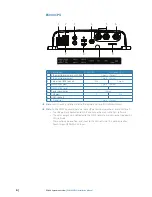
Page 8: ...d 7 USB ports 2 n a 8 HDMI sockets 1 1 9 SD card slot 1 port shared Note For NSO evo2 Installation refer to the separate NSO evo2 Installation Manual Note On the E5000 hardware there are some differen...

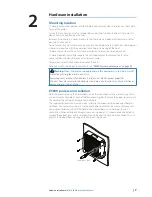
Page 9: ...ee E5000 Dimensional drawings on page 39 Warning When installing ensure appropriate safety equipment is used e g ear muffs protective glasses gloves and a dust mask Power tools may exceed safe noise l...

Page 10: ...1 The remote power signal is required to be used for a compliant ECDIS system It is recommended that the remote power signal wire be connected to the main bridge or conning station power circuit This...

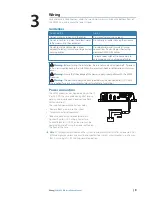
Page 11: ...he installation fire electrical shock or other serious injury may occur Warning Ensure that the voltage of the power supply is compatible with the E5000 Processor Warning The positive supply wire red...

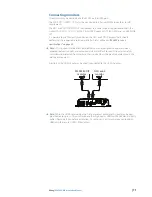
Page 12: ...e wire to GND O V 1 2 4 5 6 3 24 V NEG 24 V NEG SIMRAD ALARM RESET 1 E5000 processor 2 Powerplug E5000 3 Main power E5000 4 E0102 Alarm panel 5 Blue alarm pin E5000 6 E0102 separate power For wiring d...

Page 13: ...specifications on page 38 Note LCD monitors intended for home office use are not designed to operate in areas exposed to direct sunlight and will appear dark and difficult to read Also unless carefull...

Page 14: ...via adaptor cables A network consists of a linear backbone from which drop cables connect to the CAN bus compliant devices A single drop cable has a maximum length of 6 m 19 7 ft The total length of...

Page 15: ...drop of the network If an SI80 unit is included in the system this unit should be used for powering the CAN bus backbone Note Do not connect the CAN bus power cable to the same terminals as the engin...

Page 16: ...ite NMEA 0183 RX_A NMEA 0183 RX_B NMEA 0183 TX_A NMEA 0183 TX_B ECDIS TTYS1 2 Serial 1 1A blue blue white orange white orange RS422_RX RS422_RX RS422_TX RS422_TX ECDIS TTYS0 3 Serial 2 2B brown brown...

Page 17: ...tion refer to Websocket interface connection on page 23 Talkers and Listeners Do not connect multiple Talkers to any serial input Rx of the unit The NMEA 0183 standard is not intended for this type o...

Page 18: ...k to the E5024 system the following steps must be performed 1 Submit the User permit code to Navico 2 Verify your chart subscription from the NavTracker web site 3 Update the content of the NavStick t...

Page 19: ...r the purchased charts are prepared These chart updates and Chart permit codes are downloaded to the NavStick by using the NavSync program Updating the content of the NavStick When the chart subscript...

Page 20: ...y using the Install permits menu option When Chart permits are installed the charts have to be copied from an USB or SD drive to the E5024 system by using the Find and install charts menu option Selec...

Page 21: ...e The following sections focus on settings that typically will not require change once configured User preference settings and operation are covered in the operator manual The ECDIS settings options a...

Page 22: ...ety checks Note The Common Reference Point is a common point selected on the ship usually the con ning station to which all sensors are referenced to The Common Reference Point must be set in relation...

Page 23: ...gs The image above shows a typical sensor page The upper section of the page is similar for all sensors The Mnemonic NMEA sentences eg GLL VTG shown are dependent on the Sensor type selected The follo...

Page 24: ...transmitting device Use UDP Receiver to access ethernet sensors using the UDP protocol UDP Sender use to set the Host and Port settings Use UDP Sender to transmit data using the UDP protocol The Host...

Page 25: ...he top right corner The data is shown in raw format and updated in real time Websocket interface connection The Simrad web interface is an easy to use web style portal that lets you configure NMEA 200...

Page 26: ...ess into the web browser address bar Note Ensure that your computer s network settings are set so you can access this IP address 5 Once connected correctly the Simrad web interface home screen will ap...

Page 27: ...main menu and the available sub menu tabs will be shown directly below as indicated Web interface help files Selecting the help tab located in the top righthand corner of the screen will show the help...

Page 28: ...justment as is set by default for Simrad IMO radar Set the Data received timeout to stop overlay if no fresh data is provided Set an approximate location on vessel for the radar scanner Note Setting t...

Page 29: ...Installation Manual System settings Display Used to change the color palette For more information refer to the E5024 Operator Manual Sound Used to turn the alarm sound On or Off On screen keyboard Use...

Page 30: ...t be able to install it on the system Installing SA certificates To install an SA certificate 1 Go to Settings System and then select SA certificates A list of the currently installed SA certificates...

Page 31: ...list when you have more than one ECDIS in the system Each ECDIS in the system must have a unique name PLECDIS To setup a PLECDIS system two or more E5000 devices need to be connected using a standard...

Page 32: ...el to warn you in case dangerous or caution objects are found inside the guard zone Note A Navigational caution will appear on the screen if dangerous or caution objects are found within the guard zon...

Page 33: ...e the zone tick off the Show on chart check box Note If the guard zone display is on dangerous objects inside the zone are marked with red and caution objects are marked with yellow If the guard zone...

Page 34: ...e specified Any targets lost outside the specified range will not trigger an alarm You can turn off this alarm filter To turn On Off the lost radar target alarm Open the alarms panel by accessing the...

Page 35: ...wer connection Description Refer Yes No Voltage Power connected to E5000 Power connected to Extenal alarm panel External equipment External equipment connected to Input Output from E5000 system Refer...

Page 36: ...ber Description 000 0124 69 Micro C starter kit 120 ohm female terminator cap 120 ohm male terminator cap Micro C T piece connector Micro C 2 0 61M extension cable Micro C 15 4 55M extension cable Mir...

Page 37: ...t Number Description 000 0127 51 Ethernet cable yellow 5 Pin 2 m 6 5 ft 000 0127 29 Ethernet cable yellow 5 Pin 4 5 m 15 ft 000 0127 30 Ethernet cable yellow 5 Pin 7 7 m 25 ft 000 0127 37 Ethernet cab...

Page 38: ...ding Track Controller Autopilot Sentence B x DBT Depth Below Transducer x x 128267 DPT Depth x x 128267 DTM Datum Reference x All NMEA2000 Data is in WGS 84 Datum GGA Global Positioning System Fix Dat...

Page 39: ...t Data x TTM Tracked Target Message x TXT supplementary to ALR with more info x VBW Dual Ground Water Speed x x 128259 VDM AIS VHF Data link Message x VDO AIS VHF Data Link Own Vessel Report x VHW Wat...

Page 40: ...NSO evo2 Conformity CE C Tick HDMI Interfaces Ethernet 3 ports total 1 2 are PoE RJ45 socket NMEA 2000 compliant 1 port on rear Micro C male LEN 1 Video input 2 ports on rear BNC female NTCS or PAL fo...

Page 41: ...m 9 14 281 mm 11 05 R 2 5 mm 0 1 R 4 2 m m 0 1 7 8 0 mm 0 31 66 mm 2 58 265 mm 10 42 130 mm 5 13 Note The dimensional drawings for the monitor and alarm panel are found in a separate document LTSX50N8...

Page 42: ......

Page 43: ...988 10788 001...

Reviews: