


Chapter 2: Install the server hardware
21
Note:
The blue bracket latches will not close properly if the front and rear rail brackets are not level. Make
sure that both rails are level, and that they occupy the same U location in the rack.
Next steps
You can now mount the system enclosure in the rails.
Mount the enclosure in the rails
It takes two people to install each system into the rails, one person on either side, each holding the
system enclosure at the front and rear.
Before you begin
You have read all supplied rack and safety information. This is important if you are installing the
enclosure into the upper U locations of tall racks, where you need to use steps or platforms.
Procedure
1.
Extend each rail from the rack until it locks into place (callout A).
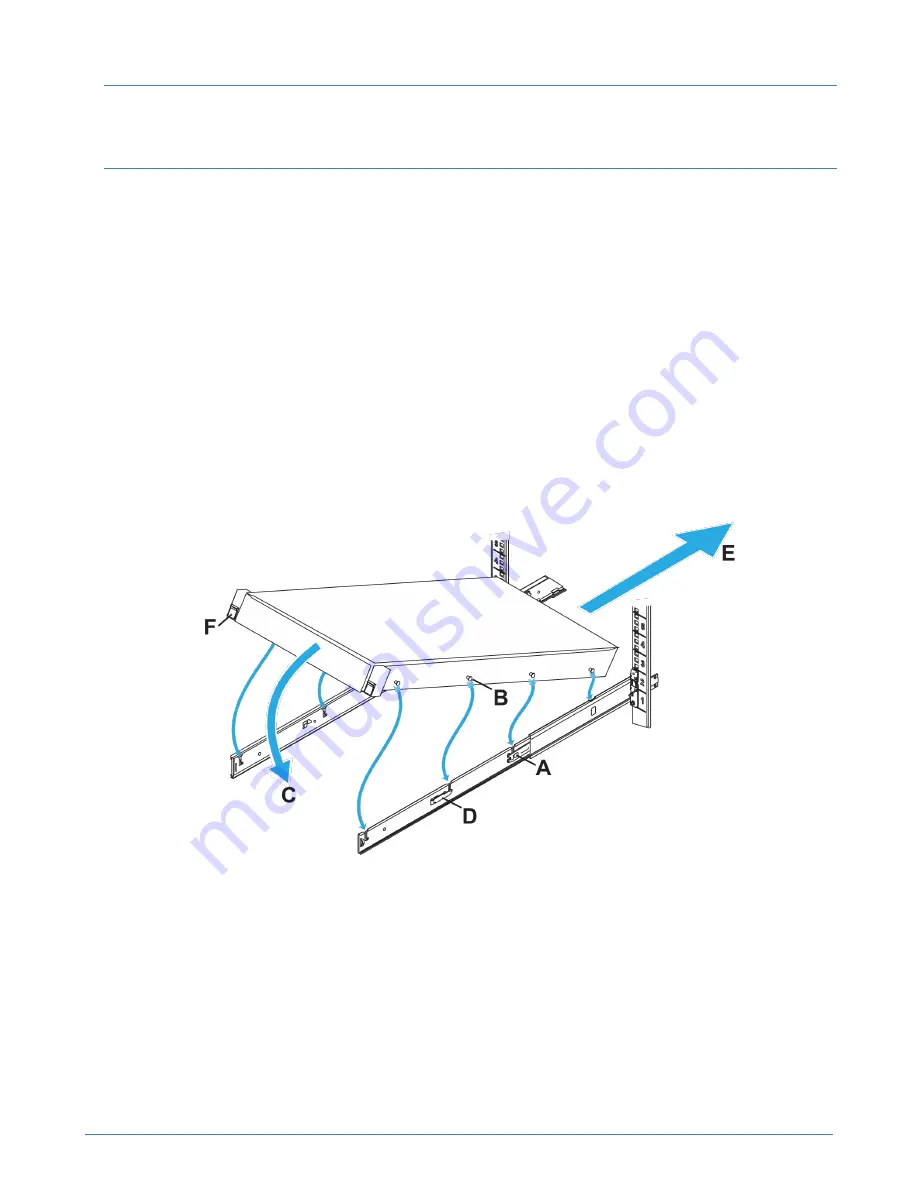
Figure 8: Enclosure installation
2.
Identify the location of the four lugs (callout B) on each side of the enclosure, and the corresponding
J-slots in the rails.
3.
Hold the enclosure over the rails, aligning the lugs with the J-slots.
4.
Starting at the back two lugs, gently rotate the enclosure down (callout C), engaging the lugs in the
J-slots.
5.
Ensure all eight lugs on the enclosure are seated firmly in the J-slots in the rails and that the lug lock
(callout D) engages.