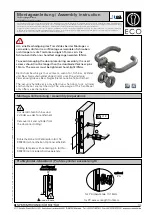
Fig. 1: Programming active (SmartCD.G2)
Fig. 2: Programming passive (SmartCD.MP)
ü
Locking device added in LSM software.
ü
LSM software launched.
ü
Programming device connected.
1. Position the programming device.
2. Programme the SmartHandle AX (see , quick guide or LSM manual for
details).
9
SmartHandle AX is programmed.
Shorten screws
Screw/Square
Length
2× L1
T - 8 mm (± 3 mm)
2× L2
T + 8 mm (± 3 mm)
Spindle
T + 37 mm (± 3 mm)
SmartHandle AX
(Manual)
6. Installation
28 / 178
Summary of Contents for SmartHandle AX
Page 1: ...SmartHandle AX Manual 08 05 2020...
Page 23: ...1 Pull out the mortise lock SmartHandle AX Manual 6 Installation 23 178...
Page 45: ...1 Pull out the mortise lock SmartHandle AX Manual 6 Installation 45 178...
Page 56: ...Insert square SmartHandle AX Manual 6 Installation 56 178...
Page 73: ...3 Insert the fitting into the adapter plate SmartHandle AX Manual 6 Installation 73 178...
Page 74: ...4 Slide the fitting down as far as it will go SmartHandle AX Manual 6 Installation 74 178...
Page 83: ...6 5 4 Procedure BKS Preparing drill holes SmartHandle AX Manual 6 Installation 83 178...
Page 93: ...SmartHandle AX Manual 6 Installation 93 178...
Page 129: ...2 Pull the cover downwards or upwards SmartHandle AX Manual 6 Installation 129 178...
Page 130: ...3 Take off the cover SmartHandle AX Manual 6 Installation 130 178...
Page 135: ...9 LockNode is mounted SmartHandle AX Manual 6 Installation 135 178...


