background image

23

and electronic components must be carefully covered beforehand as moisture can

cause malfunctions.

Do not clean with pressurised water.

After cleaning the truck, carry out the activities detailed in the “ Recommission (on

page 27)” section.

Electrical

Electrical

Electrical

Electrical System

System

System

System

Only suitably trained personnel may operate on the truck’s electrical system.

Before working on the electrical system, take all precautionary measures to avoid

electric shocks.

For battery-operated trucks, also de-energise the truck by removing the battery

connector.

Welding

Welding

Welding

Welding

To avoid damaging electric or electronic components, remove these from the truck

before performing welding operations.

Settings

Settings

Settings

Settings

When repairing or replacing hydraulic, electric or electronic components or

assemblies, always note the truck-specific settings.

Tyres

Tyres

Tyres

Tyres

The quality of tyres affects the stability and performance of the truck. When replacing

factory fitted tyres only used original manufacturer’s spare parts, as otherwise the

data plate specifications will not be kept.

When changing wheels and tyres, ensure that the truck does not slew (e.g. when

replacing wheels always left and right simultaneously).

Lift

Lift

Lift

Lift chains

chains

chains

chains

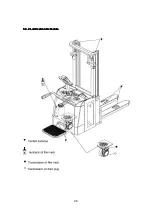
Lift chains wear rapidly if not lubricated.

The intervals stated in the service checklist apply to normal duty use. More

demanding conditions (dust,

temperature) require more regular lubrication.

The prescribed chain spray must be used in accordance with the instructions.

Applying grease externally will not provide sufficient lubrication.

Hydraulic

Hydraulic

Hydraulic

Hydraulic hoses

hoses

hoses

hoses

The hoses must be replaced every six years. When replacing hydraulic components,

also replace the hoses in the hydraulic system.

5.3Servicing

5.3Servicing

5.3Servicing

5.3Servicing and

and

and

and inspection

inspection

inspection

inspection

Thorough and expert servicing is one of the most important requirements for the safe

operation of the industrial truck. Failure to perform regular servicing can lead to truck

failure and poses a potential hazard to personnel and equipment.

The service intervals stated are based on single shift operation under normal

operating conditions. They must be reduced accordingly if the truck is to be used in

conditions of extreme dust, temperature fluctuations or multiple shifts.

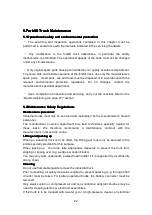
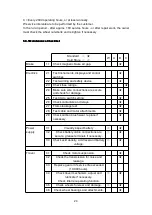
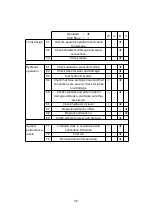
The following maintenance checklist states the tasks and intervals after which they

should be carried out. Maintenance intervals are defined as:

W = Every 50 service hours, at least weekly

A = Every 500 operating hours

B = Every 1000 operating hours, or at least annually

Summary of Contents for ES14-3300

Page 1: ...E S 1 4 3 3 0 0 E S 1 6 5 0 0 0...

Page 2: ...tain repair adjust and inspect truck 3 Before leaving the truck Do not park the truck on an incline Fully lower the load forks Set the key switch 4 to the OFF position and remove the key Drawing back...

Page 3: ...extent that it would create a hazard 10 Truck shall be kept in a clean condition to minimize fire hazards facilitate detection of loose or detective parts 11 Modifications and additions which affect c...

Page 4: ...2 3 3Safety regulations for truck operation 16 3 4 Collecting and depositing loads 17 4 Battery 4 Battery 4 Battery 4 Battery Maintenance Maintenance Maintenance Maintenance Charging Charging Charging...

Page 5: ...s any natural or legal person who either uses the industrial truck himself or on whose behalf it is used In special cases e g leasing or renting the proprietor is considered the person who in accordan...

Page 6: ...Description Description 1 1 1 1 1 1 1 1Assemblies Assemblies Assemblies Assemblies Item Component Item Component 1 Folding operator pedal 5 Control Handle 2 Side arm 6 Emergency brake swich 3 Battery...

Page 7: ...epresent battery residual capacity The LCD 2 displays the operating hours Battery Battery Battery Battery Discharge Discharge Discharge Discharge Indicator Indicator Indicator Indicator 1 1 1 1 When t...

Page 8: ...dle 9 Lower button Lowers load forks 10 Lift button Raises load forks 11 Driving regulator Controls the driving speed and direction 12 Warning signal button Triggers a warning signal 13 Collision safe...

Page 9: ...ates plates plates plates Item Description 1 Suspend direction 2 EP decal 3 Never stand under the forks and Never stand or ride on forks for any reason warning 4 Never put your hands in inner and oute...

Page 10: ...6...

Page 11: ...oad centre mm 12 Manufacturer 5 Weight without battery kg 13 adress 6 Nominal voltage V 14 Equipment no 7 Service weight kg 15 Service tel 8 Rated capacity kg 16 Licence no For queries regarding the t...

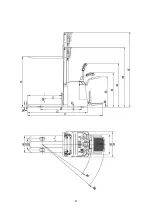
Page 12: ...t h8 Min mm 85 20 Dimensions length Pedal folded L2 mm 2003 21 Pedal unfold L1 mm 2525 22 width b1 mm 850 23 height h6 mm 2020 24 height h7 3450 25 Pedal height h2 mm 140 26 Side arm height h3 mm 1000...

Page 13: ...9...

Page 14: ...cessary adjust or secure the forks with stops Lower the truck slowly onto the ground and prevent it from rolling away 2 1 2 2 1 2 2 1 2 2 1 2Securing Securing Securing Securing the the the the truck t...

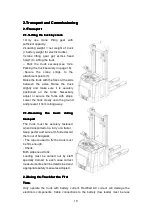
Page 15: ...e in brake in We recommended operating the machine under light load conditions for the first stage of operation to get the most from it Especially the requirements given below should be observed while...

Page 16: ...e Damage Damage and and and and Faults Faults Faults Faults The supervisor must be immediately informed of any damage or faults to the forklift truck Trucks not safe for operation e g wheel or brake p...

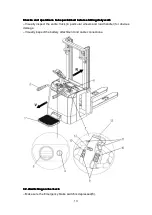
Page 17: ...starting starting starting daily daily daily daily work work work work Visually inspect the entire truck in particular wheels and load handler for obvious damage Visually inspect the battery attachme...

Page 18: ...ating outside the geometry of the truck Emergency Emergency Emergency Emergency Disconnect Disconnect Disconnect Disconnect Drawing back the emergency brake switch 6 All electrical functions are deact...

Page 19: ...ht Braking Braking Braking Braking The brake pattern of the truck depends largely on the ground conditions The driver must take this into account when operating the truck The truck can brake in three...

Page 20: ...at all times Abrupt stopping except emergencies rapid U turns and overtaking at dangerous or blind spots are not permitted It is forbidden to lean out of or reach beyond the working and operating are...

Page 21: ...ck and the load handler underneath the load unit Lift Lift Lift Lift Press the Lift 10 button until you reach the desired lift height Release the button as soon as you reach the limit position of the...

Page 22: ...there shall be no inflammable material or operating fluids capable of creating sparks within 2 metres around the truck The area must be well ventilated Fire protection equipment must be provided Prot...

Page 23: ...y batteries with a sealed battery container may be used The weight and dimensions of the battery have considerable affect on the operational safety of the truck Battery equipment may only be replaced...

Page 24: ...Connect the battery plug 30 with the charging lead of the stationary charger 29 and turn on the charger 4 4Battery 4 4Battery 4 4Battery 4 4Battery removal removal removal removal and and and and ins...

Page 25: ...the side panel The truck must be parked on level ground To prevent short circuits batteries with exposed terminals or connectors must be covered with a rubber mat Place the battery connector or the ba...

Page 26: ...enance Safety Safety Safety Safety Regulations Regulations Regulations Regulations Maintenance Maintenance Maintenance Maintenance personnel personnel personnel personnel Industrial trucks must only b...

Page 27: ...t simultaneously Lift Lift Lift Lift chains chains chains chains Lift chains wear rapidly if not lubricated The intervals stated in the service checklist apply to normal duty use More demanding condit...

Page 28: ...use ratings 2 4 Make sure wire connections are secure and check for damage 2 5 Test micro switch setting 2 6 Check contactors and relays 2 7 Frame leakage test 2 8 Test cable and motor attachments 2 9...

Page 29: ...Test hydraulic system 6 4 Check that hose and pipe lines and their connections are secure check for leaks and damage 6 5 Check cylinders and piston rods for damage and leaks and make sure they are sec...

Page 30: ...26 5 3 2 5 3 2 5 3 2 5 3 2 Lubrication Lubrication Lubrication Lubrication Schedule Schedule Schedule Schedule...

Page 31: ...draulic system B Grease Polylube GA352P Lubrication C GL 85W 90 Transmission 5 3 3 5 3 3 5 3 3 5 3 3 Maintenance Maintenance Maintenance Maintenance Instructions Instructions Instructions Instructions...

Page 32: ...transmission oil oil oil oil level level level level Prepare the truck for maintenance and repairs See 5 3 3 Maintenance Instructions Page26 Remove the front panel See 5 3 3 Maintenance Instructions...

Page 33: ...Thoroughly clean the truck Check the brakes Check the hydraulic oil level and replenish as necessary See 5 3 3 Maintenance Instructions Page26 Apply a thin layer of oil or grease to any non painted m...

Page 34: ...ional regulations or after any unusual event by a qualified inspector The inspector shall assess the condition of the truck from purely a safety viewpoint without regard to operational or economic cir...

Page 35: ...fuse Truck in charge mode Check the battery connector and connect if necessary Set key switch to I Check battery charge charge battery if Necessary Test fuses Interrupt charging Load can not be lifte...

Page 36: ...32...

Reviews: