


Install the System into a Rack
007-5466-001
15
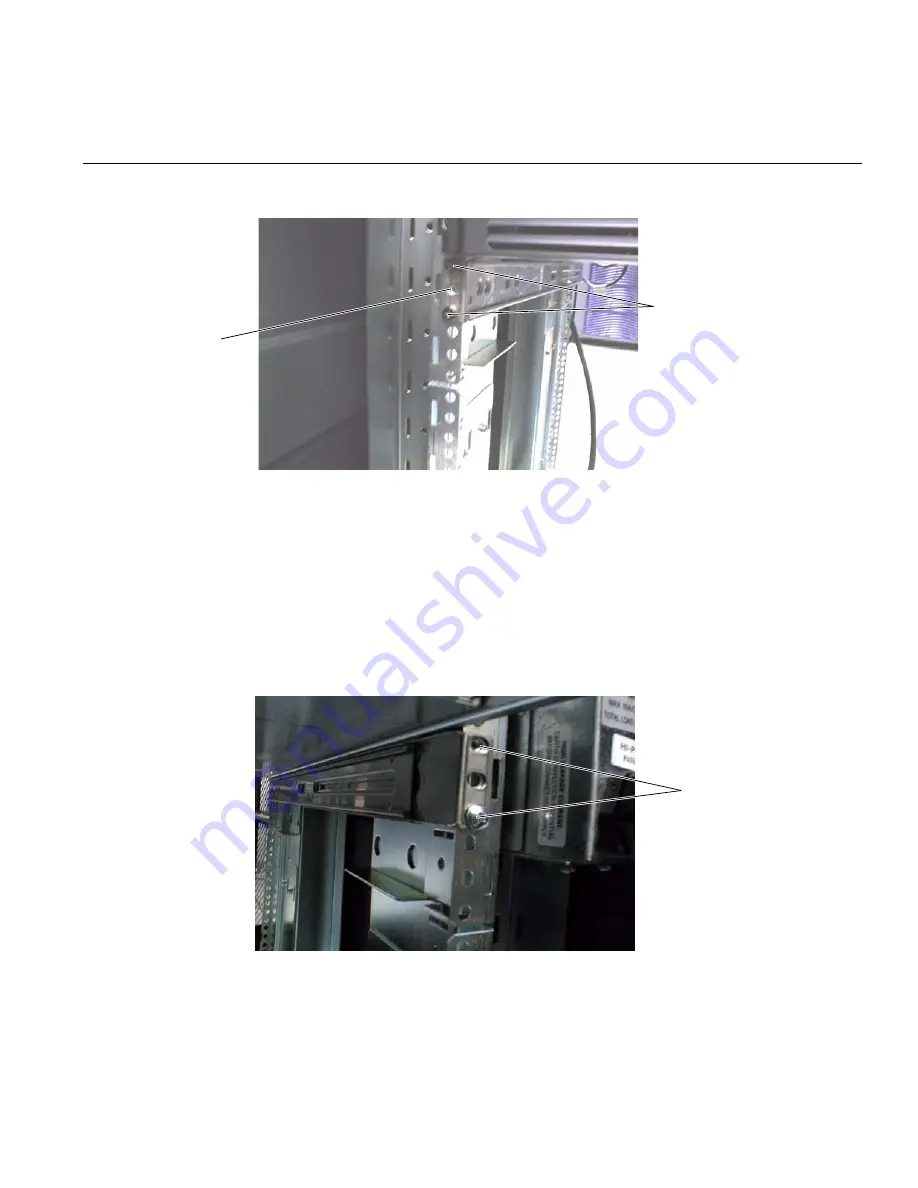
Figure 2-4
Attaching the Rail to the Front of the Rack (View from Front of Rack)
5.
Attach the rail to the rear of the chassis (refer to Figure 2-5):
a.
Slide two clips (rail nuts) over the appropriate holes in the rack frame.
b.
Position the rail over the rack chassis (in front of the rail clips/nuts) and align to the
proper position.
c.
Install two screws through the holes in the rail. The screws fasten into the two rail
clips/nuts that you previously installed.
6.
Repeat Steps 1 through 5 to install the other rail in the rack.
Figure 2-5
Attaching the Rail to the Rear of the Rack (View from Rear of Rack)
Attach these two screws.
The sheet metal
from the rack
frame fits
between the two
brackets on the
front of the rail.
Slide two rail
clips/nuts over
the rack frame.
Then, position
the rail and
attach it with two
screws.
The screws
fasten into the
rail clips/nuts.
Summary of Contents for Altix XE320
Page 1: ...SGI Altix XE320 System User s Guide 007 5466 001 ...
Page 3: ...007 5466 001 iii Record of Revision Version Description 001 February 2008 Initial publication ...
Page 4: ......
Page 16: ......
Page 20: ......
Page 28: ......
Page 45: ...Install the System into a Rack 007 5466 001 17 Figure 2 6 Install the Server in a Rack ...
Page 52: ......
Page 56: ......
Page 84: ...56 007 5466 001 4 Advanced Node Board Setup Figure 4 9 Replace DIMMs ...
Page 110: ......
Page 119: ...Power Supply 007 5466 001 91 Figure 5 6 Power Supply Replacement Power supply Lever 2 1 2 1 ...
Page 120: ......
Page 160: ......
Page 182: ...154 007 5466 001 B IPMI 2 0 Management Utility CD ROM Image Figure B 3 CD ROM Image ...
Page 184: ...156 007 5466 001 B IPMI 2 0 Management Utility Drive Redirection Figure B 4 Drive Redirection ...
Page 198: ...170 007 5466 001 B IPMI 2 0 Management Utility Figure B 10 User Console Settings ...
Page 216: ...188 007 5466 001 B IPMI 2 0 Management Utility Figure B 19 Device Information ...
Page 230: ......
Page 238: ......
Page 242: ......
Page 248: ......


