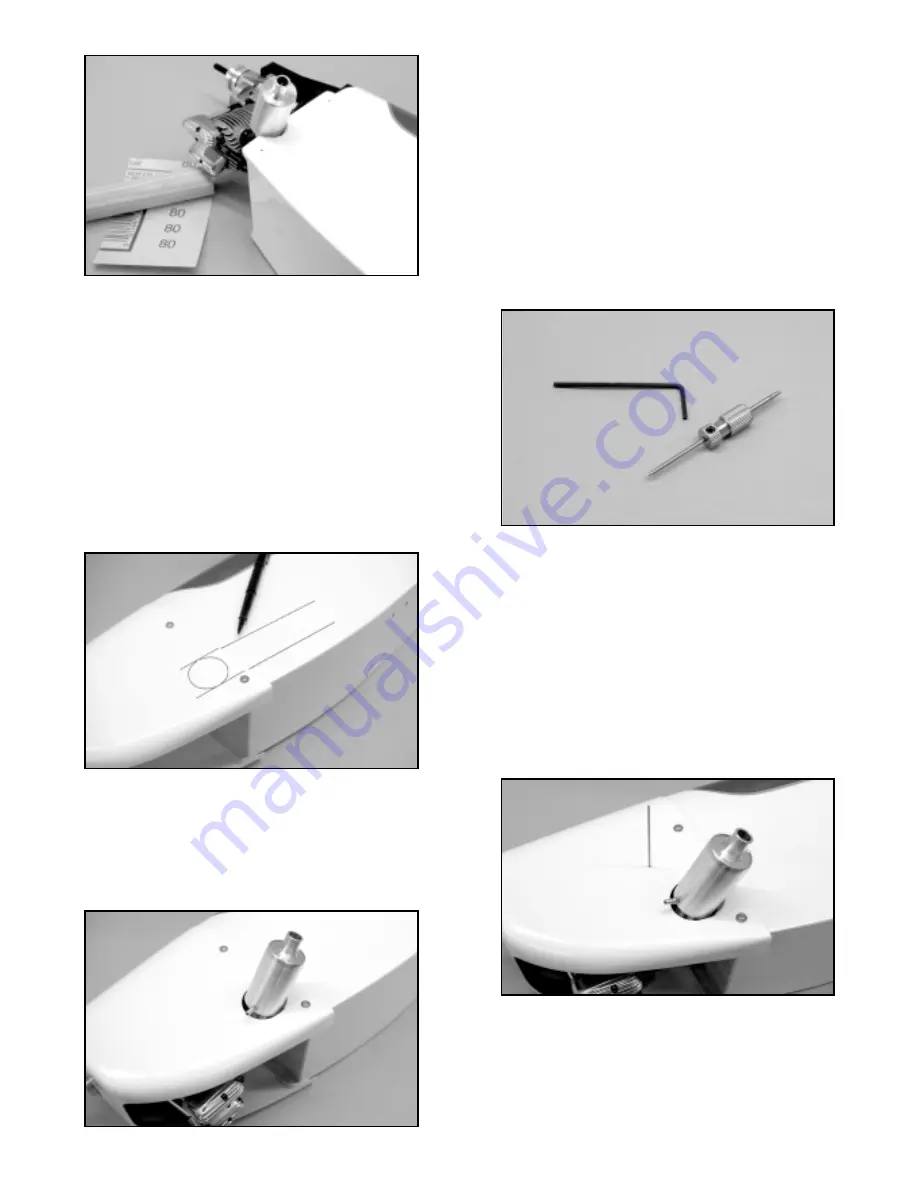
The open wood in the channel needs to be filled and fuel proofed.
Use a little 5-minute epoxy to do this, smoothing it with your finger.
When the glue sets, sand it smooth with 220 sandpaper.
❑
9) The fiberglass cowl must now be relieved to match the
muffler exit channel in the fuselage. To do this accurately, draw
two parallel "witness" lines onto the fuselage side with a non-
permanent marker pen. The top line is the top of the channel and
the bottom line is the bottom of the channel. Mount the cowl to the
fuselage and use a straight edge to transfer the witness lines onto
the cowl. With the cowl still in place, use a flashlight illuminate the
inside of the cowl at the sanded groove area. This will show the
outline of the channel on the cowl. Use the marker pen to lightly
outline the edge of the channel. Use a circle guide to complete the
circle onto the cowl and remove it from the fuselage.
Use a Dremel
®
Tool with a drum-sanding bit to clear out the cowl,
within the marks just made. Continue to trial fit the cowl in place
to the fuselage, refining the cowl opening until it fits in place with a
uniform 1/8" of clearance all the way around the muffler. With the
openings made, use a wrench to tighten the manifold nut, securing
the manifold in final position to the engine head. Likewise, tighten
the muffler nut, locking it in place to the manifold.
❑
10) A music wire needle valve extension is now made to allow
adjustment of the high-end needle from outside the cowl. Most
engines come with needle valves that have set screws, used for
this purpose. The Saito has such a setscrew, with a center hole
diameter for the extension that's just about 1/16". We put a short
length of 1/16" dia. music wire into the needle valve hole and
tightened the setscrew. The needle valve is then threaded back in
place onto the carburetor, all the way.
Place a straight edge
against the fuselage side at the nose, intersecting the piece of
wire. Mark this point on the wire with a marker pen. Remove the
needle valve and wire from the engine and remove the wire from
the needle valve. Cut the wire to length at the mark just made.
Sharpen one end of this wire to a point, using a Dremel
®
Tool and
a carbide cut-off wheel. Insert the unsharpened end of the wire
back into the needle valve and tighten the setscrew.
Thread the needle valve back onto the carburetor, all the way.
Mount the cowl to the fuselage. Turn the fuselage upside down on
your work surface. Use a pair of needle nose pliers or a hemostat
to begin unthreading the needle valve. As the needle turns, the
sharpened point on the wire will contact the inside of the cowl.
Hold a scrap piece of plywood against the outside of the cowl, over
the pointed wire, and continue unthreading the needle valve.
Within a few turns, the wire point will begin to show on the outside
of the cowl, as a dimple. When you can see this mark, stop turning
the needle and remove the cowl. Use a 3/32" dia. bit to drill a hole
through the cowl at the dimple mark. Remove and discard the
pointed piece of music wire from the needle valve. Make sure the
needle valve set screw is aligned to allow access to it when the
cowl is in place.
Cut a new length of 1/16" music wire, about 4" long. Put the cowl
back on the fuselage and insert one end of the wire through the
cowl and into the hole in the needle valve. Tighten the setscrew
enough to hold the wire. Use a marker pen to mark the wire,
outside of the cowl, about 1/8" away from its surface. Remove the
wire from the needle valve and cowl. Use pliers to make a 90
O
bend at the mark just made. Trim the excess wire from the bent
14


