


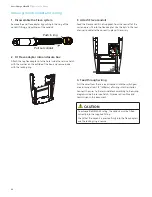


Unpacking and installation preparation
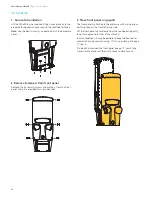
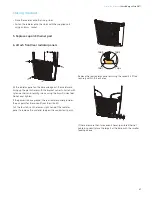
3. Remove front and rear radiator panels
If access to the rear radiator panel is difficult, the internal
radiator may be removed to access the rear-base fixing points.
If so, remove the front radiator panel only and go to item 5.
Unscrew the 8x security screws and remove them and the
washers from both radiator panels using the 5mm pin hex tool.
Pull the radiator panels away from the metalwork frame to
remove.
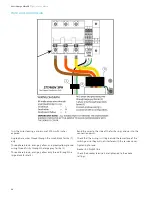
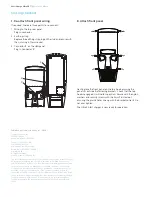
4. Remove shipping bolts
Unscrew the 4x bolts from the shipping base to disengage.
16mm socket required.
Note:
Keep the plastic inserts from the bolts for later use.
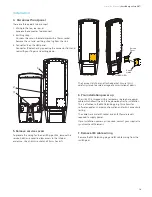
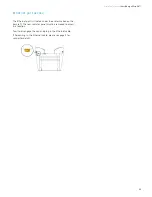
Removing the radiator from the base of the Ultra 50 gives more
space to bring power into the unit, however, removing the
radiator is not always required. Assess the situation on site.
5. Remove radiator (optional)
Unscrew the 4x nuts using an 8mm nut driver to remove the
radiator. Pull the radiator off the fasteners, and sit the radiator
on the base plate.
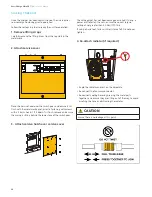
Reach behind and unclip the four-way connector.
The four-way connector is the left-hand plug attached to the
underside of the unit. Squeeze the front clip and pull down to
release.
VersiCharge Ultra 50™ |
Installation Manual
16
Summary of Contents for VersiCharge Ultra 50
Page 2: ...2 ...


