background image

69

PBD-51041066

SITRANS LG270 - Operating Instructions

44295-EN-140321

Fault description

Error pattern

Cause

Rectification

4. Measured value re-

mains momentarily 

unchanged during fill

-

ing and then jumps to 

the correct level

Level

time

0


– Turbulence on the product 

surface, quick filling


– Check parameters, change if 

necessary, e.g. in dosing ves-

sel, reactor

5. Measured value 

jumps sporadically to 

100 % during filling

Level

time

0


– Changing condensation or 

contamination on the probe


– Carry out a false signal sup-

pression

6. Measured value 

jumps to ≥ 100 % or 

0 m distance

Leve

l

time

0


– Level echo is no longer 

detected in the close range 

due to false signals in the close 

range. The sensor goes into 

overfill protection mode. The 

max. level (0 m distance) as 

well as the status message 

"Overfill protection" are output

-

ted.


– Eliminate false signals in the 

close range


– Check installation conditions

 –

If possible, switch off the func

-

tion "Overfill protection"

Measurement error during emptying

Fault description

Error pattern

Cause

Rectification

7. Measured value re-

mains unchanged in 

the close range during 

emptying

Level

time

0


– False echo larger than the level 

echo


– Level echo too small


– Eliminate false signals in the 

close range


– Remove contamination on the 

probe. After having removed 

the source of the false signals, 

the false signal suppression 

must be deleted.


– Carry out a new false signal 

suppression

8. Measured value re-

mains reproducible 

in one position during 

emptying

Level

time

0


– Stored false signals in this 

position are larger than the 

level echo


– Delete false signal memory


– Carry out a new false signal 

suppression

Depending on the reason for the fault and the measures taken, the 

steps described in chapter "

Setup

" must be carried out again or must 

be checked for plausibility and completeness.

8.5

  Exchanging the electronics module

If the electronics module is defective, it can be replaced by the user.
In Ex applications, only instruments and electronics modules with ap-

propriate Ex approval may be used.
If there is no electronics module available on site, the electronics 

module can be ordered through the agency serving you. The electron-

ics modules are adapted to the respective sensor and differ in signal 

output or voltage supply.
The new electronics module must be loaded with the default settings 

of the sensor. These are the options:

Reaction after fault recti-

fication

Summary of Contents for SITRANS LG270

Page 1: ...Operating Instructions 03 2014 Guided Wave Radar SITRANS LG270 Modbus and Levelmaster protocol Rod and cable probe ...

Page 2: ...2 PBD 51041066 SITRANS LG270 Operating Instructions 44295 EN 140321 ...

Page 3: ...upply and bus system 5 1 Preparing the connection 23 5 2 Connecting 24 5 3 Wiring plan 26 5 4 Double chamber housing with DIS ADAPT 27 5 5 Supplementary electronics 28 5 6 Switch on phase 28 6 Set up the sensor with the display and adjustment module 6 1 Adjustment volume 29 6 2 Insert display and adjustment module 29 6 3 Adjustment system 30 6 4 Parameter adjustment Quick setup 31 6 5 Parameter ad...

Page 4: ...echnical data 74 10 2 Basics Modbus 84 10 3 Modbus register 86 10 4 Modbus RTU commands 88 10 5 Levelmaster commands 91 10 6 Configuration of typical Modbus hosts 95 10 7 Dimensions 100 Safety instructions for Ex areas Please note the Ex specific safety information for installation and op eration in Ex areas These safety instructions are part of the operating instructions manual and come with the ...

Page 5: ...rsonnel and put into practice by them 1 3 Symbols used Information tip note This symbol indicates helpful additional information Caution If this warning is ignored faults or malfunctions can result Warning If this warning is ignored injury to persons and or serious damage to the instrument can result Danger If this warning is ignored serious injury to persons and or destruction of the instrument c...

Page 6: ...complying with all prevailing regulations and guidelines The instrument must only be operated in a technically flawless and reliable condition The operator is responsible for the trouble free operation of the instrument During the entire duration of use the user is obliged to determine the compliance of the necessary occupational safety measures with the current valid rules and regulations and als...

Page 7: ...ted as the standard in field instrumentation The device fulfills the requirements of the following NAMUR recom mendations NE 21 Electromagnetic compatibility of equipment NE 43 Signal level for malfunction information from measuring transducers NE 53 Compatibility of field devices and display adjustment components NE 107 Self monitoring and diagnosis of field devices For further information see ww...

Page 8: ...tput electronics 6 Voltage supply 7 Protection rating 8 Order number 9 Identification code 10 Serial number of the instrument 11 Symbol of the device protection class 12 Reminder to observe the instrument documentation 13 ID numbers instrument documentation The instrument contains two different electronics in its housing cham bers The Modbus electronics for power supply and communication with the ...

Page 9: ...y and adjustment mod ule optional Supplementary instructions manual Plug connector for con tinuously measuring sensors optional Ex specific Safety instructions with Ex versions if necessary further certificates 3 2 Principle of operation The SITRANS LG270 is a level sensor with cable or rod probe for continuous level or interface measurement particularly suitable for applications in high temperatu...

Page 10: ...an no longer be detected probe end tracking is automatically activated The measurement is contin ued with the last calculated dielectric constant The accuracy thus depends on the stability of the dielectric constant If you measure a medium with a dielectric constant below 1 5 probe end tracking is always active In this case you have to enter the dielectric constant of the medium A stable dielectri...

Page 11: ...n find a list of dielectric constants on our home page www siemens com sitranslg The composition of the upper medium must be stable no varying products or mixtures The upper medium must be homogeneous no stratifications within the medium Min thickness of the upper medium 50 mm 1 97 in Clear separation from the lower medium emulsion phase or detri tus layer max 50 mm 1 97 in If possible no foam on ...

Page 12: ...closed and stored according to the orientation and storage markings on the outside Unless otherwise indicated the packages must be stored only under the following conditions Not in the open Dry and dust free Not exposed to corrosive media Protected against solar radiation Avoiding mechanical shock and vibration Storage and transport temperature see chapter Supplement Technical data Ambient conditi...

Page 13: ...nt part for TDR sen sors of SITRANS series LG You can find further information in the operating instructions manual Electronics module Modbus SITRANS series LG If you are using an instrument with rod version you can extend the rod probe individually with curved segments and rod extensions of different lengths All extensions used must not exceed a total length of 6 m 19 7 ft The extensions are avai...

Page 14: ...allations on cooled or heated vessels In the case of instrument housings with self sealing NPT threads it is not possible to have the cable entries screwed in at the factory The openings for the cable glands are therefore covered with red protec tive caps as transport protection Prior to setup you have to replace these protective caps with ap proved cable glands or close the openings with suitable...

Page 15: ...ment all the way down to the tip of the probe may not be pos sible The exact value of the min distance lower dead band is stated in chapter Technical data Fig 5 Vessel with conical bottom Plastic vessel Glass vessel The guided microwave principle requires a metallic surface on the process fitting Therefore in plastic vessels etc use an instru ment version with flange from DN 50 or place a metal sh...

Page 16: ...er Higher sockets or sockets with a bigger diameter can generally be used They can however increase the upper blocking distance dead band Check if this is relevant for your measurement In such cases always carry out a false signal suppression after instal lation You can find further information under Setup procedure h d d h DN40 DN150 DN150 DN200 150 100 _ _ Fig 7 Mounting socket When welding the ...

Page 17: ...odule from the sensor By doing this you avoid damage to the electronics through inductive coupling Do not mount the instruments in or above the filling stream Make sure that you detect the product surface not the inflowing product Fig 9 Mounting of the sensor with inflowing medium The reference plane for the measuring range of the sensors is the sealing surface of the thread or flange Welding work...

Page 18: ...teral inlets in bypass tubes also do not influence the measurement Measuring probes can be mounted in bypass tubes up to DN 200 For bypass tubes select the probe length such that the blocking distance dead band of the probe is above or below the lateral filling openings You can thus measure the complete range of the medium in the bypass tube When designing the bypass tube keep the blocking distanc...

Page 19: ...d not be below the lower tube connection to the vessel A false signal suppression with installed sensor is generally rec ommended to achieve maximum possible accuracy Instruments for a temperature range up to 280 C or up to 450 C have a distance piece between process fitting and electronics hous ing Ths distance piece is used for thermal decoupling of the electron ics against high process temperat...

Page 20: ...rely fixed There is an inside thread M8 in the gravity weight e g for an eye bolt optional Make sure that the probe cable is not completely taut Avoid tensile loads on the cable Avoid undefined vessel connections i e the connection must be either grounded reliably or isolated reliably Any undefined change of this requirement can lead to measurement errors If there is a danger of the rod probe touc...

Page 21: ...n You can find further information in the supplementary instructions of the rod extension In case of difficult installation conditions for example in a socket the probe can be adapted respectively with a rod extension Let the probe length determine automatically by the instrument to compensate the resulting running time changes You can find further information in the supplementary instructions of ...

Page 22: ...ce distance The probe can carry out an auto matic running time correction with it Probes with reference distance can only be used when mounting in standpipes or bypass tubes The min length of the probe is 1000 mm 39 4 in The reference distance must not be overfilled The upper dead band is hence 450 mm 17 7 in 2 3 4 5 1 2 5 4 3 1 6 6 Fig 13 Measuring ranges SITRANS LG270 with steam compensation 1 R...

Page 23: ...bus is termi nated with suitable terminating resistors With plastic housing the NPT cable gland or the Conduit steel tube must be screwed without grease into the threaded insert Max torque for all housings see chapter Technical data In systems with potential equalisation connect the cable screen directly to ground potential at the power supply unit in the connection box and at the sensor The scree...

Page 24: ...lift the terminal block with a small screwdriver and pull it out When reinserting the terminal block you should hear it snap in Proceed as follows 1 Unscrew the housing cover 2 If a display and adjustment module is installed remove it by turn ing it slightly to the left 3 Loosen compression nut of the cable entry gland 4 Remove approx 10 cm 4 in of the cable mantle strip approx 1 cm 0 4 in of insu...

Page 25: ...erminal opening is then free When the screwdriver is released the terminal closes again You can find further information on the max wire cross section under Technical data Electromechanical data 7 Check the hold of the wires in the terminals by lightly pulling on them 8 Connect the screen to the internal ground terminal connect the outer ground terminal to potential equalisation 9 Tighten the comp...

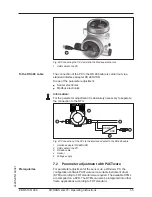
Page 26: ...t double chamber housing 1 Internal connection to the connection compartment 2 For display and adjustment module or interface adapter Information The connection of an external display and adjustment unit is not pos sible with this double chamber housing power supply MODBUS D0 D1 IS GND USB 1 2 4 3 1 3 4 5 2 off on Fig 18 Terminal compartment 1 USB interface 2 Slide switch for integrated terminatio...

Page 27: ...APT 3 1 2 Fig 19 View to the electronics compartment with DISADAPT for connection of the external display and adjustment unit 1 DIS ADAPT 2 Internal plug connection 3 Plug connector M12 x 1 3 4 1 2 Fig 20 View to the plug connector M12 x 1 1 Pin 1 2 Pin 2 3 Pin 3 4 Pin 4 Contact pin Colour connection ca ble in the sensor Terminal electronics module Pin 1 Brown 5 Pin 2 White 6 Pin 3 Blue 7 Pin 4 Bl...

Page 28: ...ART 3 Ground terminal for connection of the cable screen 5 6 Switch on phase After SITRANS LG270 is connected to the bus system the instrument carries out a self test for approx 30 seconds The following steps are carried out Internal check of the electronics Indication of the instrument type hardware and software version measurement loop name on the display or PC Indication of the status message F...

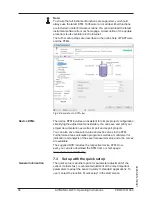
Page 29: ...and removed again at any time You can choose any one of four differ ent positions each displaced by 90 It is not necessary to interrupt the power supply Proceed as follows 1 Unscrew the housing cover 2 Place the display and adjustment module in the requested posi tion onto the electronics and turn to the right until it snaps in 3 Screw housing cover with inspection window tightly back on Removal i...

Page 30: ...display and adjust ment module The LC display indicates the individual menu items The functions of the individual keys are shown in the above illustration Approx 10 minutes after the last pressing of a key an automatic reset to measured value indication is triggered Any values not confirmed with OK will not be saved After switching on the SITRANS LG270 carries out a short self test where the devic...

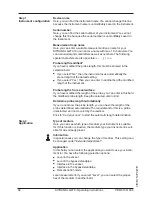
Page 31: ... and adjustment module You can find Extended adjustment in the next sub chapter Measurement loop name In the first menu item you can assign a suitable measurement loop name You can enter a name with max 19 characters Type of medium In the next menu item you can see which type of medium the instru ment is suitable for If your instrument is only suitable for a certain medium this menu item is not vi...

Page 32: ... can enter the max adjustment for the level Enter the appropriate distance value in m corresponding to the percentage value for the full vessel The distance refers to the sensor reference plane seal surface of the process fitting Keep in mind that the max level must lie below the dead band Min adjustment In this menu item you can enter the min adjustment for the level Enter the suitable distance v...

Page 33: ...ey are no longer taken into account for the level and interface measurement We generally recommend carrying out a false signal suppression to achieve the best possible accuracy This should be done with the lowest possible level so that all potential interfering reflections can be detected Enter the actual distance from the sensor to the product surface All interfering signals in this section are d...

Page 34: ...e available The submenu points described below Here you can assign a suitable measurement loop name Push the OK key to start the processing With the key you change the sign and with the key you jump to the next position You can enter names with max 19 characters The character set comprises Capital letters from A Z Numbers from 0 9 Special characters _ blanks In this menu item you select the distan...

Page 35: ...t and demonstration purposes In this mode the sensor ignores the parameters of the application and reacts immedi ately to each change In this menu item you can define the type of medium product This menu item is only available if you have selected level measure ment under the menu item Application You can choose between the following medium types Dielectric con stant Type of medium Examples 10 Wat...

Page 36: ...known distance to the interface In this menu item you can enter the max adjustment for the level With interface measurement this is the maximum total level Adjust the requested percentage value with and store with OK Enter the appropriate distance value in m corresponding to the percentage value for the full vessel The distance refers to the sensor reference plane seal surface of the process fitti...

Page 37: ...level measurement also for the interface measurement If you select Yes the current setting will be displayed If you have selected No you can enter the adjustment for the inter face separately Enter the requested percentage value For the full vessel enter the distance value in m matching the per centage value This menu item is only available if you have selected interface meas urement under the men...

Page 38: ...me The linearization applies to the measured value indication and the current output By activating the appropriate curve the volume per centage of the vessel is displayed correctly If the volume should not be displayed in percent but e g in l or kg a scaling can be also set in the menu item Display Warning If a linearization curve is selected the measuring signal is no longer necessarily linear to...

Page 39: ...height h Positive socket correction value h Negative socket correction value Since scaling is very extensive scaling of the level value was divided into two menu items In menu item Level 1 you define the scaling variable and the scaling unit for the level value on the display e g volume in l Setup Scaling Level Setup Scaling Level 1 ...

Page 40: ...e scaling unit for the interface value on the display e g volume in l You can accept the scaling of the level measurement also for the interface measurement If you select Yes the current setting is displayed If you have selected No you can enter the scaling for the interface separately In menu item Interface 2 you define the scaling format on the display and the scaling of the interface measured v...

Page 41: ... Max you determine the reac tion of the current output during operation The default setting is min current 3 8 mA and max current 20 5 mA If a supplementary electronics with an additional current output is implemented in the instrument then you can adjust the additional current output separately In menu item Current output 2 you specify which measured value the additional current output refers to ...

Page 42: ...cannot be changed in the display and adjustment module To change these values you have to use the adjustment software PACTware The following circumstances cause interfering reflections and can influence the measurement High sockets Vessel installations such as struts Note A false signal suppression detects marks and saves these false signals so that they are no longer taken into account for the le...

Page 43: ...gnal suppression This is useful if the saved false signal suppression no longer matches the metrological conditions in the vessel In the menu item Lock unlock adjustment you can protect the sensor parameters against unauthorized modification The PIN is activated deactivated permanently The following adjustment functions are possible without entering the PIN Select menu items and show data Read dat...

Page 44: ...d value 1 is Filling height Level In this menu item you define the indication of the measured value on the display You can display two different measured values In this menu item you define measured value 2 The default setting for the displayed value 2 is the electronics tem perature The optionally integrated background lighting can be adjusted via the adjustment menu The function depends on the h...

Page 45: ...ced by the process conditions In this menu item the measurement certainty of the level measurement is displayed as percentage value The higher the value the more reli able the measurement Values 90 indicate reliable measurement If you have selected interface measurement under the menu item Setup Application the peak values of the interface measurement are displayed in addition to the peak values o...

Page 46: ...the meas distance Y Zoom 1 2 5 and 10x signal magnification in V Unzoom Reset the presentation to the nominal measuring range with single magnification In this menu item you can simulate measured values via the current output This allows the signal path to be tested e g through down stream indicating instruments or the input card of the control system Select the requested simulation size and adjus...

Page 47: ...les storing echo curves of the measurement Under the sub menu item Echo curve memory you can store the current echo curve Parameter settings for recording the echo curve and the settings of the echo curve itself can be carried out in the adjustment software PACTware With the adjustment software PACTware and the PC the high reso lution echo curve can be displayed and used later on to assess the qua...

Page 48: ...he measured value memory is deleted The following table shows the default values of the instrument De pending on the instrument version or application all menu items may not be available or some may be differently assigned Setup Menu item Default value Modified value Block adjustment Released Measurement loop name Sensor Units Distance unit mm Temperature unit C Probe length Length of the probe Ex...

Page 49: ...rrespond to 0 Accept scaling of the level measurement Yes Scaling variable Interface Volume Scaling unit Interface Litres Scaling format Interface Without decimal positions Scaling interface 100 correspond to 100 Scaling interface 0 correspond to 0 Current output output variable First HART variable PV Lin percent Level Current output Output characteristics 0 100 correspond to 4 20 mA Current outpu...

Page 50: ...Device memory Measured value memory Re cording in time interval 3 min Device memory Measured value memory Re cording with measured value difference 15 Device memory Measured value memory Start with measured value Not active Device memory Measured value memory Stop with measured value Not active Device memory Measured value memory Stop recording when memory is full Not active Additional adjustments...

Page 51: ...sensor had In this menu item you can select the type and size of your probe from a list of all possible probes This is necessary to adapt the electronics optimally to the probe In this menu item you gain access to the protected area where you can enter special parameters In exceptional cases individual parameters can be modified in order to adapt the sensor to special requirements Change the setti...

Page 52: ...enu item the features of the sensor such as approval pro cess fitting seal measuring range electronics housing and others are displayed 6 6 Saving the parameter adjustment data We recommended noting the adjusted data e g in this operating instructions manual and archiving them afterwards They are thus available for multiple use or service purposes If the instrument is equipped with a display and a...

Page 53: ... the items Sensor specific units temperature unit and linearization The values of the user programmable linearization curve The function can also be used to transfer settings from one instru ment to another instrument of the same type If it is necessary to exchange a sensor the display and adjustment module is inserted into the replacement instrument and the data are likewise written into the sens...

Page 54: ...the interface adapter Scope of the parameter adjustment Sensor electronics 3 1 2 Fig 25 Connection of the PC directly to the sensor via the interface adapter 1 USB cable to the PC 2 Interface adapter 3 Sensor The connection of the PC to the Modbus electronics is carried out via a USB cable Scope of the parameter adjustment Sensor electronics Modbus electronics To the sensor electronics To the Modb...

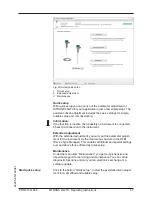
Page 55: ... to separate the connection to the RTU RS485 USB 1 2 3 4 5 Fig 27 Connection of the PC via the interface adapter to the RS 485 cable 1 Interface adapter RS 485 USB 2 USB cable to the PC 3 RS 485 cable 4 Sensor 5 Voltage supply 7 2 Parameter adjustment with PACTware For parameter adjustment of the sensor via a Windows PC the configuration software PACTware and a suitable instrument driver DTM accor...

Page 56: ...e adjustment considerably You can save and print your project documentation as well as import and export projects You can also save measured value and echo curves in the DTM Furthermore a tank calculation program as well as a multiviewer for indication and analysis of the saved measured value and echo curves are available The supplied DVD includes the respective device DTM How ever you can also do...

Page 57: ...nt is connected Check the connection to the instrument Extended adjustment With the extended adjustment you carry out the parameter adjust ment for the instrument via the clear menu structure in the DTM Device Type Manager This enables additional and special settings over and above those offered by quick setup Maintenance Under the menu item Maintenance you get comprehensive and important support ...

Page 58: ...om seal surface If you have modified the length of the probe you can enter in this field the modified probe length Keep the selected unit in mind Determine probe length automatically If you do not know the probe length you can have the length of the probe determined automatically The requirement for this is a probe unrestricted and not covered by the medium Click to Carry out now to start the auto...

Page 59: ...urement refers to the phase limit between two liquids The total level is also available as a measured value Superimposed gas phase present Check if there is a superimposed gas phase in the vessel This is always the case if the total level never touches the process fitting Properties Here you can enter the dielectric constant of the upper medium As an alternative you can enter the distance to the i...

Page 60: ...f you have the possibility you can enter here the sounded distance to the medium False signal suppression With this function you can carry out the automatic false signal sup pression We recommend carrying out false signal suppression in any case When the setup of the instrument is finished additional settings can be made These are various backups and the locking of the instru ment against unauthor...

Page 61: ...gnal conditions in the device for later instrument tests and diagnostics Lock adjustment with PIN after setting The instrument is locked with the current PIN A parameter adjust ment is possible only after the PIN is entered again 7 4 Saving the parameter adjustment data We recommend documenting or saving the parameter adjustment data via PACTware That way the data are available for multiple use or...

Page 62: ...ctive measured values The requested values and recording conditions are set via a PC with PACTware DTM or the control system with EDD Data are thus read out and also reset Up to 500 events are automatically stored with a time stamp in the sensor non deletable Each entry contains date time event type event description and value Event types are for example Modification of a parameter Switch on and s...

Page 63: ...ntenance requirement and explained by pictographs 4 1 2 3 Fig 30 Pictographs of the status messages 1 Failure red 2 Out of specification yellow 3 Function check orange 4 Maintenance blue Failure Due to a malfunction in the instrument a failure message is outputted This status message is always active It cannot be deactivated by the user Function check The instrument is in operation the measured va...

Page 64: ...tment according to the limit values difference between min and max 10 mm Bit 1 F025 Error in the lineariza tion table Index markers are not continuously rising for example illogical value pairs Check linearization table Delete table Create new Bit 2 F036 No op erable software Failed or interrupted software update Repeat software update Check electronics version Exchanging the elec tronics Send ins...

Page 65: ... the instrument not sufficient Check or correct installation and or parameter adjustment Use an instrument with bigger measuring range Bit 11 F265 Meas urement function disturbed Sensor no longer carries out a measure ment Operating voltage too low Check operating voltage Carry out a reset Disconnect operating voltage briefly Bit 12 F267 No execut able sensor software Sensor cannot start Exchangin...

Page 66: ...and provides information on causes as well as corrective measures Code Text mes sage Cause Rectification M500 Error with the reset delivery status With the reset to delivery status the data could not be restored Repeat reset Load XML file with sensor data into the sensor M501 Error in the non active linearization table Hardware error EEPROM Exchanging the electronics Send instrument for repair M50...

Page 67: ...measuring range according to the wiring plan The following table describes possible errors in the current signal and helps to remove them Error Cause Rectification 4 20 mA signal not stable Fluctuations of the measured variable Set damping according to the instrument via the display and adjustment module or PACTware DTM 4 20 mA signal missing Electrical con nection faulty Check connection accordin...

Page 68: ... max adjustment not correct Adapt min max adjustment Wrong linearization curve Adapt linearization curve Running time error small measurement error close to 100 serious error close to 0 Repeat setup 2 Measured value jumps towards 100 Level time 0 Due to the process the ampli tude of the product echo sinks A false signal suppression was not carried out Carry out a false signal sup pression Amplitud...

Page 69: ...ng emptying Level time 0 False echo larger than the level echo Level echo too small Eliminate false signals in the close range Remove contamination on the probe After having removed the source of the false signals the false signal suppression must be deleted Carry out a new false signal suppression 8 Measured value re mains reproducible in one position during emptying Level time 0 Stored false sig...

Page 70: ...of the sensor you can transfer these to the replacement electronics module A new setup is no more necessary 8 6 Exchange or shorten cable rod The cable or rod meas part of the probe can be shortened if neces sary To loosen the rod or cable you need a fork spanner with spanner width 13 1 Loosen the rod or cable by applying a fork spanner to the flat surfaces SW 13 provide counterforce with another ...

Page 71: ...d length with mounted measuring rod 2 Cable Loosen the pins on the gravity weight hexagon 3 3 Cable remove the pins 4 Cable Pull the cable out of the gravity weight 5 Shorten the cable rod with a cut off wheel or metal saw at the marking Take note of the specifications in the following illustration when shortening the cable 6 Cable with gravity weight Shift the cable according to the drawing into ...

Page 72: ...ware Sensor Voltage supply HART modem PC with PACTware Current sensor software as file You can find the actual sensor software as well as detailed infor mation of the procedure in the download area on our homepage www siemens com sitranslg You can find information about the installation in the download file Caution Instruments with approvals can be bound to certain software ver sions Therefore mak...

Page 73: ...ng companies We use recyclable materials and have designed the parts to be easily separable Correct disposal avoids negative effects on humans and the environ ment and ensures recycling of useful raw materials Materials see chapter Technical data If you have no way to dispose of the old instrument properly please contact us concerning return and disposal WEEE directive 2002 96 EG This instrument i...

Page 74: ... On site Materials non wetted parts Ʋ Plastic housing plastic PBT Polyester Ʋ Aluminium die casting housing Aluminium die casting AlSi10Mg powder coated basis Polyester Ʋ Stainless steel housing precision casting 316L Ʋ Stainless steel housing electropol ished 316L Ʋ Second line of defence Borosilicate glass GPC 540 Ʋ Seal between housing and housing cover NBR stainless steel housing precision cas...

Page 75: ...L from seal surface Ʋ Rod ø 16 mm 0 63 in up to 6 m 19 69 ft Ʋ Trimming accuracy rod 1 mm 0 05 of the rod length Ʋ Cable ø 2 mm 0 079 in up to 75 m 246 1 ft Ʋ Cable ø 4 mm 0 157 in up to 75 m 246 1 ft Ʋ Trimming accuracy cable 2 mm 0 05 of the cable length Lateral load Ʋ Rod ø 16 mm 0 63 in 30 Nm 22 lbf ft Max tensile load Ʋ Cable ø 2 mm 0 079 in 1 5 KN 337 lbf Ʋ Cable ø 4 mm 0 157 in 2 5 KN 562 l...

Page 76: ...robes εr 1 6 2 4 3 5 1 2 4 5 3 1 Fig 42 Measuring ranges SITRANS LG270 1 Reference plane 2 Probe length L 3 Measuring range default setting refers to the measuring range in water 4 Upper dead band see diagrams under Accuracy grey section 5 Lower dead band see diagrams under Accuracy grey section Output variable Output Ʋ Physical layer Digital output signal according to standard EIA 485 ...

Page 77: ...l dielectric constant 2 0 1 Ʋ Installation Probe end does not touch the vessel bottom Sensor parameter adjustment No gating out of false signals carried out Typical deviation Interface measure ment 5 mm 0 197 in Typical deviation Total level interface measurement See following diagrams Typical deviation Level measurement2 3 See following diagrams L 0 2 mm 0 079 2 mm 0 079 15 mm 0 591 5 mm 0 197 0 ...

Page 78: ... m 1 968 1 1 0 05 m 1 968 Fig 44 Deviation SITRANS LG270 in rod version in oil 1 Dead band no measurement possible in this area L Probe length 0 2 mm 0 079 2 mm 0 079 15 mm 0 591 10 mm 0 394 0 08 m 3 15 0 3 m 11 811 0 1m 3 94 L 1 Fig 45 Deviation SITRANS LG270 in cable version in water 1 Dead band no measurement possible in this area L Probe length ...

Page 79: ...e length L 0 15 mm 0 591 2 mm 0 079 2 mm 0 079 25 mm 0 984 0 2 m 7 874 0 15 m 5 906 0 15 m 5 906 0 1 m 3 937 1 1 Fig 47 Deviation SITRANS LG270 in cable version 4 mm 0 157 in in oil 1 Dead band no measurement possible in this area L Probe length Repeatability 1 mm Variables influencing measurement accuracy Temperature drift Digital output 3 mm 10 K relating to the max measuring range or max 10 mm ...

Page 80: ... 0 76 1 6 3 1 400 C 752 F 0 03 0 25 0 53 1 1 2 2 Steam satu rated steam 100 C 212 F 180 C 356 F 2 1 264 C 507 F 1 44 9 2 366 C 691 F 1 01 5 7 13 2 76 0 Characteristics and performance data Measuring cycle time 500 ms Step response time4 3 s Max filling emptying speed 1 m min Ambient conditions Ambient storage and transport tempera ture 40 80 C 40 176 F Process conditions For the process conditions...

Page 81: ...ange plastic housing and stainless steel housing electropolished Process temperature 196 450 C 321 842 F The measurement error from the process conditions is in the specified pressure and temperature range of below 1 1 2 0 C 32 F 40 C 104 F 80 C 176 F 450 C 842 F 220 C 428 F 3 4 196 C 384 8 F 20 C 68 F 110 C 230 F 35 C 95 F Fig 49 Ambient temperature process temperature version 196 450 C 321 842 F...

Page 82: ...1 100 C 148 F 196 C 321 F 100 bar 1450 psig 200 bar 2900 psig 300 bar 4350 psig 400 bar 5800 psig 380 bar 5510 psig 350 bar 5070 psig 0 C 32 F 200 C 392 F 100 C 212 F 400 C 752 F 300 C 572 F 320 bar 4640 psig 450 C 842 F Fig 51 Process pressure process temperature version 196 450 C 321 842 F 1 Process temperature depending on the seal material 2 Process pressure Vibration resistance Ʋ Instrument h...

Page 83: ...isplay element Display with backlight Measured value indication Ʋ Number of digits 5 Ʋ Size of digits W x H 7 x 13 mm Adjustment elements 4 keys Protection rating Ʋ unassembled IP 20 Ʋ mounted into the housing without cover IP 40 Materials Ʋ Housing ABS Ʋ Inspection window Polyester foil Integrated clock Date format Day Month Year Time format 12 h 24 h Time zone Ex factory CET Rate deviation max 1...

Page 84: ...has an unambiguous address and can send mes sages to the bus This is initiated by the Master the addessed Slave answers For data transfer the versions serial EIA 485 as well as the mode RTU are available In the RTU and ASCII mode inter esting here data will be transmitted in binary form The telegram consists generally of the address the function the data as well as the transmission check Bus archi...

Page 85: ...itable for connection to the following RTUs with Modbus RTU or ASCII protocol RTU Protocol ABB Totalflow Modbus RTU ASCII Bristol ControlWaveMicro Modbus RTU ASCII Fisher ROC Modbus RTU ASCII ScadaPack Modbus RTU ASCII Thermo Electron Autopilot Modbus RTU ASCII Parameters for the bus communication The SITRANS LG270 is preset with the default values Parameter Configurable Values Default Value Baud ...

Page 86: ...gisters consist of 16 bit They can be read and written Before each command the address 1 byte after each command a CRC 2 byte is sent Register Name Register Num ber Type Configurable Values Default Value Unit Address 200 Word 1 255 246 Baud Rate 201 Word 1200 2400 4800 9600 19200 9600 Parity 202 Word 0 None 1 Odd 2 Even 0 Stopbits 203 Word 1 None 2 Two 1 Delay Time 206 Word 10 250 50 ms Byte Oder ...

Page 87: ...DAB Status 1412 DWord See Register 100 SV 1414 Secondary Variable in Byte Order CDAB Status 1424 DWord See Register 100 TV 1426 Third Variable in Byte Order CDAB Status 1436 DWord See Register 100 QV 1438 Quarternary Variable in Byte Order CDAB Status 2000 DWord See Register 100 PV 2002 DWord Primary Variable in Byte Order ABCD Big Endian SV 2004 DWord Secondary Variable in Byte Order ABCD Big End...

Page 88: ...32 Degree Celsius 33 Degree Fahrenheit 40 US Gallon 41 Liters 42 Imperial Gallons 43 Cubic Meters 44 Feet 45 Meters 46 Barrels 47 Inches 48 Centimeters 49 Millimeters 111 Cubic Yards 112 Cubic Feet 113 Cubic Inches 10 4 Modbus RTU commands FC3 Read Holding Register With this command any number 1 127 of holding registers can be read out The start register from which the readout should start and the...

Page 89: ... N 2 Bytes 1 to 127 0x7D Response Parameter Length Code Data Function Code 1 Byte 0x04 Start Address 2 Bytes 2 N Register Value N 2 Bytes Data FC6 Write Single Register With this function code an individual holding register can be written Request Parameter Length Code Data Function Code 1 Byte 0x06 Start Address 2 Bytes 0x0000 to 0xFFFF Number of Registers 2 Bytes Data Response Parameter Length Co...

Page 90: ...eral holding registers can be writen Only registers can be written in an enquiry which are immediately consecutive If there are gaps registers do not exist between the registers then they cannot be written in a telegram Request Parameter Length Code Data Function Code 1 Byte 0x10 Start Address 2 Bytes 0x0000 to 0xFFFF Register Value 2 Bytes 0x0001 to 0x007B Byte Number 1 Byte 2 N Register Value N ...

Page 91: ... 0x2B MEI Type 1 Byte 0x0E Read Device ID Code 1 Byte 0x01 to 0x04 Confirmity Level 1 Byte 0x01 0x02 0x03 0x81 0x82 0x83 More follows 1 Byte 00 FF Next Object ID 1 Byte Object ID number Number of Objects 1 Byte List of Object ID 1 Byte List of Object length 1 Byte List of Object value 1 Byte Depending on the Object ID 10 5 Levelmaster commands The SITRANS LG270 is also suitable for connection to t...

Page 92: ...ensor the joker must not be used because otherwise several slaves will answer Commands that modify the instrument return the command with OK EE ERROR replaces OK if there was a problem changing the configuration Report Level and Temperature Request Parameter Length Code Data Report Level and Temperature 4 characters ASCII Uuu Response Parameter Length Code Data Report Level and Temperature 24 char...

Page 93: ...t Parameter Length Code Data Set number of Floats 5 characters ASCII UuuFn Response Parameter Length Code Data Set number of Floats 6 characters ASCII UuuFOK If the number is set to 0 no level is returned Set Baud Rate Request Parameter Length Code Data Set Baud Rate 8 12 characters ASCII UuuBbbbb b pds Bbbbb b 1200 9600 default pds parity data length stop bit optional parity none 81 even 71 de fa...

Page 94: ...ive to Transmit Delay 4 characters ASCII UuuF Response Parameter Length Code Data Set Receive to Transmit Delay 5 characters ASCII UuuFn n number of measurement values 0 1 or 2 Report Receive to Transmit Delay Request Parameter Length Code Data Report Receive to Transmit Delay 4 characters ASCII UuuR Response Parameter Length Code Data Report Receive to Transmit Delay 7 characters ASCII UuuRmmm mm...

Page 95: ...c to GND Fig 53 Connection of SITRANS LG270 to RTU Fisher ROC 809 1 SITRANS LG270 2 RTU Fisher ROC 809 3 Voltage supply Parameter Parameter Value Baud Rate 9600 Floating Point Format Code 0 RTU Data Type Conversion Code 66 Input Register Base Number 0 The basic number of the input registers is always added to the input register address of SITRANS LG270 Address 1300 must hence be entered as registe...

Page 96: ...ion of SITRANS LG270 to RTU ABB Total Flow 1 SITRANS LG270 2 RTU ABB Total Flow Parameter Parameter Value Baud Rate 9600 Floating Point Format Code 0 RTU Data Type 16 Bit Modicon Input Register Base Number 1 The basic number of the input registers is always added to the input register address of SITRANS LG270 Address 1303 must hence be entered as register address for 1302 for RTU ABB Total Flow ...

Page 97: ...70 to RTU Thermo Electron Autopilot 1 SITRANS LG270 2 RTU Thermo Electron Autopilot 3 Voltage supply Parameter Parameter Value Baud Rate 9600 Floating Point Format Code 0 RTU Data Type IEE Fit 2R Input Register Base Number 0 The basic number of the input registers is always added to the input register address of SITRANS LG270 Address 1300 must hence be entered as register address for 1300 for RTU ...

Page 98: ... of SITRANS LG270 to RTU Bristol ControlWave Micro 1 SITRANS LG270 2 RTU Bristol ControlWave Micro 3 Voltage supply Parameter Parameter Value Baud Rate 9600 Floating Point Format Code 2 FC4 RTU Data Type 32 bit registers as 2 16 bit registers Input Register Base Number 1 The basic number of the input registers is always added to the input register address of SITRANS LG270 Address 1303 must hence b...

Page 99: ...Fig 57 Connection of SITRANS LG270 to RTU ScadaPack 1 SITRANS LG270 2 RTU ScadaPack 3 Voltage supply Parameter Parameter Value Baud Rate 9600 Floating Point Format Code 0 RTU Data Type Floating Point Input Register Base Number 30001 The basic number of the input registers is always added to the input register address of SITRANS LG270 Address 31303 must hence be entered as register address for 1302...

Page 100: ...70 Operating Instructions 44295 EN 140321 10 7 Dimensions Housing 1 81 mm 3 19 ø 77 mm 3 03 114 mm 4 49 M20x1 5 NPT M16x1 5 Fig 58 Dimensions housing with integrated display and adjustment module the housing is 9 mm 0 35 in higher ...

Page 101: ... mm 3 94 L 50 mm 1 97 ø 2 mm 0 08 ø 16 mm 0 63 ø 20 mm 0 79 ø 20 mm 0 79 ø 16 mm 0 63 ø 20 mm 0 79 ø 16 mm 0 63 Fig 59 SITRANS LG270 threaded version with gravity weight all gravity weights with thread M8 for eye bolt L Sensor length see chapter Technical data 1 Cable ø 4 mm 0 157 in temperature version 196 280 C 321 536 F 2 Cable ø 2 mm 0 079 in 3 Cable ø 4 mm 0 157 in temperature version 196 450...

Page 102: ...1 2 3 Fig 60 SITRANS LG270 threaded version with centering weight L Sensor length see chapter Technical data x ø 40 mm 1 57 in ø 45 mm 1 77 in ø 75 mm 2 95 in ø 95 mm 3 74 in 1 Cable ø 2 mm 0 079 in cable ø 4 mm 0 157 in temperature version 196 280 C 321 536 F see supplementary instructions Centering 2 Cable ø 2 mm 0 079 in cable ø 4 mm 0 157 in temperature version 196 450 C 321 842 F see suppleme...

Page 103: ...16mm 0 63 L 35mm 1 38 312 mm 12 28 45 mm 1 77 237 mm 9 33 ø 16 mm 0 63 L 1 2 3 Fig 61 SITRANS LG270 threaded version L Sensor length see chapter Technical data 1 Rod ø 16 mm 0 63 in temperature version 196 280 C 321 536 F 2 Rod ø 16 mm 0 63 in temperature version 196 450 C 321 842 F 3 Max height of the vessel isolation ...

Page 104: ...104 PBD 51041066 SITRANS LG270 Operating Instructions 44295 EN 140321 10 8 Trademark All the brands as well as trade and company names used are property of their lawful proprietor originator ...

Page 105: ...amping 38 Date of manufacture 52 Date Time 47 Default values 48 Deviation 67 E Echo curve memory 62 Echo curve of the setup 47 Electronics compartment 26 Error codes 65 Event memory 62 F Factory calibration date 52 False signal suppression 42 Fault rectification 67 Functional principle 9 G Gas phase 35 H HART address 51 HART variables 42 I Inflowing medium 17 Installation position 15 K Key functio...

Page 106: ...ng Instructions 44295 EN 140321 S Scaling measured value 39 40 Sensor characteristics 52 Sensor status 44 Simulation 46 Special parameters 51 Status messages NAMUR NE 107 63 T Type label 8 Type of medium 35 U Units 34 V Vessel insulation 19 ...

Page 107: ...Notes 107 PBD 51041066 SITRANS LG270 Operating Instructions 44295 EN 140321 ...

Page 108: ...erborough ON Canada K9J7B1 email techpubs smpi siemens com www siemens com processautomation Subject to change without prior notice PBD 51041066 Rev 1 0 Siemens AG 2014 For more information www siemens com level www siemens com weighing PBD 51041066 Printed in Canada ...

Reviews: