1 0
Figure 22
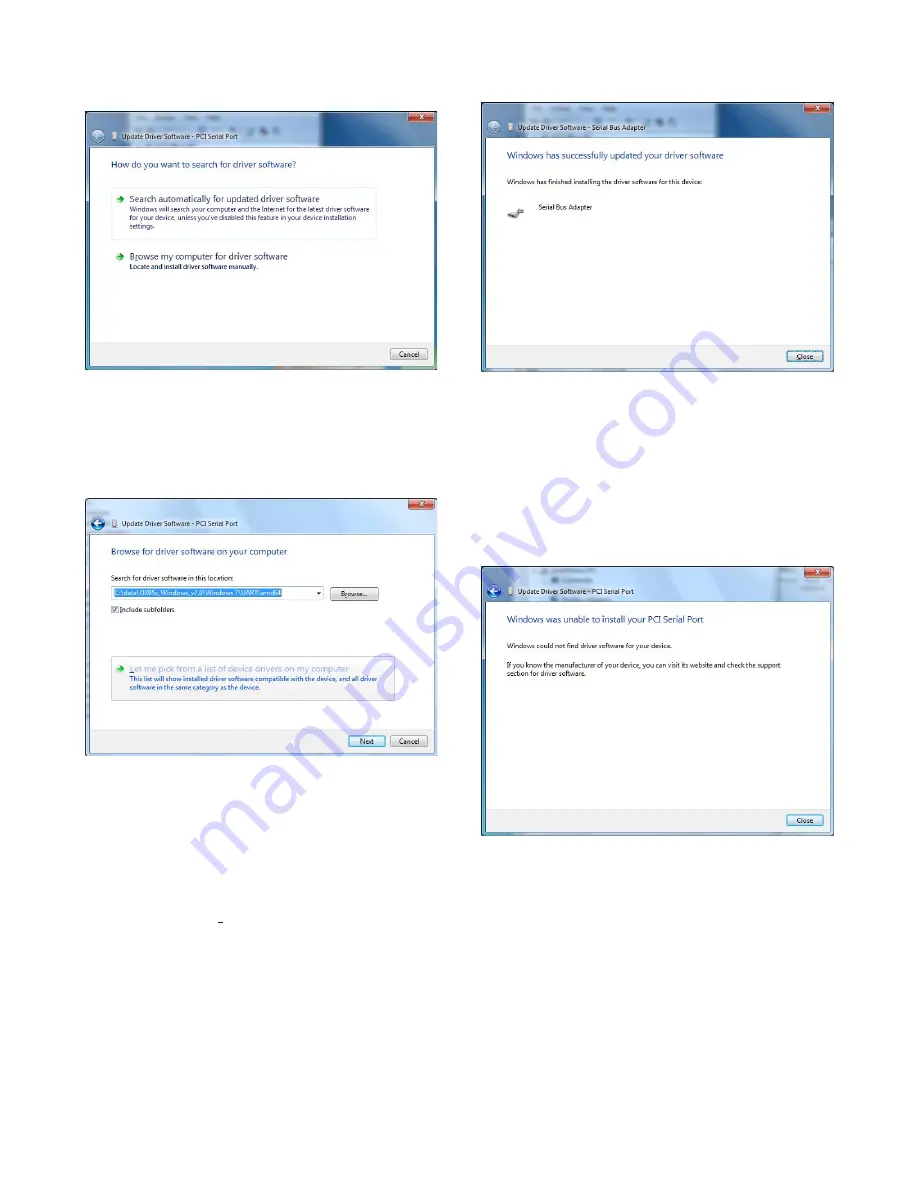
How To Search For Driver Software
3. Click on the “Browse my computer for driver software”
selection. A screen as shown in Figure 23 displays.
Figure 23
Browse For Driver Software
Notes:
1. The screen shows a folder in the C: drive, which will
differ based on the PC being installed.
3. Search for the Oxford UART folder on the installation
CD/DVD, using the Browse button. Once found - select
it, and the correct path for the driver location is shown as
in the previous screen.
4. Click on “Next>”, which prompts Windows 7 to at-
tempt the installation of the driver based on the selected
folder. After a driver install, one of two screens, as
shown in Figures 24 or 25 displays.
Figure 24
Successful Driver Installation
Notes:
1. The screen above reflects a good install, where the
correct PCI Serial Port entry was selected from the
Device Manager’s entry under Other Devices.
2. The screen below reflects an incorrect Device Manager
(PCI Serial Port) entry is selected (i.e. does not
correspond to the NCC-2F hardware).
Figure 25
Unsuccessful Driver Installation
5. To verify which COM ports were installed and to check
that there are no issues, verify the Device Manager en-
tries. Clicking on the Close button in the “Update Driver
Software”, returns to the Device Manager and displays a
screen as shown in Figure 26, for a successful install.


