background image

5

Safety precautions

Gigaset SL78H / EN-USA-CANADA / A31008-M2058-R301-2-6019 / security.fm / 30.03.2010

V

e

rsion 4, 16.0

9

.2005

Safety precautions

Warning

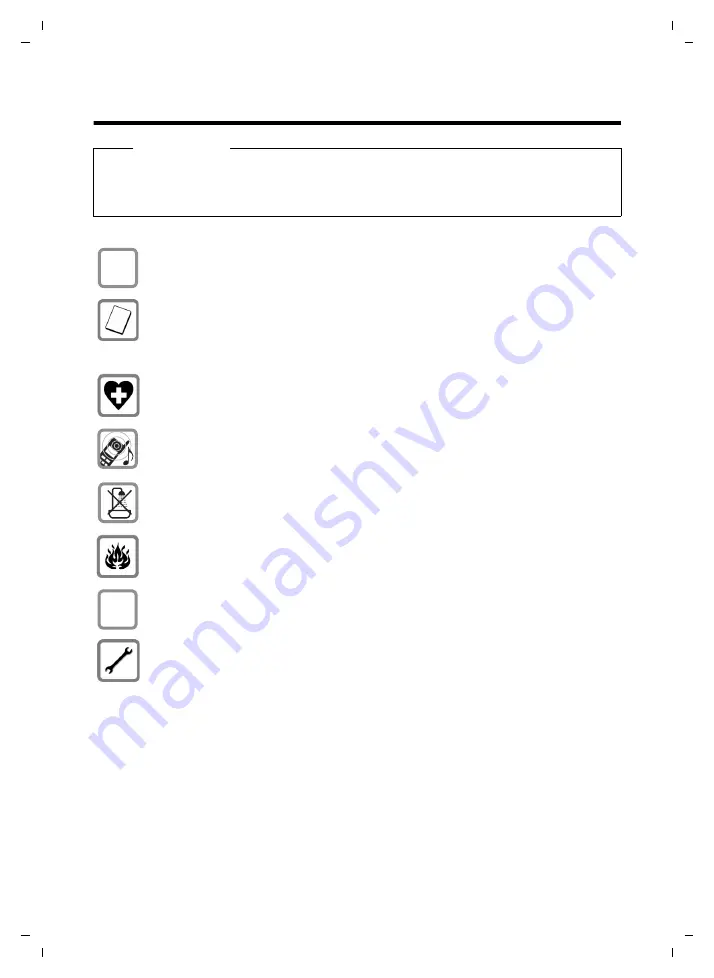
Be sure to read this user guide and the safety precautions before using your telephone.

Explain their content and the potential hazards associated with using the telephone to your 
children.

Use only the charging cradle supplied with the power adapter.

Use only 

recommended, rechargeable batteries 

(

¢

page 49). Failure to do so 

could damage your health and cause injury.

Do not charge the handset in charging unit or base station while the headset 
is connected.

Using your telephone may affect nearby medical equipment. Be aware of the tech-
nical conditions in your particular environment (such as a doctor's office).

Do not hold the rear of the handset to your ear when it is ringing or when the hands-
free function is activated. Otherwise, you risk serious and permanent damage to 
your hearing.

Do not install the charging cradle in bathrooms or shower areas. The charging cradle 
is not waterproof (

¢

page 49).

Do not use your phone in environments that pose a explosion hazard 
(e.g., paint shops).

If you give your phone to someone else, make sure you also give them the 
user guide.

Please remove faulty base stations from use, as they could interfere with other wire-
less services.

$

ƒ

Summary of Contents for Gigaset SL78

Page 1: ...95 Bocholt Manufactured by Gigaset Communications GmbH under trademark license of Siemens AG As of 1 Oct 2011 Gigaset products bearing the trademark Siemens will exclusively use the trademark Gigaset All rights reserved Subject to availability www gigaset com Gigaset Communications GmbH 2010 ...

Page 2: ...7 Quick list key page 27 Open Quick list 8 Charging socket 9 Microphone 10 Flash key Consultation call flash Insert a dialing pause press and hold 11 Asterisk key Ringers on off press and hold with an open connection switch between pulse dialing touch tone dialing press briefly for text input open a table of special characters 12 Key 1 Dial network mailbox press and hold 13 Talk key Answer a call ...

Page 3: ... 24 25 26 27 28 29 30 31 ØÜ Appointment page 34 Anniversary page 31 Ø Ú Alarm clock page 36 Signal strength page 14 or ECO Mode symbol page 34 Bluetooth activated page 38 or ô õ Bluetooth headset data device connected Ringer switched off page 43 Keypad lock switched on page 20 Battery being charged page 14 Battery charge status page 14 Number of new messages u In the list of missed appointments pa...

Page 4: ...entries 18 Using the menus 19 Activating deactivating the handset 20 Activating deactivating the keypad lock 20 Using this guide 21 Menu tree 23 Making calls 25 Making an external call 25 Ending a call 25 Accepting a call 25 Using the handsfree feature 26 Switching to mute 26 Making internal calls 26 Using the directory and lists 27 Using the Directory Quick list 27 Using the Last Number Redial li...

Page 5: ...ng the handsfree earpiece volume 42 Changing ringers 43 Using the Resource Directory 44 Activating deactivating advisory tones 45 Setting long distance and area codes 45 Restoring the handset default settings 46 Questions and answers 47 Protecting our environment 48 Appendix 49 Caring for your telephone 49 Contact with liquid 49 Specifications 49 Writing and editing text 50 Additional functions in...

Page 6: ...or base station while the headset is connected Using your telephone may affect nearby medical equipment Be aware of the tech nical conditions in your particular environment such as a doctor s office Do not hold the rear of the handset to your ear when it is ringing or when the hands free function is activated Otherwise you risk serious and permanent damage to your hearing Do not install the chargi...

Page 7: ...m 30 03 2010 Version 4 16 09 2005 First steps Checking the package contents 1 One Gigaset SL78H handset 2 One battery 3 One battery cover 4 One belt clip 5 One charging cradle with power adapter 6 One user guide 7 USB cable 8 CD ROM with driver for the USB cable 2 4 3 5 1 7 6 8 ...

Page 8: ... at temperatures ranging from 5 C to 45 C Please note u Keep in mind the range of the base station It is up to 985 feet 300 m in unobstructed outdoor areas and up to 165 feet 50 m inside buildings The range is reduced when Eco mode is activated page 34 u Never expose the telephone to heat sources direct sunlight or other electri cal devices u Protect your phone from moisture dust corrosive liquids...

Page 9: ...teries page 49 recommended by Gigaset Communications GmbH using other batteries could result in significant health risks and property damage For example the outer casing of the batteries could be destroyed or the batteries could explode The phone could also malfunction or be damaged as a result of using batteries that are not the recommended type First insert the battery at the top of the receptac...

Page 10: ...for attaching the belt clip To attach Press the belt clip onto the back of the handset so that the protrusions on the belt clip engage the notches To remove Use your right thumb to press the belt clip slightly to the right of center then slide the fingernail of your left index finger between the clip and the casing and lift the clip upwards Placing the handset in the charging cradle Insert the pow...

Page 11: ...cedure 1 On the handset The display indicates that the handset is searching for the specified base station Please note If the handset is already registered to a base station start the registration pro cedure as follows v Ï Registration Register Handset Press the key below Register on the dis play screen to open the input field The submenu Register Handset is shown in the display Register Handset B...

Page 12: ...rmation on how to deregister can be found in your base station s user guide Please note u After the first battery charge and discharge you can place your handset in the charging cradle after every call u Always repeat the charging and discharging procedure if you remove the battery from the handset and reinsert it u The battery may heat up during charging This is not dangerous For this place the h...

Page 13: ...ge 24 The submenu Date Time is shown on the display The active input position flashes Using the keypad enter the month day and year using 8 characters e g Q 4 2QQO for 10 14 2009 Date Time Date 00 00 0000 Time 00 00am Back Save Time Press the right or left Control key to change the input posi tion and correct an entry Enter the hours and minutes as four digit numbers using the keypad e g QM 5 for ...

Page 14: ...10 Version 4 16 09 2005 Press the key below Save on the dis play screen to save your entries The display shows Saved You will hear a confirmation tone Press the key below Back on the dis play screen to return to idle status am pm Save Saved Date Time Date 10 14 2009 Time 07 15am am pm Save ...

Page 15: ...firmware version please update the handset s firmware page 51 Setting up area codes Before you can return a call from the Calls list page 31 you must store the local area code of the area in which your phone is being used If your phone is in a mul tiple area code area you must also store the extra codes for that area Local Area Code v Ï Telephony Local Area Code Enter the local area code Save Pres...

Page 16: ...03 2010 Version 4 16 09 2005 Connecting the USB cable You can connect the supplied USB cable to the back panel of your telephone to connect the tel ephone to a PC page 50 Remove thebeltclip if attached page 9 Remove the battery cover page 8 Connect the USB cable to the USB socket 1 1 ...

Page 17: ...enu driven devices such as other Gigaset telephones you should first read the section entitled Using the phone page 17 If you have any questions about using your phone please read Questions and answers page 47 or contact our Customer Care team page 55 Information on is located here Setting the ringer and volume page 43 Setting the handset volume page 42 Setting Eco mode page 34 Transferring direct...

Page 18: ...ets In the main menu submenus and lists t s Scroll up down line by line In input fields You can use the Control key to move the cursor up t down s right v or left u Press and hold v or u to move the cursor word by word During an external call s Open the directory u Initiate an internal consultation call t Adjust the loudspeaker volume for earpiece and handsfree mode Functions when clicking the mid...

Page 19: ...n the Last Number Redial list Using the keys on the keypad c Q etc Press the matching key on the handset Enter digits or letters Correcting incorrect entries You can correct incorrect characters in the input fields by navigating to the incor rect entry using the Control key You can then u Press Ñ to delete the character to the left of the cursor Press and hold Ñ to delete the word to the left of t...

Page 20: ...isplay key OK Press the Display key Back or the End Call key a briefly to return to idle status Submenus The functions in the submenus are displayed in list for mat example to the right To access a function Scroll to the function with the Control key q and press OK Press the Display key Back or the End Call key a briefly to return to the previous menu level or to cancel the operation Reverting to ...

Page 21: ...switch the handset on Activating deactivating the keypad lock The keypad lock prevents any inadvertent use of the phone Press and holdthe Pound key to activate or deactivate the keypad lock You will hear the confirmation tone When the keypad lock is activated you will see the icon on the display and a message when you press a key The keypad lock is deactivated automatically if someone calls you It...

Page 22: ...ress right on the Control key v to open the main menu Using the Control keys navigate right left up and down p until the submenu Settings is selected Press the Display key OK to confirm your selection PressthebottomoftheControlkey s until the menu item Teleph ony appears on the display Press the Display key OK to confirm your selection Settings Date Time Audio Settings Display Language Registratio...

Page 23: ...he Auto Answer function is already selected Press the Display key Change to activate deactivate the function Telephony Auto Answer Area Codes Listening In Dialing Mode Back Change Telephony Auto Answer Area Codes Listening In Dialing Mode Back Change Pressthekeybelow Back onthedisplay screen to return to the previous menu level or Press andhold the End Call keyato return to idle status ...

Page 24: ...6 ò Bluetooth Activation page 38 Search for Headset page 39 Search for DataDevice page 39 Known Devices page 39 Own Device page 40 É Additional Features Room Monitor page 37 Missed Alarms page 36 Í Calendar page 34 Ê Call Lists page 31 Ì Voice Mail Menu dependent on base station á Resource Directory Screensavers page 44 Caller Pictures page 44 Sounds page 44 Capacity page 44 Î Directory page 27 ...

Page 25: ...Call Volume page 42 Ringer Settings page 43 Advisory Tones page 45 Music on Hold dependent on base station Display Screensaver page 41 Backlight page 42 Language page 41 Registration page 10 Submenu dependent on base station Telephony Submenu dependent on base station System Submenu dependent on base station Reset page 46 Submenu dependent on base station ...

Page 26: ...et see the user guide issued with it Ending a call a Press the End Call key Accepting a call The handset indicates an incoming call in three ways by ringing by a display on the screen and by the flashing Handsfree key d You can accept the call by Pressing the Talk key c Pressing the Handsfree key d If the handset is in the charging cradle and the Auto Answer function is activated page 42 the hands...

Page 27: ...during a call Press and hold the Handsfree key d while placing the handset in the base sta tion If the Handsfree key d does not light up press the key again For instructions on how to adjust the loud speaker volume page 42 Switching to mute You can deactivate the microphone in your handset during an external call Mute Press the Display key to mute the handset The display shows Microphone is off Mu...

Page 28: ...st of name numbers that can be Person Business name and phone number dial around name and code descriptive name and PIN etc Open the Quick list in idle status by press ing the C key Entry lengths Number max 32 digits Name max 16 characters Storing a number in the directory s New Entry You can enter data in the following fields First Name Last Name Enter first name and or last name If no name is en...

Page 29: ...is as follows 1 Space 2 Digits 0 9 3 Letters alphabetical 4 Other characters To bypass the alphabetical order of the entries inserta space or a digit in front of the first letter of the last name These entries will then move to the beginning of the directory Selecting entries in the directory and Quick list s C Open the directory or Quick list You have the following options u Use s to scroll throu...

Page 30: ...ist page 27 Linking Quick list numbers with one number You can insert the dialing code of a network provider ahead of the number linking C Open Quick list s Select entry Quick list number Options Press the Display key Display Number Select and press OK Enter number or select number from the directory page 30 c Press the Talk key Both num bers are dialed Sending the directory Quick list to another ...

Page 31: ...splayed Options Copy to Directory Complete the entry page 27 Copying a number or e mail address from the directory In some cases you can open the directory for example to copy a number or e mail address Your handset doesn t have to be in idle status Depending on the situation open the directory with s or Ò q Select entry page 28 Saving an anniversary in the directory For each number in the directo...

Page 32: ...corresponding phone number by press ing the Display key View Managing entries in the Last Number Redial list c Press the key briefly s Select entry Options Open menu You can select the following functions with q Copy to Directory Copy an entry to the directory page 27 Display Number as in the directory page 29 Delete Entry as in the directory page 29 Delete All as in the directory page 29 Using th...

Page 33: ...ntments page 36 An advisory tone sounds as soon as a new message arrives in a list The f key flashes it goes off when the key is pressed In idle status the display shows an icon for the new message The number of new entries is displayed on the right next to the corresponding symbol List selection The lists displayed after pressing the Mes sage key f depend on whether there are any new messages u f...

Page 34: ... stations with voice mail v Ì Set Key 1 Network Mailbox Select and press Select Ø selected For base stations without voice mail v Ì Network Mailbox To continue Enter the number for the net work mailbox Save Press the Display key The setting for Fast Access applies to all Gigaset SL78H handsets Calling the network mailbox Press and hold You are directly connected to the network mail box d Press the...

Page 35: ...is displayed in idle status To do this in idle sta tus Calendar Options Show Cal in Idle display Press Change to activate deactivate the func tion on Saving an appointment Requirement The date and time have already been set page 12 v Í u Today s date is selected bordered in orange u Days on which appointments have already been saved are highlighted in orange r q Select the required day in the grap...

Page 36: ...nt reminderorswitchitoff dependingonthe base station Off Press the Display key to deacti vate the appointment reminder Managing appointments Editing individual appointments r q Select the day in the graphic cal endarandpressthewControl key Days on which appoint ments have already been saved are highlighted in orange in the calendar q Select appointment for the day You have the following options Vi...

Page 37: ...isplayed with the last name and first name The date and time will also be provided Delete Delete appointment If 10 entries are already stored in the list the next appointment reminder will delete the oldest entry Setting the alarm clock Requirement The date and time have already been set page 12 Activating deactivating the alarm clock and setting the wake up time v Í Alarm Clock You can enter data...

Page 38: ...monitor function is acti vated allofthehandsetkeysaredeactivated except for the Display keys If you accept an incoming call the room monitor is suspended for the duration of the call but the function remains activated If you deactivate then reactivate the hand set the room monitor remains activated Activating the room monitor and entering the destination number v É Room Monitor You can enter data ...

Page 39: ...ooth devices Your Gigaset SL78H handset can communi cate wirelessly with other devices using Bluetooth technology Before you can use your other Bluetooth devices you must first activate Bluetooth and then register the devices to the handset You can register one Bluetooth headset to the handset You can also register up to five data devices PC PDA to send and receive directory entries as vCards or e...

Page 40: ...n appears next to each device name in the list displayed If a device is connected the display header indicates the corresponding symbol instead of ò Viewing entries Open list s select entry Options Press the Display key View Entry Select and press OK Device name and address are displayed Back with OK Deregistering Bluetooth devices Open list s select entry Options Press the Display key Delete Entr...

Page 41: ...other Blue tooth device v ò Own Device Change Press the Display key Change the name Save Press the Display key Handset settings Your handset is preconfigured but you can change the settings to suit your individual requirements Quickly accessing functions and numbers You can assign a number or a function to each of the Digit keys Q and 2 to O The left and right Display keys have func tionspreselect...

Page 42: ...s described when first assign ing the key page 40 Changing the display language You can view the display texts in different languages v Ï Language The current language is indicated by a Ø s Select language and press Select Ifyouaccidentallychoosealanguageyoudo not understand v Ï s s s Press the keys one after the other and confirm using OK s Select the correct language and press the right Display ...

Page 43: ... without having to press the Talk key c v Ï Telephony Auto Answer Change Press the Display key on Changing the handsfree earpiece volume You can set the loudspeaker volume for handsfree talking and the earpiece volume to five different levels In idle status t Open the menu for setting the Call Volume r Set the earpiece volume s Scroll to the Speaker line r Set the handsfree volume Save Press the D...

Page 44: ...your telephone must not ring e g at night Time Control Select On or Off Suspend ringing from Enter the start of the period in 4 digit for mat Suspend ringing until Enter the end of the period in 4 digit for mat Same ringer for all functions In idle status t Ringer Settings All Set volume and ringer see Settings for individual functions Save Press the Display key Yes Confirm the prompt to save your...

Page 45: ...not have enough memory available you must first delete one or more pictures You cannot rename or delete pictures marked with the icon Viewing pictures playing back sounds v á Screensavers Caller Pictures Sounds select entry Pictures View Press the Display key The selected picture is displayed Use the q key to scroll between the pictures If you have saved a picture in an invalid data format you wil...

Page 46: ...or In Call The battery warning tone is only activated deacti vated and only sounds during a call Save Press the Display key Setting long distance and area codes To transfer phone numbers e g in vCards it is essential that your area code interna tional and local area code is saved on the phone Some of these numbers are already preset v Ï Telephony Area Codes Check that the pre set area code is corr...

Page 47: ...settings You can reset individual settings and changes that you have made The following settings are not affected by the reset u Registration of the handset to the base station u Date and time u Calendar entries u Entriesinthedirectory Quicklist andCall lists aswell asthecontentoftheResource Directory v Ï Reset Handset Reset Yes Press the Display key ...

Page 48: ... The base station s range is reduced because Eco mode is activated Deactivate Eco mode page 34 or reduce the distance between the handset and the base station 2 The base station is not turned on Check the base station power adapter Please register handset flashes in the dis play Handset has not yet been registered to the base station or has been de registered Register the handset page 10 Handset d...

Page 49: ...on the Internet at www gigaset com Environmental management system Gigaset Communications GmbH is certified compli ant with the EN 14001 and ISO 9001 international standards ISO 14001 Environment Certified since September 2007 by TÜV SÜD Management Service GmbH ISO 9001 Quality Certified since February 17 1994 by TÜV SÜD Manage ment Service GmbH Ecological energy consumption The use of ECO DECT pa...

Page 50: ...as fully dried out you will usually be able to use it again Specifications Recommended batteries Technology Lithium ion Li ion Voltage 3 7 V Capacity 750 830 mAh Type V30145 K1310 X444 V30145 K1310 X445 The handset is supplied with the recom mended battery Only the original battery may be used In light of continuous advances in battery technology we regularly update the list of recommended batteri...

Page 51: ...case 1st letter uppercase all others lowercase Press the Pound key before entering the letter You can see in the display whether upper case lowercase or digits is selected Additional functions in the PC interface You can connect the handset to your com puter using Bluetooth page 38 or the USB data cable supplied If you want to use a Bluetooth connection your computer must be equipped with an suita...

Page 52: ... USB data cable page 15 sup plied Start the Gigaset QuickSync program on the PC Set up the connection to the handset Open the Device tab through Settings Device Properties Click Firmware Update The firmware update starts Data is first loaded from the update server over the Internet The time required depends on the speed of your Internet con nection Your telephone display is switched off and the Me...

Page 53: ...uirement that the sum of the RENs of all devices does not exceed five This Class B digital apparatus complies with Cana dian ICES 003 Cet appareil numérique de la classe B est con forme à la norme NMB 003 du Canada FCC ACTA Information Warning Changes or modifications to this unit not expressly approved by Gigaset Communica tions USA LLC could void the FCC authority to operatetheequipment Thisincl...

Page 54: ...gainst harmful interference in a resi dential installation Some cordless telephones operate at frequencies that may cause interfer ence to nearby TV s and VCR s to minimize or pre vent such interference the system base should not be placed near or on top of a TV or VCR and if interference is experienced moving the base far ther away from the TV or VCR will often reduce or eliminate the interferenc...

Page 55: ...e following conditions a When the power cord is damaged or frayed b If liquid has been spilled into the product c If the product has been exposed to rain or water d If the product does not operate normally by fol lowing the operating instructions Adjust only those controls that are covered by the operating instructions because improper adjustment of other controls may result in damage and may requ...

Page 56: ... memory of the Product may be lost during repair 3 THISLIMITEDWARRANTYDOESNOT COVER AND IS VOID WITH RESPECT TO THE FOLLOWING Cosmetic damage physical damage to the sur face of the Product including without limita tion breakage cracks dents scratches or adhesive marks on the LCD screen or outside casing of the Product Products which have been repaired main tained or modified including the antenna ...

Page 57: ...n the Products will meet your requirements or will work in combination with any hardware or applications software prod ucts provided by third parties that the operation of the software will be uninterrupted or error free or that all defects in the software products will be corrected 6 LIMITATION ON REMEDIES NO CONSEQUENTIAL OR OTHER DAMAGES Your exclusive remedy for any breach of this lim ited war...

Page 58: ... TORT INCLUDING NEGLIGENCE STRICT LIABILITY BREACH OF CONTRACT OR BREACH OF WARRANTY OF GIGASET NAM OR SELLER OR ANY SUPPLIER AND EVEN IF GIGASET NAM OR SELLER OR ANY SUPPLIER HAS BEEN ADVISED OF THE POSSIBILITY OF SUCH DAMAGES REPAIR OR REPLACEMENT AS PROVIDED UNDER THE WAR RANTY IS YOUR SOLE AND EXCLUSIVE REMEDY FOR BREACH OF THE LIMITED WARRANTY 9 LIMITATION OF LIABILITY AND REMEDIES NOTWITHSTA...

Page 59: ...fm 30 03 2010 Version 4 16 09 2005 Accessories Ordering Gigaset products You can order Gigaset products from your specialist retailer Use only original accessories This prevents possible health risks and property dam age and also ensures compliance with all relevant regulations ...

Page 60: ...nswer 25 42 B Battery charging 1 2 11 display 1 2 icon 1 2 14 inserting 8 recommended batteries 49 tone 45 Birthday see Anniversary Bluetooth accepting a call 25 activating 38 changing device name 40 deregistering devices 39 list of known devices 39 registering devices 39 setting own area code 45 transferring directory vCard 30 C Calendar 34 Call accepting 25 accepting Bluetooth 25 ending 25 exter...

Page 61: ...es 36 network mailbox report 33 screensaver 41 setting 41 Display keys 1 18 assigning 40 Disposal 48 E Earpiece mode 26 Earpiece volume 42 ECO DECT 34 E mail address copying from the directory 30 End Call key 1 25 Ending call 25 Entry selecting from directory 28 Environment 48 Error tone 45 Extra codes 14 F Fast access network mailbox 33 Firmware update 51 Flash key 1 G General troubleshooting 47 ...

Page 62: ...cal area codes 14 Lock activating deactivating keypad lock 20 M Making calls accepting a call 25 external 25 internal 26 Manual last number redial 31 Medical appliances 5 Memory directory Quick list 29 My stuff 44 Menu end tone 45 opening 17 overview 23 prompting 19 Message key 1 opening lists 32 Microphone 1 Missed anniversary 36 appointment 36 calls 31 Muting the handset 26 My stuff 44 N Network...

Page 63: ... entry to handset 29 Sensitivity room monitor 37 Service Customer Care 55 Setting date 12 24 screensaver 41 time 12 24 Setting up handset 8 Signal tone see Advisory tones Snooze mode 37 Sound downloading 44 Sound see Ringer Specifications 49 T Talk key 1 25 U Update 51 USB connection 15 V Viewing the network mailbox report 33 VIP directory entry 28 Volume earpiece 42 earpiece volume 42 handset han...

Reviews: