IP 8000 Conference Phone Application Note—Page 6
The “Virtual IP Address” parameter is a new configuration
parameter with ShoreTel’s release 8. This “Virtual IP
Address” is an IP address that can be moved to a different
switch during a failure. For each site that supports SIP
extensions, one “Virtual IP Address” is defined that will act
as the SIP Proxy for the site. This IP address must be static.
The ShoreTel server will assign this “Virtual IP Address” to
the ShoreGear switch that is configured as SIP proxy for the
site. Two ShoreGears can be configured as SIP proxy
switches for redundancy and reliability purposes. If the
primary proxy switch goes down, the other proxy switch will
take over the “Virtual IP Address”. Due to this “Virtual IP
Address” mechanism, SIP phones will not know if the proxy
switch goes off-line. Note: If you choose not to define a
“Virtual IP Address” you can only define one Proxy Switch
and there is no redundancy, or failover capabilities. The
switches available in the “Proxy Switch 1 / 2” will only be
shown if proxy resources have been enabled on the switch.
The Admission Control Bandwidth defines the bandwidth
available to and from the site. This is important as SIP
devices may be counted against the site bandwidth. See the
ShoreTel Planning and Installation Guide for more information.
ShoreTel’s release 8 now adds 13 codecs by default, these
codecs can be grouped as “Codec Lists” and defined in the
sites page for “Inter-site” and “Intra-site” calls. See the
ShoreTel release 8 Server Notes for more information. The
default settings will work properly with the IP 8000 confer-
ence phone.
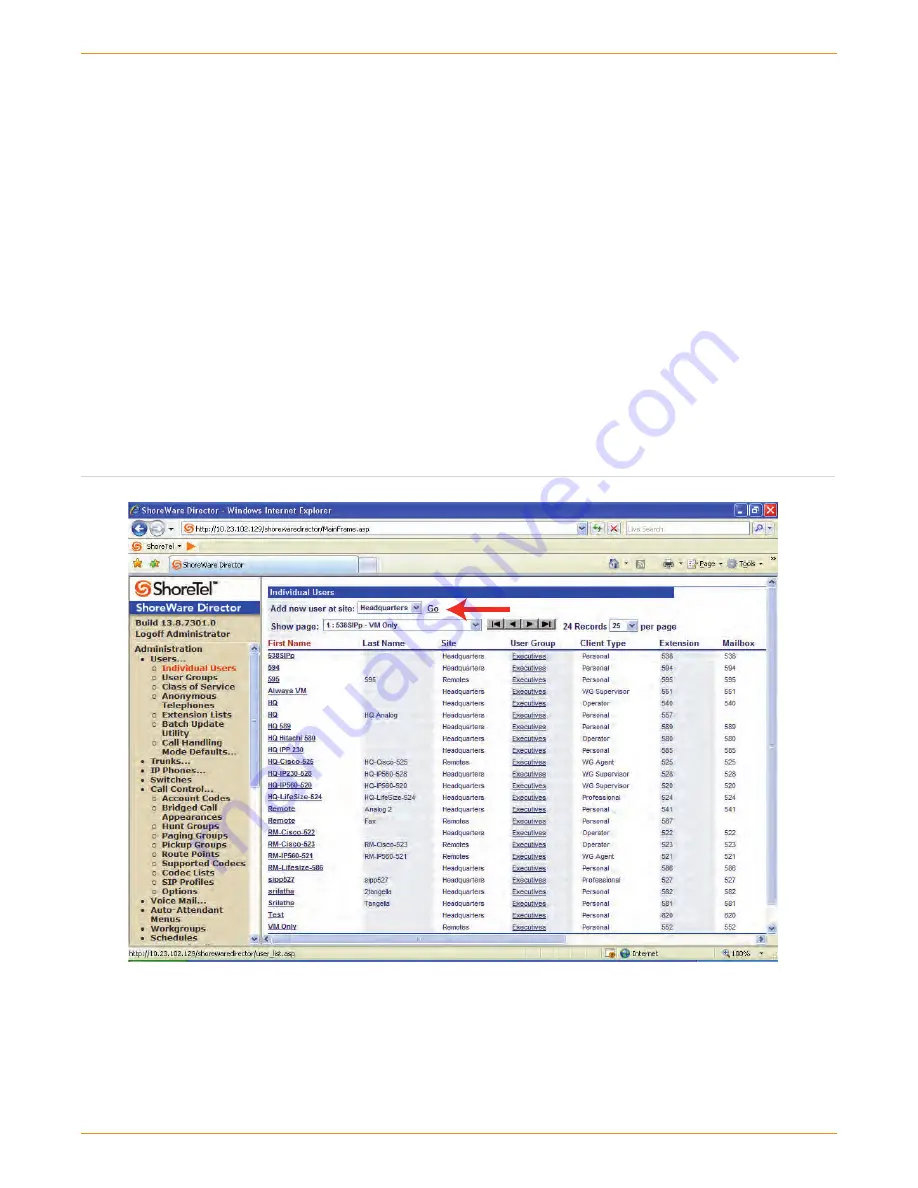
Creating User Extension for SIP Device
You need to create a user extension for the IP 8000. This is
accomplished from ShoreWare Director by selecting
“Administration” followed by “Users…” then “Individual
Users”. This action will bring up the “Individual Users”
screen, at the top of the page, to the right of “Add new user
at site:” select the desired site (from the drop down menu)
where the user will reside and select “Go” (Figure 8).
Figure 8 – Trunk Groups Settings


