background image

33 


5.4.2.


Data Post Processing 

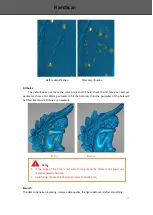
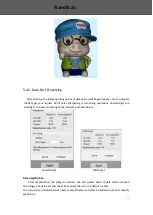
After meshing, the following dialogue box of data post processing will appear. You can simplify 

the data per your request, do fill holes, sharpening or smoothing operations. Unwatertight and 
watertight, the post processing of the interface as shown below. 


    Unwatertight 


Watertight 


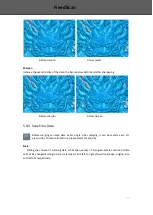
Data simplification 

After  simplification,  the  polygon  numbers,  size  and  surface  detail  of  data  will  be  reduced 

accordingly. Check the simplify check box and set the ratio, the default is 100%. 
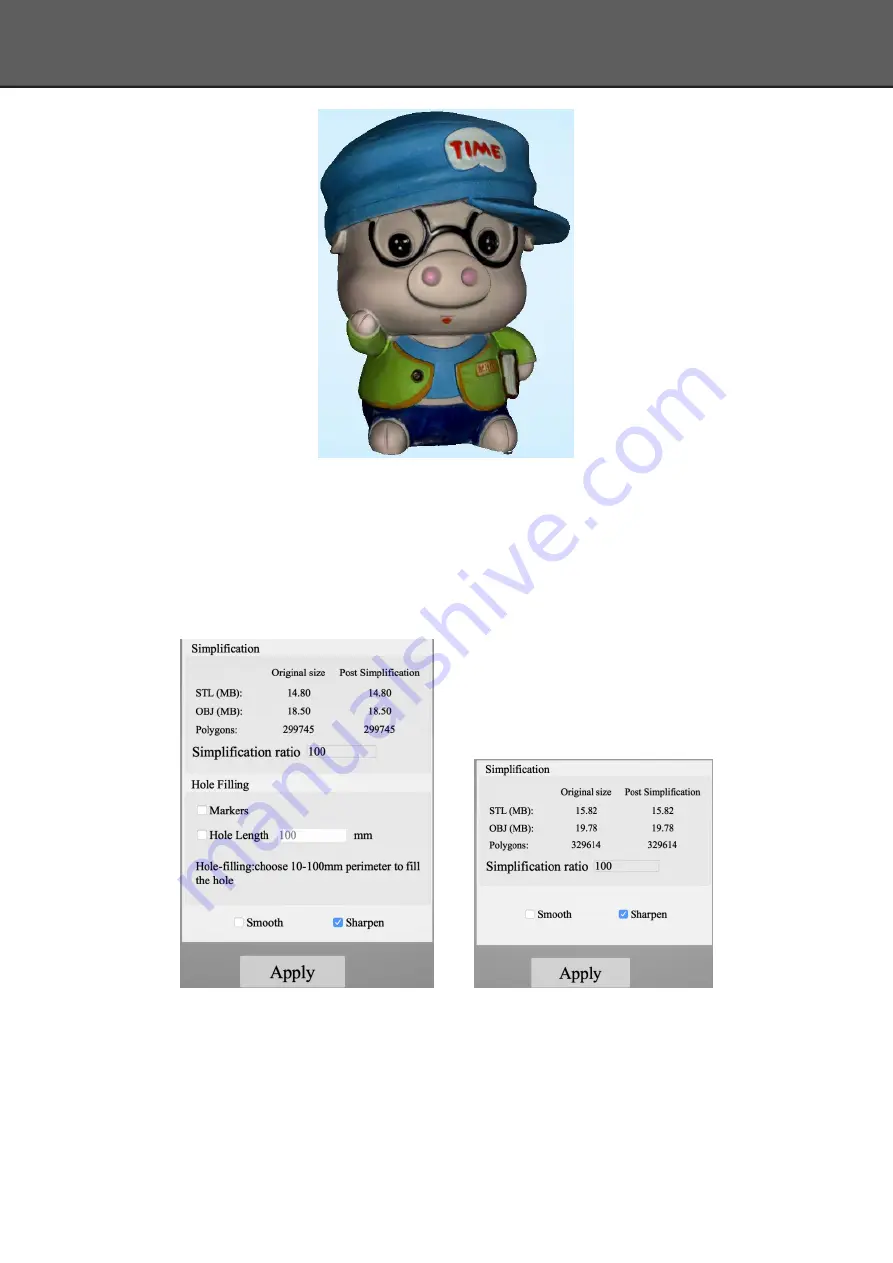
The comparison of detail between before simplification and after simplification (at 30% simplify 
proportion). 

Fixed


Scan


Summary of Contents for EinScan-SP

Page 1: ...EinScan SP Desktop 3D Scanner User Manual ...

Page 2: ...wn Menu 17 3 3 1 Language 17 3 3 2 TeamViewer 17 3 3 3 Feedback 17 3 3 4 User Setting 18 3 3 5 Factory Default 18 3 3 6 Einscan Community 19 3 3 7 About 19 4 Calibration 20 4 1 Calibration 21 4 2 Calibration Precaution 24 5 Fixed Scan 25 5 1 Help Mode for Beginner 26 5 2 Before Scaning 27 5 3 Scanning 29 5 3 1 Start Scan 29 5 3 2 Edit Tool 29 5 3 3 Manual Align 31 5 3 4 Delete Current Data 31 5 3 ...

Page 3: ...2 5 5 1 Mouse Operation Prompts 37 5 5 2 Hot Key 37 5 5 3 Points and Triangles 38 5 5 4 Help 38 5 5 5 Model Viewer 38 5 6 Work Offline 39 6 FAQ 40 7 Safety Precautions 42 8 Help 44 Catalog ...

Page 4: ...3 1 ...

Page 5: ...uantity Scanner Head 1 Turntable 1 Scanner Stand 1 Scanner Bracket 1 Calibration Board 1 Calibration Board Holder Power Adapter 1 Power Cord 1 USB Cable 1 USB Cable 1 Tripod 1 Reference Point 1 Quick Guide 1 Device List ...

Page 6: ...90 480mm Light source White light LED Maximum scan volume 30mm 30mm 30mm 30mm 30mm 30mm Minimum scan volume 200mm 200mm 200mm 700mm 700mm 700mm Texture Scan Yes Outdoor Operation No affected by strong light Special Scan Object For transparent reflective and dark object please spray powder first before scanning Printable Data Output Yes Data Format OBJ STL ASC PLY Specification Parameter ...

Page 7: ...6 Items Recommended PC configuration Operating System Mac OS 10 RAM 8G Graphic Memory 1G Specification Parameter ...

Page 8: ...7 2 ...

Page 9: ...Step 2 Insert calibration board onto the board holder NOTE Rotate the calibration board only while calibration Step 3 1 Turntable and Scanner installation 1 Place the turntable onto scanner stand 2 Screw the scanner into the socket on the stand Hardware Installation ...

Page 10: ...of scanner and turntable Step3 2 Setting scanner on tripod for fixed scan turntable coded targets and markers align mode 1 Screw the scanner head onto tripod 2 Plug power cord into outlet and the back of scanner Plug USB cable into back of scanner and computer USB port Plug USB cable into back of scanner and turntable Hardware Installation ...

Page 11: ...0 Scanner Turn on off Hold on the touch switch for about one second to turn the scanner on Double click on the touch switch and stay for one second each time to turn the scanner off Hardware Installation ...

Page 12: ...ck Software download as shown below Secondly please complete the registration if registered click log in After take the survey it will enter the page http www einscan com software download Finally click the icon to jump to the page of any file to download the software Software download ...

Page 13: ...ware on the Application In the next step connect the device and check whether the camera driver installation is successful click the Mac logo on the top left corner of the desktop select about the machine open the overview system report and see if the camera s name is normally displayed under the camera in the hardware Software Uninstall Open the Application delete EinScan S as shown below Softwar...

Page 14: ...13 3 ...

Page 15: ... scanned while the scan is in progress Do not scan moving object size smaller than 30 30 30mm and objects with hollow pattern design Mark points stick Stick mark points on the object in random avoiding sticking in one line Public areas alignment require at least four mark points While placing the points uniformly stick the mark points on the object and make sure that in each single scan area has a...

Page 16: ...p right corner To open Help Mode for Beginner go to Setting User Setting Help mode for beginners 3 2 2 Obtain License File When a warning of license file doesn t match the scanner pops up when entering scanning mode the license file can be acquired by clicking Activate 3 2 3 Operation Procedure Operation Procedure First Scan ...

Page 17: ...16 First Scan ...

Page 18: ...Spanish French Korean Russian and Turkish Language can be switched in the choose device type interface 3 3 2 TeamViewer By clicking TeamViewer you can go to the TeamViewer interface directly without installation 3 3 3 Feedback If you have any questions or suggestions please share with us by clicking Feedback Leave your email in My E mail Drop down Menu ...

Page 19: ...gram To help us improve the quality and user experience of Einscan we hope to be allowed to collect usage information to Einscan Team This information will not identify you and does not include your project data By default this checkbox is selected and we strongly recommend you to select it 3 3 5 Factory Default System setting brightness turntable steps calibration data will restore to the factory...

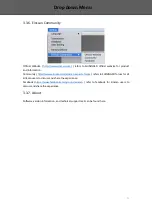
Page 20: ...tp www einscan com einscan experts forum refers to SHINING3D forum for all EinScan users to discuss and share the experience Facebook https www facebook com groups einscan refer to facebook for Einscan users to discuss and share the experience 3 3 7 About Software version information and technical support mail can be found here Drop down Menu ...

Page 21: ...20 4 Scanning cannot be entered if calibration is not done after installing the software There is a WARNING No calibration data please calibrate first ...

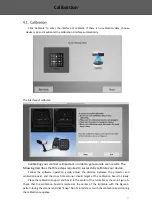
Page 22: ...essfully calibrate your device Follow the software operation guide adjust the distance between the projector and calibration board and the cross from scanner should target at the calibration board n clearly Place the calibration support and board in the center of the turntable as shown in Figure A Check that the calibration board is located at the center of the turntable with the Figure A pattern ...

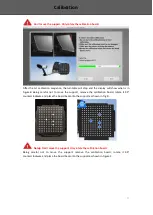
Page 23: ...l not to move the support remove the calibration board rotate it 90 counterclockwise and place the board back onto the support as shown in Fig B Note Don t move the support Only rotate the calibration board Being careful not to move the support remove the calibration board rotate it 90 counterclockwise and place the board back onto the support as shown in Figure C Calibration ...

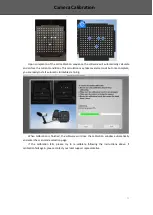
Page 24: ... once complete you are ready to start automatic turntable scanning When calibration is finished the software will close the calibration window automatically and enter the scan mode selection page If the calibration fails please try to re calibrate following the instructions above If calibration fails again please contact your local support representative Camera Calibration ...

Page 25: ...need do calibration again When the scanner is used for the first time or after long time without using When there is strong vibration during the transportation When alignment mistake or failure frequent appear during the scanning When scanning data is incomplete and quality is much worse during the scanning Calibration Precautions ...

Page 26: ...25 5 ...

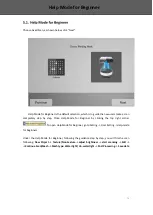
Page 27: ...r by clicking the top right corner To open Help Mode for Beginner go to Setting User Setting Help mode for beginners Under the Help Mode for Beginner following the guidance step by step you will finish a scan following New Project Texture Non texture adjust brightness start scanning Edit Continue Scan Mesh Mesh type Watertight Un watertight Post Processing Save data Help Mode for Beginner ...

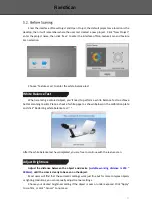
Page 28: ...ning results Place a sheet of white paper as shown below on the calibration plate and click Restarting white balance test After the white balance test has completed you are free to continue with the texture scan Adjust Brightness Adjust the distance between the object and device suitable working distance is 290 480mm until the cross is clearly to be seen on the object Most users will find that the...

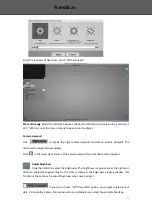
Page 29: ... display Click in the lower right corner of the camera viewport to zoom the camera viewport Adjust Brightness Drag the button to adjust the brightness The brightness is appropriate at the right scan distance equipment against objects the cross is clearly in the brightness viewing window This function is the same as the adjust brightness when new a project If you don t choose With Turntable option ...

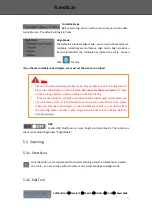
Page 30: ... to start scanning After the turntable has rotated one circle you can change with turntable or not turntable steps and align mode 5 3 2 Edit Tool Edit buttons Deselect Revert Delete Undo Show Hide Note 1 Choose turntable coded targets align mode Please make sure that the object won t block the coded targets on the turntable You can set scanner on tripod Or there will be no fringe pattern while tur...

Page 31: ...lick the button and DELETE in the keyboard to delete selected data Undo You can only undo the last deleted data Show Hide Stripes Click the button to switch the texture display and hide Non texture scan there is no such button End single piece edit Click to save data and exit the single piece edition Click delete the current scan dat After end the single piece edit the right toolbar will display a...

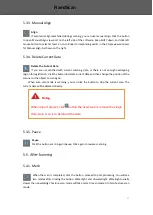
Page 32: ...the button to delete current data and then change the position of the scanner or the object to scan again When auto scan mode is scanning you can click the button to stop the current scan The current data will be deleted directly 5 3 5 Pause Pause Click the button scanning will pause Click again to resume scanning 5 4 1 Mesh When the scan is completed click the botton proceed to post processing Yo...

Page 33: ...ce or with less detail The time for data processing is in relation to the detail setting The higher the level of details is the longer time the processing takes It may keep for a long time in 95 please be patient Select the object details Unwatertight Unclosed model The following picture is the watertight and unwatertight model Watertight Unwatertight Texture watertight results FixedScan FixedScan...

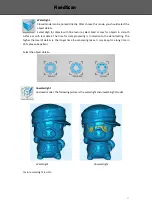
Page 34: ...atertight and watertight the post processing of the interface as shown below Unwatertight Watertight Data simplification After simplification the polygon numbers size and surface detail of data will be reduced accordingly Check the simplify check box and set the ratio the default is 100 The comparison of detail between before simplification and after simplification at 30 simplify proportion FixedS...

Page 35: ... fill the hole less than the perimeter of the hole will be filled Mark point fill hole as an example After Before Smooth The data to denoise processing improve data quality the figure before and after smoothing Note 1 If the edge of the hole is not smooth may cause the effect is not good not recommended to fill hole 2 Hole filling choose 10 100mm perimeter to fill the hole FixedScan ...

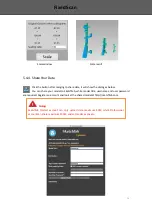
Page 36: ...fore merging can save data as asc single After merging it can be saved as asc stl ply and obj To save color texture please select Ply and obj Scale Scaling the volume of scanning data while the quantity of triangular facets and size of data will not be changed Scaling result as reference From left to right shows double size original size and half size respectively FixedScan ...

Page 37: ...s below You can share your model to Sketchfab while model title username and user password are required Register an account and look at the shared model at http sketchfab com Note Sketchfab Normal account can only upload data maximum 50M while Professional account can share maximum 200M and set model as private Fixed Scan ...

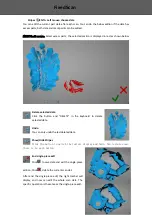
Page 38: ... down the middle mouse button pan the object Hold down the mouse wheel Scroll up and down to the object scroll down to enlarge the object Hold down the Shift left mouse button select the area on the object Delete Delete the selected area Manual align the prompt text is as follows Press and hold shift left mouse click Select point to start manual align 5 5 2 Hot Key Space button To start scan or du...

Page 39: ...rrent points and the current triangles change in real time 5 5 4 Help Click this button to get the operation manual and notes in more detail under the current step The following picture shows the help information of new project 5 5 5 Model Viewer Einscan software can be a 3d viewer for ASC OBJ STL format file Drag the 3d model to Einscan software under scanning mode interface Fixed Scan ...

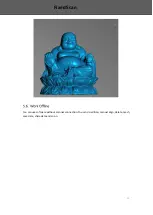
Page 40: ...39 You can use software without scanner connection You can do edition manual align delete mesh save data share data and so on Fixed Scan ...

Page 41: ...40 6 ...

Page 42: ...fails without mark points when the turntable has rotated several circles or when it is under f ixed scan mode Solution Try to make sure there are at least 1 3 overlap between the current scan area and the previous scan area and the object surface should be featured For objects which are symmetric and without rich features using mark points or manual merger is recommended 3 How to scan objects in t...

Page 43: ...42 7 ...

Page 44: ...queeze it Prepare precautions like sunscreen rain proof shock proof and etc No matter on sunny or rainy days If the device could not function correctly fixing the device by opening it by yourself is not allowed The device shall be repaired by professional technicians or under their instruction You should send the device to facilities with qualification for recycling it instead of dropping into the...

Page 45: ...44 8 ...
Page 46: ...45 Contact us Email einscan_support shining3d com More scanning information More scanning information can refer to http www einscan com Support Help ...

Reviews: