background image

13 


EinScan HX User Manual 


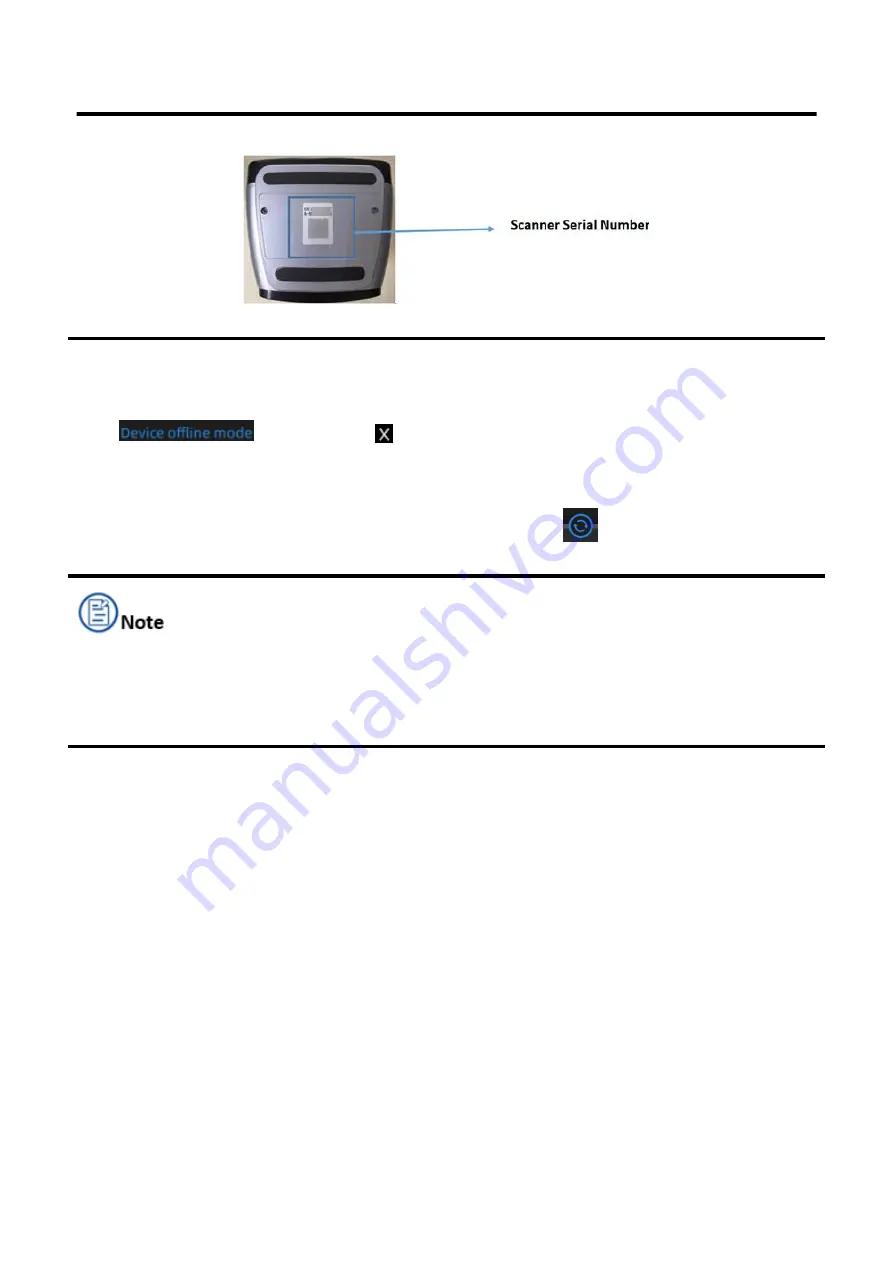
Figure 2-4 Serial Number 


2.4.4 Device Offline Mode 

Click 

  or close button

  to enter the offline-mode operating interface.   

Offline mode only supports importing and processing projects with scanned data, while it does not 
support calibrating and scanning operations.   

To connect device under offline mode, click the reconnect button 

  to re-enter the shining pass 

interface . 


Once log in successfully, your account

s information will be saved for auto login.   


After login and entering the operating interface successfully, if the scanner is disconnected, 
EXScan system would enter the offline mode automatically. 


Summary of Contents for EinScan HX

Page 1: ... www shinging3d com If you have any further questions or comments also feel free to contact us we heartily provide customers the best products and service Disclaimer SHINING 3D TECH CO LTD OWNS COMPLETE INTELLECTUAL PROPERTY OF THIS MANUAL WITHOUT THE COMPANY S WRITTEN CONSENT IT WOULD BE ILLEGAL TO COPY PLAGIARIZE ADAPT OR DEDUCT THE WORK IN ANY FORM WITH ANY PURPOSE THE WARRANTY AND THE SERVICE ...

Page 2: ...formation as the emphasis and supplement to the text Indicates a potential risk which if not avoided could result in property damage data loss lower performance or unpredictable issues The safety instructions that you must precisely follow to avoid injury Failure to observe can cause damages to your product or result in personal injuries ...

Page 3: ...ter 10 2 4 2 Login to Activate Online 11 2 4 3 Offline Activation 11 2 4 4 Device Offline Mode 13 2 5 Upgrade 14 2 5 1 Upgrade Hardware 14 2 5 2 Upgrade Software 15 3 Operation 16 3 1 Calibration 16 3 1 1 Caution 16 3 1 2 Standard Calibration 18 3 1 3 Quick Calibration 20 3 1 4 Laser Calibration 21 3 1 5 White Balance 22 3 2 Preparation 23 3 2 1 Scanned Objects 23 3 2 2 Operating Buttons 25 3 2 3 ...

Page 4: ...Marker Alignment 51 3 5 4 Manual Marker Alignment 52 3 6 Mesh 54 3 7 Post Processing 57 3 7 1 Simplification 57 3 7 2 Mesh Optimization 58 3 7 3 Smooth 59 3 7 4 Remove Small Floating Parts 60 3 7 5 Fill Holes 60 3 7 6 Texture Remapping 63 3 7 7 Flip Normal 64 3 7 8 Cutting Plane Tool 65 3 7 9 Mirror 65 3 8 Measurement 66 3 8 1 Create Features 66 3 8 2 Movement 68 3 8 3 Measure 70 3 9 Export Data 7...

Page 5: ...4 EinScan HX User Manual 3 9 5 Preview Model 76 3 10 Other Operations 78 Support and Contact 80 Submit a Ticket 80 Contact Us 81 ...

Page 6: ...onvenient handheld operation EinScan HX is mainly applied in the industry such as automobile manufacturing aerospace and machinery manufacturing It applies the LED structure light and laser which enables repeating high precision scanning to various kinds of industry materials All in all EinScan HX is a cleverly designed tool covering various needs by balancing both quality and efficiency of scanni...

Page 7: ...re 1 2 Assembly Diagram Electrical Plug scanner Connection Plug scanner Electrical Connections Electrical Plug power adaptor USB Plug aviation cable Plug Adapters Steps 1 Connect and with the scanner 2 Connect 3 Put into the socket 4 Connect to PC USB 3 0 port ...

Page 8: ...7 EinScan HX User Manual Ensure that all the cables are not loose during the scanning operation You are suggested to use fastening tools to prevent the device from being offline ...

Page 9: ...64 bit I7 8700 NVIDIA GTX RTX series cards higher or equal to GTX 1080 32GB 4G 2 3 Install Software Steps 1 Download the installation package 2 Go to https www EinScan com support download and select your scanner model or simply copy the installation package from the USB 3 Double click the installation package agree the modification to computer and terms then follow the instructions to complete in...

Page 10: ...information and software register for a free account after software installation or from passport shining3d com Before getting shining pass ensure that the device has been connected properly refer to Connect Cables Registration is required to activate your scanner ...

Page 11: ...ouble click to enter the software Register for an account firstly if you do not have a Shining 3D user account 1 Click or go to https passport shining3d com signup for register there will be a pop up Figure 2 1 Register or Login from Softeware ...

Page 12: ...s finishing the online activation 2 4 3 Offline Activation If the computer on which the software is installed cannot be networked you can use Activate Offline to complete activation To start offline activation you need the following Another computer connected to the internet USB disk or a portable hard disk to transfer files between the computer with software and the internet connected computer Of...

Page 13: ...successfully 1 Import the saved C2V file in the disk 2 Export V2C file Export V2C file corresponding to the account to the disk 6 Return to the computer on which the software is installed Click Import to save V2C file from disk to the computer Then the scanner is fully activated If the activation fails just contact us through the mailbox EinScan_support shining3d com Send us the serial number of y...

Page 14: ...h scanned data while it does not support calibrating and scanning operations To connect device under offline mode click the reconnect button to re enter the shining pass interface Once log in successfully your account s information will be saved for auto login After login and entering the operating interface successfully if the scanner is disconnected EXScan system would enter the offline mode aut...

Page 15: ...re that the device stay powered on during the whole process of upgrade It is suggested to back up the original firmware in case of the upgrade failure or the coming version being unsatisfying Upgrading Process Firmware updating will take around 6 minutes Power off the device and exit the software after upgrading successfully Reconnect the device and reopen the software the device is running under ...

Page 16: ...nder prompting update will pop up immediately after opening the software Steps 1 Click Yes to update Figure 2 6 Update Warning 2 Click Download Now to download the installation package Figure 2 7 Update Reminder 3 When the download is completed there will be a pop up click Yes to start installing Do not close the software or unplug the power supply during download ...

Page 17: ...h causes no harm to human body such as eyes and skin under the normal operating situation However avoiding direct eye contacts with the laser beam and keeping the scanner away from children are still commanded for your own safety 3 1 1 Caution EXScan system enters the calibration interface directly as being opened for the first time Users can also click Calibration on the navigation bar for switch...

Page 18: ...oard Keep the calibration board away from the corrosive fluid metals and sharp objects to avoid unexpected corrosion or damages It is not recommended to wipe the calibration board When cleaning the board becomes very necessary gently wipe it with a piece of clean moisture cloth Do not wipe the calibration board with chemicals or alcohols After using the calibration board put it in a flannel bag fo...

Page 19: ... to the black line frame Figure 3 2 Calibration Board 3 Hold the scanner face to the center of board in upright position Move the mark into the white line frame Figure 3 3 Preview of the Calibration Board 4 Press the play button on the scanner Keep adjusting the distance between the scanner and the calibration board by moving the scanner horizontally from near to far slowly until all the color bar...

Page 20: ...t angle Follow the operation instructions on the interface to complete the calibration for the following 5 positions Table 3 1 Five Angles for Calibration Position 1 Position 2 Position 3 Position 4 Position 5 6 After finishing the standard calibration click Next on the following pop up for entering the LASER CALIBRATION Figure 3 5 Calibration Succeeded ...

Page 21: ...l expectation after completing the standard calibration Quick calibration s operating process is like the standard calibration while it requires one position only Figure 3 6 Preview of the Calibration Board After finishing the quick calibration click Next on the following pop up for entering the LASER CALIBRATION Figure 3 7 Quick Calibration Succeeded ...

Page 22: ...scanner face to the center of board in upright position 3 Keep moving the scanner up and down slowly until all the color bars turn green which means that all the required distances have been captured Figure 3 8 Laser Calibration 4 After finishing the laser calibration click Next on the following pop up for entering the white balance Figure 3 9 Laser Calibration Succeeded ...

Page 23: ...e to the center of board in upright position 3 Keep moving the scanner up and down slowly until the scanner takes a photo automatically which indicates that the distance is just being optimal Figure 3 10 White Balance Interface 4 After finishing the white balance calibration click Next on the following pop up for entering the scan mode Figure 3 11 White Balance Succeeded ...

Page 24: ... features Add features on the surface manually by drawing markers Texture alignment Surfaces with few features Stick markers on the surface and within its edge Global marker alignment Here are some basic rules for sticking markers Read them carefully before operating Markers should be stocked randomly but evenly Avoid sticking in regular The number of markers stocked on the aligning common area sh...

Page 25: ...EinScan HX User Manual 24 Figure 3 12 Different Ways of Sticking Markers ...

Page 26: ...EinScan HX User Manual 25 3 2 2 Operating Buttons Operating Buttons on the Scanner Figure 3 12 Scanner Operating Buttons within the EXScan Preview Play Pause ...

Page 27: ...EinScan HX User Manual 26 3 2 3 Workflow ...

Page 28: ...ing speed 20FPS 55FPS Texture Scan Available Non Available Scanning objects Ordinary objects Industry products Advanced Mode 1 Advanced mode is unchecked by default 2 The advanced mode can be turned on off only after the scan mode being selected 3 The point distance adjusting function in advanced mode is only applicable to laser scan mode 4 When advanced mode is unchecked the point distance range ...

Page 29: ...e under rapid scan mode such as features aligning markers aligning global markers aligning and hybrid aligning And the texture feature of the scanned surface can be captured when scanning under this mode Hybrid alignment mode allows sticking markers on the surface without extinguish feature so that there is no need to stick markers all over the object which saves lots of time compared to laser Sca...

Page 30: ...e project file Figure 3 17 Select Project Storage Location 3 Select a mode and set parameters before scanning Select Texture Texture scan requires colorful texture surface for adding color information to the scanning data and is only available in rapid scan mode after completing the white balance calibration As it takes longer time for data processing when meshing notice that move the scanner slow...

Page 31: ... detail in Scanned Objects Read it carefully before scanning Markers alignment mode is not suitable for scanning objects with dark colored surface Feature Alignment This mode aligns the data automatically by analyzing the geometric features of the object during scanning Rich features on the object are required for this mode Track lost may happen if there is not enough common area captured in neigh...

Page 32: ...ag the cursor for adjusting the point distance which suggests the distance between points of clouds Noted that higher resolution is required for scanning delicate objects such as gears Table 3 4 Resolution of Laser Scan and Rapid Scan Resolution Laser Scan Laser Scan under advanced mode Rapid Scan Scope 0 1mm 3 0mm 0 05mm 3 0mm 0 25mm 3 0mm High Detail 0 2mm 0 7mm Medium Detail 0 5mm 1 0mm Low Det...

Page 33: ...ew The software enters preview mode every time a new project being built an existed project being imported or restart scanning after a pause Click Start in software or press the Play button on scanner to exit the preview mode and start scanning If there is a pop up of Tracking Lost on the interface just face the scanner to those currently captured regions the green colored ones or the regions with...

Page 34: ...oth reveal the distance between the scanner and the object The light turns green under optimal distance while it turns red or blue as the distance being too close or too far Table 3 5 Distance Color Too close Optimal Too Far Distance color bar Distance color on the scanner Check Brightness Adjust the brightness by clicking or on the scanner or dragging the brightness bar on the preview window to t...

Page 35: ...geometry Not Check Plane Detection Turning off plane detection enables scanner to scan flat surface while misalignment may happen Texture Flashing Texture flashing is only available under texture scan mode and is designed for improving the uniformity of the texture in scanning result with continuous Led flashing It is highly recommended to turn on this function or you need to make sure there is am...

Page 36: ... the Trigger to run into the preview mode 2 Click the Trigger again or click Play to exit the preview mode and start the scan Find proper distance and brightness according to the environment as well as object itself during scanning 3 Click Pause on the interface or the Trigger to pause scanning The data will be automatically saved in the project file ...

Page 37: ...the objects to be scanned ranges from 300mm3 to 4m3 Laser scan allows marks alignment only so it is necessary to stick markers properly previous operation And the laser line is not to be projected when markers are not recognized Check Preparation for more information of laser scan preparation Figure 3 23 Marks on the Object ...

Page 38: ...resolution the better the details However higher resolution may lead to larger files and longer processing times Higher resolution is required as scanning delicate objects such as gears Click High Detail Medium Detail or Low Detail for choosing presetting resolution parameters or drag the cursor for adjusting the point distance which suggests the distance between points of clouds The maximum size ...

Page 39: ...djust parameters to an optimal level accordingly Data is not to be record during Preview The software enters preview mode every time a new project being built an existed project being imported or restart scanning after a pause Click Start in software or press the Play button on scanner to exit the preview mode and start scanning If there is a pop up of Tracking Lost on the interface just face the ...

Page 40: ...inder on the left side both reveal the distance between the scanner and the object The light turns green under optimal distance while it turns red or blue as the distance being too close or too far Table 3 8 Distance Color Too close Optimal Too Far Distance color bar Distance color on the scanner Check Brightness Adjust the brightness by clicking or on the scanner or dragging the brightness bar on...

Page 41: ...EinScan HX User Manual 40 Table 3 9 Preview Too bright X Good ...

Page 42: ...nned global markers to the original global markers switch to Scan Point Cloud mode and click Add Global Markers Scan Global Markers Scan markers is usually applied for completing existed global markers data as only scanning the markers the scanner is able to capture the data swiftly without projecting laser line Switching to scanning markers or importing global markers files after scanning point c...

Page 43: ...ptimize Point Clouds Check this option so that the system will optimize the point clouds data automatically Local Enlarged View Check this option to enter the 3D enlarged view by checking the detailed scanning data users can find the missing part and complete the its data in time Entering the preview mode or scan mode with Local Enlarged View on the scanned data would be presented within a rather ...

Page 44: ...to run into the preview mode 2 Click the Trigger again or click Play to exit the preview mode and start the scan Find proper distance and brightness according to the environment as well as object itself during scanning 3 Click Pause on the interface or the Trigger to pause scanning The data will be automatically saved in the project file ...

Page 45: ...after clearing all the data by the function of edit the data will recover once re scanning When editing one or more projects it is needed to select those projects from the project list The data of project turns blue once being selected 3 4 1 Generate Point Clouds Click to generate point clouds The point clouds is a collection of the point data describing the surface of scanned object in 3D coordin...

Page 46: ...n of the arrow can also be saved the newly scanned data cannot be added to it Figure 3 30 Example Steps 1 Click to enter cutting plane interface 2 Choose a create method Create a cutting plane by fitting point cloud Press down Shift and Left mouse button to select point cloud data those selected data is to form a cutting plane Create cutting plane by straight line Press down Shift and Left mouse b...

Page 47: ...e of the plane and press the arrow for moving the plane 2 Dragging 4 cursors or entering certain numbers to adjust the angle and position of cutting plane precisely 3 Check Delete Selected Data then the red regions will be deleted 4 Click Invert to select opposite regions 5 Click Delete Plane to delete the current cutting plane 4 Click right mouse button for hiding cutting plane or canceling the h...

Page 48: ...ctive projection The distance to each edge of the object is equal Connected Domain Select all of connected data to edit To delete the redundant data and noise select one part of them click Connected Domain button to select all of connected garbage data and then delete The initial data will be cleared once the processing is confirmed Shortcut Keys Table 3 10 Instruction for Shortcut Keys Shortcut k...

Page 49: ...s Remove the project Delete the selected project s Pop up the project tree Save data in asc or p3 format manually Enter Manual Alignment Click the right mouse button on the project in the project tree for various operations The current project is the last one listed on the project tree and is always the one to be added newly scanned data Reopening a previous project can turn it the current one ...

Page 50: ... multiple scan data are combined into a whole set of point cloud data thereby effectively solving the problem of incomplete data collection When more than two project files are present in the project tree and scanned point cloud data is in those project files the project can be aligned Click on the right side of the interface to enter the project alignment interface Figure 3 35 Alignment If the pr...

Page 51: ...t As it is difficult to obtain the integrated data at one time repeating multi angle scanning is necessary Aiming at combining all those point cloud data into one manual alignment captures the overlapping area through recognizing the similar features and then aligning the point cloud data intelligently Manual alignment is a supplement to feature alignment which can solve the problem of feature ali...

Page 52: ... 3 37 Manual Alignment 3 5 3 Marker Alignment If the currently selected project is a marker point project the marker point alignment can be performed It is necessary to ensure that the two projects have no less than 3 common marker points each other otherwise the alignment will fail The software will automatically align according to the mark points Please spray powder on the surface of the black o...

Page 53: ...ects will be merged into a group which can be further aligned Cancel Undo the completed alignment Exit Exit the alignment interface 3 5 4 Manual Marker Alignment Select two project files and manually select multiple 3 marker points for alignment The selected marker points will be cleared after aligning Press Ctrl Z to cancel the selected marker points one by one ...

Page 54: ...EinScan HX User Manual 53 Figure 3 39 Manual Marker Alignment ...

Page 55: ...ted click to create mesh 2 Choose the type of mesh Watertight or Unwatertight All holes will be filled automatically The data can directly be 3D printed Unclosed model stays the way it is scanned Processing time is quicker than Watertight Figure 3 40 Watertight Unwatertight Through the toolbar on the left you can simplify optimize remove small floating parts remove spike and fill marker hole If th...

Page 56: ...and optimize the data at the filter level Low Med and High Remove small floating parts Remove small floating parts on the model Max triangles Set max plate number to get mesh model s triangle plate number is within configured plate number Fill small hole For objects with tiny holes larger than 10 mm use the function to fill tiny hole to make the scanned image look better For objects with holes sma...

Page 57: ...EinScan HX User Manual 56 4 Click Apply to mesh ...

Page 58: ...ctly drag the file in STL OBJ PLY into the measurement interface Shift LMB left mouse button Select unwanted data and the selected data will be displayed in red Ctrl LMB left mouse button Deselect a selected region Table 3 13 Icons on Post Processing Icon Name Description Select Visible To select data on the front view only Select Through To select data all though Texture Remapping Refer to Textur...

Page 59: ...cation the result will not be added It will always operate on the original data The comparison of detail between before simplification and after simplification at 70 simplify proportion Before simplification After simplification Figure 3 43 Simplification 3 7 2 Mesh Optimization Mesh optimization can optimize the quality of the data by adding more triangles to curvature regions There are 3 ratio o...

Page 60: ...s on Mesh Optimization the result will not be added It will always operate on the original data 3 7 3 Smooth Smooth the possible noise on the surface of the scan data It might remove some small details or smooth some sharp edges at the same time Set the ratio from 1 to 100 the default is 0 Figure 3 45 Smooth Menu The example of before and after smoothing is shown below Run 2 times data will be smo...

Page 61: ...loating part 100 Figure 3 47 Remove Small Floating Parts Click Apply to remove floating part preview the result of current settings Click Confirm to remove floating part Click Cancel to quit and go back to the original data Multiple operations on Remove floating part the result will not be added It will always operate on the original data 3 7 5 Fill Holes Due to the loss of point cloud data in som...

Page 62: ... for the hole filling considering the point position on the boundary TANGENT calculates the solution considering the point position and the normal of the last row of triangles forming the boundary CURVATURE calculates the solution considering the point position and the normal of the 2 last rows of triangles forming the boundary Figure 3 49 Effect of Curvature Tangent or Flat Click Apply to auto fi...

Page 63: ...fore picking a hole Figure 3 50 Manual hole filling Click the edge of the hole to fill it Click according to the order of filling holes from the last hole to cancel hole filling Ctrl Z can also cancel hole filling Click Confirm to apply Click Cancel to quit and go back to the original data The data will not be automatically saved after the post processing saving the post processing data manually i...

Page 64: ...scanned data will affect the texture render By doing the texture remapping the texture information will be reapplied on the mesh Fill Holes Simplification Texture Remapping Figure 3 52 Texture Remapping Choose Texture Layout Optimization TLO to create an optimized arrangement for the texture file It will make the texture manual editing much more convenient if you are going to process the texture i...

Page 65: ...contrast are reset to 0 3 7 7 Flip Normal To redefine the front direction of the scanned data in reversal design After the normal is flipped the texture remapping cannot be performed You should complete the texture remapping before performing the flip normal Select the part of the grid that needs to be flipped by clicking Select Through the mode is enabled by default All the parts are flipped by d...

Page 66: ...scan data that coincides with the created plane Delete selected area delete the red area 4 Click Orient Based On Plane the scanning model will be readjusted according to the direction of the plane arrow 5 Click Apply to delete the red area 6 Click Confirm to save the current result and close the Cutting Plane Tool window 3 7 9 Mirror Mirror the mesh through a plane defined by a straight line After...

Page 67: ... Features Click feature to display the menu click again to close the menu Feature Menu Display of Features Figure 3 56 Click on the corresponding icon to create points lines planes Then select the creation method and follow the instructions click Create to generate or Close to cancel and close the window The features created displaying in gray the selected feature is in Red In the feature list cli...

Page 68: ...repeat for the second plane The created line is the intersection between the 2 non parallel planes Feature creation failed Error code 1 the planes are parallel Plane 3 Points Fit The plane is generated by 3 points not co linear Click on the data to select one point or click on a previous created feature point In the Choice list select one of the points to reselect it Feature creation failed Error ...

Page 69: ...ta Figure 3 57 Exact Movement Menu Offset Enter the coordinates of the object data center in the X Y and Z axes and click the Move to button to make the data center consistent with the input coordinates Rotation Enter the coordinates of the object data center in the X Y and Z axes and click the Move to button to make the data center consistent with the input coordinates Make sure that the X Y and ...

Page 70: ...e system to be aligned That is the normal of the selected plane corresponds to the coordinate axis the selected feature point corresponds to the origin Select a feature surface in the plane drop down menu and select an axis in the corresponding constraint drop down menu of the plane The arrow on the plane corner indicates the positive direction of the plane and the selected axis direction will be ...

Page 71: ...formation 3 8 3 Measure Click button to display the menu click again to close the menu DISTANCE This tool calculates the distance between two points belonging to the surface of the data Click on the data to pick the first and second point select one of the two points to redo it Figure 3 60 Distance menu Total is the 3D distance X Y and Z are the projection of the segment to the respective planes S...

Page 72: ...ected data in mm 2 Redo the selection and click Calculate again to update Figure 3 61 Surface area menu VOLUME This tool calculates the volume contains in a watertight mesh It returns the volume in mm 3 and the coordinates of the smallest box parallel to the global coordinates containing all the data Figure 3 62 Volume Menu Figure 3 63 File Notwatertight Alert ...

Page 73: ...nScan HX User Manual 72 Enter exit the measurement interface Click Measurement to enter the measurement interface and display the measurement menu click the button again to exit the measurement interface ...

Page 74: ... 3 64 Save Folder Table 3 15 Format Types of data Save as Recommendation ASC whole piece Optimized point cloud scan asc Check the data Quick export no need for post processing for handheld scanning Post processing can be done through other software STL Mesh data scan stl 3D printing Reverse designing Compatible with most post processing software OBJ Mesh data scan obj scan jpg scan mtl Used in art...

Page 75: ...f data will not be changed The result of data size scaling is as shown in the figure above from left to right the size is doubled the original size and the size is half By default the scale is 100 and will be exported with millimeters for reference If you need to use inches you can enter Scale Data or process it in third party software be careful to avoid double scaling 3 9 3 Share Data Click afte...

Page 76: ... with one click Geomagic Control X Export data to Geomagic Control X Mainly used for inspection If the GeomagicControl X software has been installed clicking this button will open the Geomagic Control X software and import the mesh data Verisurf Export data to Verisurf If Verisurf software has been installed clicking this button will open the Design with Verisurf and import the encapsulated stl da...

Page 77: ...Edge SHINING 3D Edition and import the encapsulated stl data into Solid Edge SHINING 3D Edition The third party software should be installed and activated in advanced Solid Edge Shining 3D Edition is included in the scanner Please follow the license card to activate the software The rest above mentioned software are not included Please contact us if you are interested to buy 3 9 5 Preview Model Do...

Page 78: ... can be loaded files from 3rd party software might fail to be loaded In this case we recommend Meshlab a free mesh software editor or upload to sketchfab To load a OBJ textured file make sure to have the MTL and JPG files with the same name and in the same folder than the OBJ ...

Page 79: ...uality and user experience of device we hope to be allowed to collect usage experience information This information will not contain your personal information or scanned data and will not be accessible to any third party The User Experience Enhancement Program will continuously keep you informed with the newest software update information to assure you get free software updates and enjoy the lates...

Page 80: ...ed software release information contact information etc Open help mode Open the real time help file Teamviewer The quick access to remote assistance Send the ID and password in the pop up window to the technical supporters for remote assistance ...

Page 81: ... and Contact Submit a Ticket Sign up in Shining 3D EinScan Support Platform support einscan com or send an email directly to einscan_support shining3d com Login with your account Click Submit a ticket on the tab bar to submit a ticket ...

Page 82: ...s SHINING 3D Tech Co Ltd Hangzhou China Phone 86 571 82999050 Add No 1398 Xiangbin Road Wenyan Xiaoshan Hangzhou Zhejiang China 311258 EMEA Region SHINING 3D Technology GmbH Stuttgart Germany Phone 49 711 28444089 Add Breitwiesenstraße 28 70565 Stuttgart Germany Americas Region SHINING 3D Technology Inc San Francisco United States Phone 1 415 259 4787 Add 1740 Cesar Chavez St Unit D San Francisco ...

Page 83: ...EinScan HX User Manual 82 ...

Reviews: