64
a
Programming
This chapter explains how to program various items.
Before you start programming, press the
j
key and select the "6 PGM MODE" or "7 SD CARD MODE"
by using the
I
key and press the
A
key.
Basic Instructions
This section illustrates the basic programming by using an example of programming for departments.
■
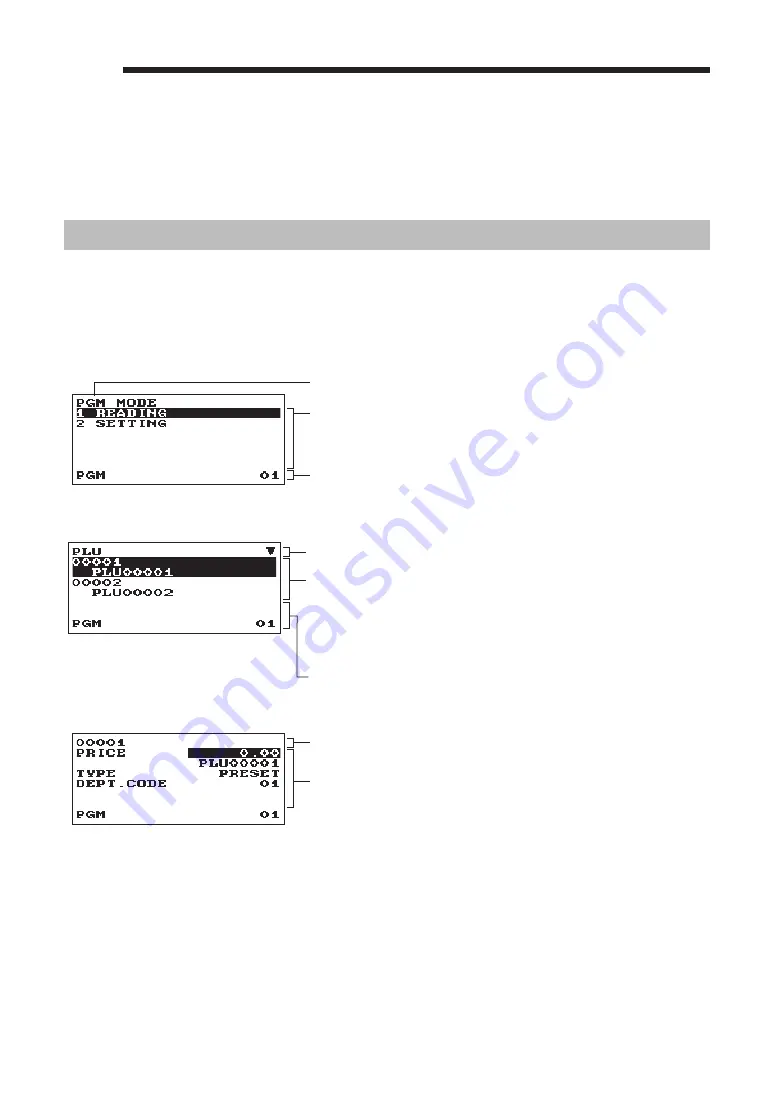
Programming screen
Opening screen: When you select the "6 PGM MODE", your display will show a programming opening
screen corresponding to the mode you selected.
Mode you are in
Numeric entry and status information area
Programming menu: Use the cursor keys or numeric key to select
an option, and press the
A
key.
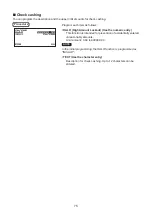
Code selecting screen (Dept. PLU):
Selected menu
Numeric entry and status information area
Code number and its description
(In case of PLU, two lines are used for one code, upper line -
code, lower line - description.)
Use the cursor keys or numeric keys to select an option, and
press the
A
key.
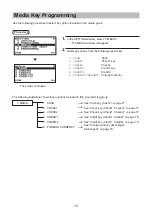
Programming screen:
Selected code
Setting items:
Use the cursor keys to select an item.
To select an option, follow the instruction shown below.
Numeric entry: Use numeric keys
Character entry: Use character keys
Selective entry: Press
.
key to toggle options or press the
z
key to show the option list. Use the
cursor keys to move the cursor and press the
z
or
A
key to select it.
Summary of Contents for XE-A177
Page 9: ...9 Rear view XE A207W XE A207B XE A217W XE A217B Customer display RS232 ...
Page 12: ...12 Keyboard XE A217W XE A217B Keyboard layout Programing keyboard layout ...
Page 109: ...109 Function Text PGM mode Report type Function Text ...
Page 111: ...111 Optional PGM mode Item Setting Report type ...
Page 112: ...112 Report PGM mode Report type Setting Item Message PGM mode Report type Receipt logo text ...
Page 132: ...132 ...
Page 134: ......


