


52
E
Customizing the Settings
You can customize various settings of this software.
The settings are the same in both whiteboard mode and overlay mode. However, the contents of the screen will vary depending
on which mode is started.
TIPS
• If “Share software settings with all users” is selected during installation, the settings will be the same for all users.
1. Touch the “Settings” button (
) on the toolbar.
2. Set the options as necessary. (See below.)
3. When you finish adjusting the settings, touch “OK”.
n
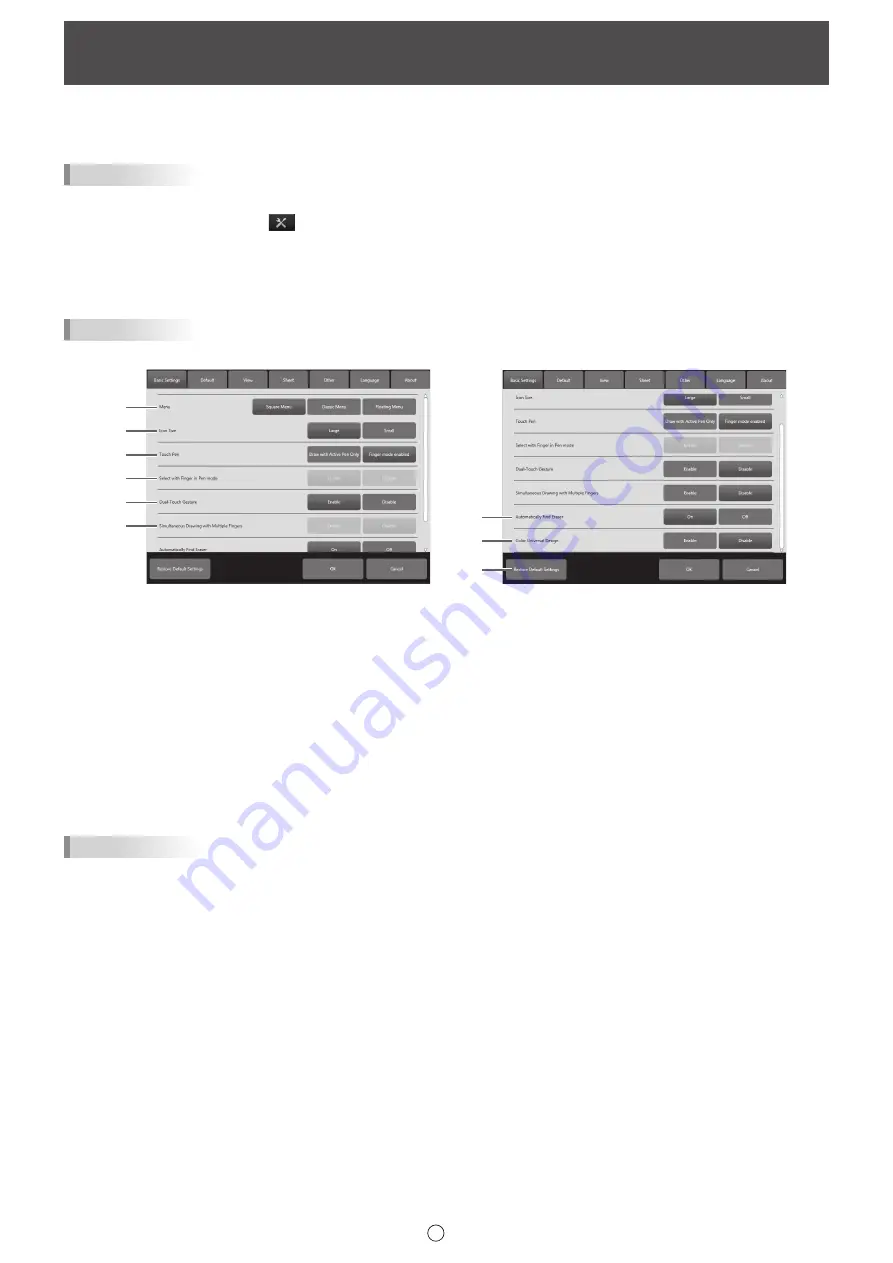
Basic Settings
TIPS
• When this software is restarted or new boards are created / added, setting will be reflected.
(1)
(2)
(3)
(4)
(5)
(6)
(7)
(8)
(9)
(1) Menu
Select “Square Menu”, “Classic Menu” or “Floating Menu” for the menu format. (Page 8, 9, 10)
(2) Icon Size
Set the icon size to “Large” or “Small” in the square menu and classic menu.
(3) Touch Pen
Select the pen to use from “Draw with Active Pen Only”, “Finger mode enabled”.
Select “Finger mode enabled” when using a passive pen or finger.
“Draw with Active Pen Only” cannot be selected if a model that can use these functions is not connected when the Pen
Software is launched.
To use multiple models, set to “Finger mode enabled”. In this case, the “2 button pen” and “3 button pen” functions cannot
be used.
Available items vary according to the models.
TIPS
• If a different model is also connected, “Draw with Active Pen Only” will not operate correctly. Use “Finger mode enabled”.
(4) Select with Finger in Pen mode
When using an active pen, this can be set when “Touch Pen” is set to “Draw with Active Pen Only”. When set to “Enable”,
you can touch an object to select that object.
Summary of Contents for PN-L602B
Page 63: ...V3 5 EN 17B 1 ...


