12
E
Connecting Peripheral Equipment
Caution
• Be sure to turn off the main power switch and disconnect
the plug from the power outlet before connecting/
disconnecting cables. Also, read the manual of the
equipment to be connected.
• Be careful not to confuse the input terminal with the output
terminal when connecting cables. Accidentally reversing
cables connected to the input and output terminals may
cause malfunctions and the other problems.
• Do not use any cable that has a damaged or deformed
terminal. Using such a cable may cause malfunctions.
• Images may not be displayed properly depending on the
computer (video cards), cables, or peripheral devices to be
connected.
TIPS
• The audio input terminals used in each input mode are
factory-set as follows.
Input mode
Audio input terminal
(Factory setting)
DisplayPort
DisplayPort input terminal
HDMI1 [PC], HDMI1 [AV]
HDMI2 [PC], HDMI2 [AV]
PC/AV HDMI input terminal
Connection with a PC or AV equipment
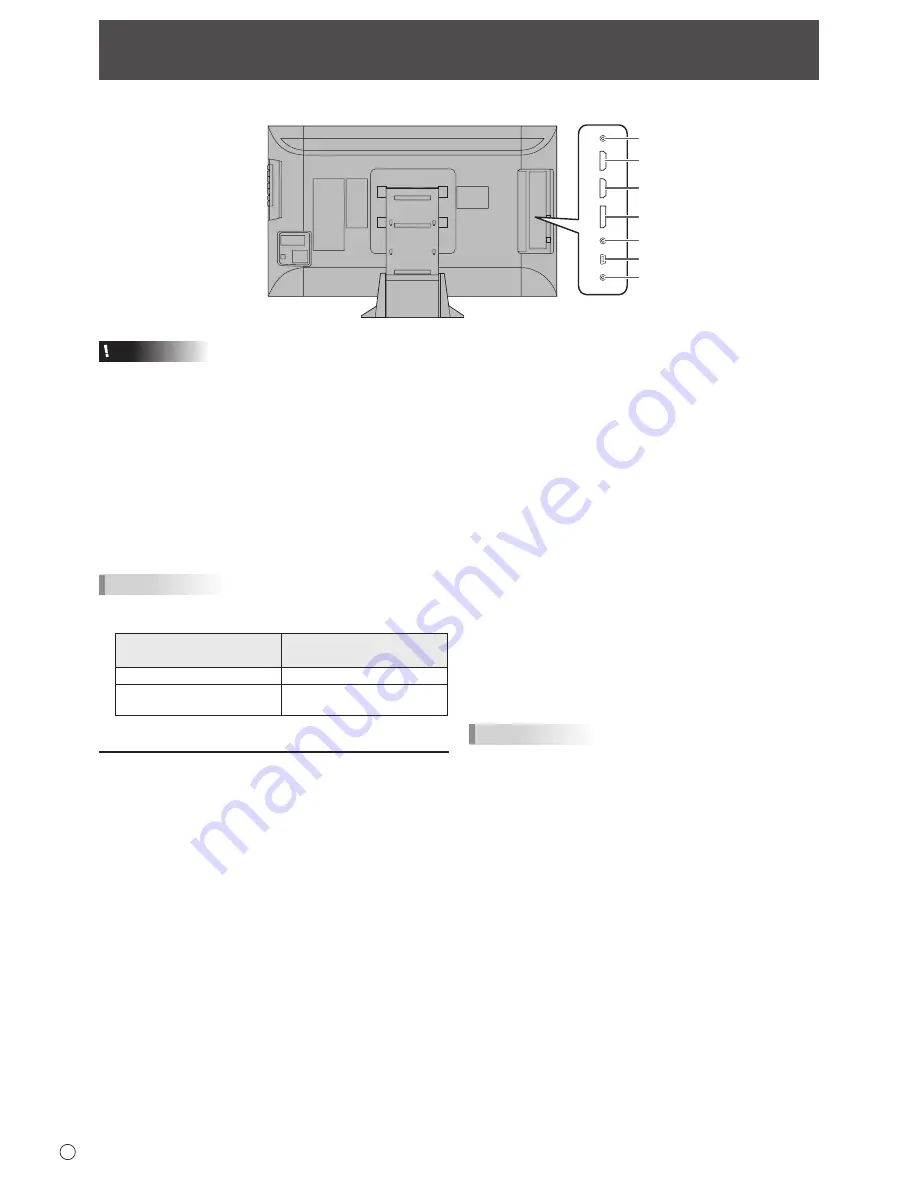
1. RS-232C input terminal
• The monitor can be connected to a PC using the RS-
232C conversion cable (supplied) and a commercially
available RS-232 straight cable to control the monitor
from the PC.
2. PC/AV HDMI1 input terminal
3. PC/AV HDMI2 input terminal
• Use a commercially available HDMI cable (High Speed
cable compliant).
• Set HDMI1, HDMI2, or HDMI DUAL in INPUT SELECT
on the SETUP menu according to the device to be
connected.
• Select the audio input terminal to be used in HDMI1
[AV], HDMI1 [PC], HDMI2 [AV], or HDMI2 [PC] of AUDIO
SELECT on the SETUP menu.
When HDMI1 or HDMI2 is selected, connection to the
audio input terminal is unnecessary.
4. DisplayPort input terminal
• Use the supplied DisplayPort cable.
• Select the audio input terminal to be used in DisplayPort
of AUDIO SELECT on the SETUP menu.
When DisplayPort is selected, connection to the audio
input terminal is unnecessary.
* Use the supplied cable.
*
If you need to extend the cable, consult your dealer.
5. Audio input terminal
• Use a commercially available audio cable (mini stereo
jack) without resistance.
• Set the audio input terminal used for each input mode in
AUDIO SELECT on the SETUP menu.
6. USB (mini-B) port
• To use the touch panel, connect the touch panel to your
computer with the provided USB cable.
7. Headphone terminal
• Use commercially available headphones (mini stereo
jack).
• The output sound varies depending on the input mode.
• The volume can be adjusted using the volume adjustment.
TIPS
• The length of the signal cables or surrounding environment
may affect the image quality.
• Video output is disabled in the following cases:
When the power is turned off
When the monitor is in input signal waiting mode
1
2
3
4
5
7
6
Summary of Contents for PN-K322B
Page 1: ...PN K322B LCD MONITOR OPERATION MANUAL ...
Page 2: ......
Page 41: ...PN K322B Ma EN13F 1 ...


