background image

-50-

Summary of Contents for PC-1600

Page 1: ...guration 3 4 PC 1600 block diagram 4 5 Memory mapping 7 6 Power supply 11 7 System operation 11 8 Service precations 15 9 LSI pin descriptions 20 10 Connection locations and interface signal identification 35 11 Circuit diagram and P W B parts signal position 39 12 Parts list and parts gued 57 CE 1600P 63 CE 1600F 98 CE 1600M 105 CE 1600L 110 CE 1601L 111 CE 1602L 112 CE 1603 L 113 CE 1604L 114 SH...

Page 2: ...l name PC 1600 Keyboard layout PC 1600 Memory modules usable CE 151 155 159 and 161 The CE 150 does not meet the upper grade corn patibility test for software that uses the REM 1 because of a functional restriction on the PC 1600 optional printer CE 1600P since the CE 150 has two data recorder remote control terminals REM O and REM 1 1 2 Implementation of functions that were not feasible with the ...

Page 3: ... name PC 1600 Keyboard layout PC 1600 Memory modules usable CE 151 155 159 and 161 The CE 150 does not meet the upper grade corn patibility test for software that uses the REM 1 because of a functional restriction on the PC 1600 optional printer CE 1600P since the CE 150 has two data recorder remote control terminals REM O and REM 1 1 2 Implementation of functions that were not feasible with the P...

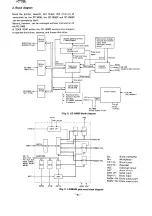
Page 4: ... trigonometric function logarithm exponential angular conversion power raising square root integral absolute value signum circle ratio Edit functions Horizontal cursor movement control CTR L character key I Insertion INS deletion DEL CTRL character key Une up and down i t Fig l Interrupts Timer interrupt RS 232C interface interrupt analog input interrupt function key interrupt Interfaces RS 232C i...

Page 5: ...E 155 I CE 159 I CE 161 PC 1600 CE 1600L Optical Optical Serial Port Fiber Cable __ o c Analog Input Port 8 RS 232C I Serial Port I I CE 152 J Cassette Recorder 16L __Die CE 1601L Cable CE 1602L Cable CE 1603L Cable CE 1604L Cable CE 150 Printer with Cassette Interface NOTE The PC 1600 option CE 1600P cannot be used in conjunction with the PC 1500 option CE 150 CE 158 CE 162 CE 515P Printer I r CE...

Page 6: ... ON J UART I J 5UB CPU RE5ET I t ___ ON I KEYBOARD r BX7269W J CONVERT I ANALOG IN __ 2 B U 5 5 L o T 1 5 L o T 2 5 I o R 5 I 2 3 2 C 3 58MHz Z 80 BU5 I r CGC L Z 80 LH I F J 1 I I 1 LH 5810 Interrupt Memory 1 0 control compatible control control J J 1 r L O MAIN CPU 2 LH 5803 Keyboard Buzzer Cassette Timer R5232C 5ystem bus UART Main unit RAM 5LOTl SLOT2 Main unit ROM e tc Main CPU internal block...

Page 7: ... in step 2 and the Z 80 bus is set in the floating state PC 1600 Then ELH goes to a low level so that the LH 5803 bus is activated LHWAIT now goes to low which causes the LH 5803 to operate 4 2 Sub CPU role The sub CPU has the following roles 1 Main power on and main power oft CD When the svstern off command is received from the main CPU the system is turned off The system is turned on when the sy...

Page 8: ...ration as in step 2 and the Z 80 bus is set in the floating state PC 1600 Then ELH goes to a low level so that the LH 5803 bus is activated LHWAIT now goes to low which causes the LH 5803 to operate 4 2 Sub CPU role The sub CPU has the following roles 1 Main power on and main power off CD When the system off command is received from the main CPU the system is turned off The system is turned on whe...

Page 9: ...ond the Z 80 proceeds to the next processing The Z 80 sends a pulse signal on DST8 of the UART in order to inform the sub CPU a command request which the sub CPU receives of through the Klline With the KI line of the sub CPU high an interrupt is se nt to the sub CPU and the command is processed in the interrupt service routine G One of the following requests may be made depending on the command is...

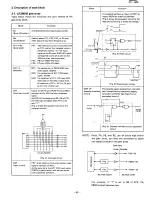
Page 10: ...If bO 1 bank 1 PVOUT 1 PVOUT SC7852 output is used to represent the chosen bank 0 or 1 PVOUT is 0 when bank 0 is selected It is 1 when bank 1 is selected Similarly when the Z 80 accesses aspace in 4000H 7FFFH bank 0 bank 7 is selected depending on the status in the bits b3 bl PVOUT PU and PT are used to represent bank 0 thru bank 7 The PVOUT PU and PT conform to the 1 0 address 31 H and the space ...

Page 11: ... 32 KB area 4 RAM3 This signal must be high to access the memory space in COOOH FFFFH of bank O This signal is connected to CE2 of the two 8KB RAMs A 13 is used to determine wh ich RAM is to be selected OOOOH 5 3 Memory map as seen from the LH 5803 4000H 8000H COOOH FFFFH 8KB RAM CEl input Memory spacechosen A13 COOOH DFFFH A13A inverted A13 gate array output EOOOH FFFFH 5 RAM2 Memory select signa...

Page 12: ...ernal LSI control register port 3FH 40H System reserve I 4FH 50H HD61202 IC2 IC3 58H HD61202 lC3 5BH HD61202 lC2 System reserve 60H S2 slot 2 6FH 78H CE 1600F 7FH 80H CE 1600P 83H 84H F8H _0_ PC l600 Z 80 1 0 LH 5803 Read Write address address 30H A030H 10R MOD 10WMOD 31H A031H 10R MAP 10WMAP 32H A032H 10R INT 10WPRI 33H A033H IOR P 10WCDF 34H A034H 10R LHMSK 10W LHMSK 35H A035H 10R ZMSK 10WZMSK 3...

Page 13: ... iii VEE VEE is supplied when the system is turned on iv VDD VDD is supplied when the PRIME output is at a high level with the system on 6 3 System on system off The on off state of the system is controlled by the LU 57813P The on off state of the system is seen on the BFO output When BFO is low the system is on and VCC and VEE are available When the system is off no power is supplied except VGG 1...

Page 14: ...ut the real timer issues a timer interrupt ever 0 5 second second a If the wake up timer has been set the time on the real timer is checked for whether it coincides 11 PC 1600 with the wakeup time If it coincides the system is turned on b If the wake up timer is set to turn on the system with the RS 232C interface CI Input the system is turned on with the input of the CI signal as it has been moni...

Page 15: ...n the RESET switch on the back of the CE 1600P is pressed KL and Z15 of the subcontroller go high When this pulse width continues for more than 300 micro seconds the subcontroller proceeds in the same way as the system power on procedure so that areset is applied to the system 7 3 3 Difference from ALL RESET The subcontroller interrogates the s tate of the BREAK ON key at 7 3 1 and 7 3 2 above in ...

Page 16: ... lines to sense a key depression When a key depression is sensed that particular key is distinguished after sending astrobe to each line As the key input appears on KIN7 KINO of the SC7852 a row of the keys in a low state is judged to be the row at which the key entry occurred Since input not having a key entry is internally pulled up in the LSI it is in a high level 7 6 Buzzer block 7 6 1 General...

Page 17: ...D is activated RS 232C interface high side voltage The RS 232C interface input output signals CTS DSR CD and CI are Input to the UART opposite polarity regardless of the state of PRIME high or low 7 7 1 RS 232C interface signal Although signals of this interface conform to the EIA standards they are used for controls that differ in some ways from the RS 232C interface in general 14 1 Input signals...

Page 18: ...ruction of the IC4584 which may occur by an accidental short in connection with the RS 232C inter face or the connection of outputs together The capacitor C2 is for increasing speed for conveying a change in the MN4584 8 Service precautions Before servicing of the PC 1600 lt is mandatory that you release static power in your body by using the earth band When removing the key PWB from the top cabin...

Page 19: ...g a soldering pencil l l7D T iT T TiT iT lIIII 17 ItTtTt T ll lJ 0 zaaOlZ ll VOO zazraa D D D 1 _ Al Fig 8 5 16 NOTE This job is required for the reuse of the key PWB 4 How to solder the FPC PWB with the key PWB 1 I Apply a thin layer of solder over the soldered portion of the FPC PWB 2 Cut away 1 5 to 2 0 millimeters of the tip of the FPC PWB using a knife or scissors in order to check whether th...

Page 20: ...and fill up the back side of the chip with solder PC 1600 c Lift the PWB with your hand and carefully mount it over the leads of the LSr When the solder on the leads melts after five to six seconds remove the LSI from the PWB using a tweezers or a small flat tip screwdriver d Clean away solder fragments remaining on the pattern side of the LSI using a solder wick Then evenly apply a thin layer of ...

Page 21: ... 11 Solder tip o CHi C Ti P 1 011 BB For chip relacement 12 Solder tip OCHiCTiP 1012 BB For chip replacement 13 Solder tip OCHiCTiP 1013 BB For chip replacement 14 Solder tip OCHiCTiP 1014 BB For chip replacement 15 Solder tip OCHiCTiP 1020 AX For chip replacement No 5 9 o IA 1 6 Size of chip No A B C 0 5 12 5 9 5 12 5 9 5 6 15 5 12 5 15 5 12 5 7 16 3 13 3 16 3 13 0 8 17 0 14 0 17 0 14 0 9 23 0 20...

Page 22: ... circuit test The quartz meter must be used in this measurement test Tolerance 1 5 second day under ambient tempera ture of 25 5 C NOTE 00 not perform the measurement test in the early morning as the internal temperature may differ even if the room temperature is within the re quired limits The same is applicable to the quartz meter 8 6 Power off test 1 Make sure that the machine operates normally...

Page 23: ...on the Z 80 s WR is a direct output on this line 2 When the LH 5803 is in operation it becomesan Input to enable R W for the LH 5803 10 25 A15 AO ln Out 1 When the Z 80 is in operation the Z 80 addressbus is an output on this line 2 When the LH 5803 is in operanon the LH 5803 addressbus isan Input on this line 26 33 DB7 DBO ln Out Data bus 34 10RQ ln Out 1 When the Z 80 is in operation the Z 80 10...

Page 24: ... 5S03 control ROM select signal COOOH FFFFH memory space 45 CS24 Out Low Z 80 control ROM select signal 1 4000H 7FFFH memory space bank 3 2 SOOOH COOOH memory space bank 4 One wait is inserted 46 LHS3 Out Low Memory select signal 47 LHS2 17 Out Low Oepending on the state of bit 6 of 1 0 3CH the memory spaceselected 48 LHSl 17 Out Low differs b6 0 b 6 1 LHSl ASOOH AFFFH bank 0 BOOOH B7FFH bank 0 LH...

Page 25: ...ries LSI and is connected to the HD61202 LCD driver input This signal is issued with a half clock delay slower than 10Ra 61 DMEO Out High LH 5803 memory select signal This signal goes high when the LH 5803 accessesthe memorv 62 70 PAO PA7 V ln Out Corresponds to the port PA of the LH 5810 1 0 port This signal is used for the key strobe signal To restore the original state of the low forced strobe ...

Page 26: ...t as an interrupt request from the PC 1500 peripheral 81 INTO In High An interrupt to the CPU This line is input as an interrupt request from the T8576F 82 INT1 V In Low An interrupt to the CPU This line is input asan interrupt request from the PC 1600 peripheral Pulled up internally 83 INT4 In L An interrupt to the CPU An interrupt is sent to the CPU at a high to low transition This line is input...

Page 27: ...ransferred to the PH register and the contents of FFFFH to the PL register When the reset input changes from high to low the program starts to execute from the address set in the program cou nter 3 BRQ In In Bus request Connected to ELH of the SC7852 output BF flip flop output BFO and input BFI The BF fiip flop is reset by the OFF command of the CPU It can be reset when the BFI is set high The BFO...

Page 28: ...iver and connected to HIN and the segment signal generator LSI 19 DISP Out LCD display on off control signal outpur Can be set and reset by means of a command With the PC 1600 this function is not used 20 27 H7 HO Out LCD backplate signal outpur When the LCD is driven by the backplate signal and the segment signal the backplate signal is issued by the CPU 28 OD Out Output disable signal When OD is...

Page 29: ...O In Crvstal connection pins XLO is an input and XL1 is an output 64 XL1 Out Inside the CPU the clock is divided in half When a 2 6MHz crystal is connected the machine cycle within the CPU is at 1 3MHz 65 WAIT In CPU wait signal When this input is high the CPU s internaioperation clock ep stops and the CPU therefore stops executing a command When it resumes a low state the CPU starts to execute a ...

Page 30: ... high KH state 12 KI In High A command request from the main CPU lnterrupt is caused by a high K1 state 13 T In Test pin which is NC 14 OSCOUT Out The 32 768 KHz timer crvstal oscillator is attached across these lines 15 OSCIN In 16 KL In High Reset input from the peripheral unit As monitored by the software if this input is high for more than the given time the reset is executed 17 Z15 Out High I...

Page 31: ...re are four causeswhich force this signal level to high I The weke up time matched the real time timer 11 The time of alarm 1 or 2 matched the real time timer 111 Receipt of an Input from the external keyboard IV At 0 5 second cycle of the real time timer This signal goes low when the interrupf causestatus is read or when all Inputs from the external keyboard have been read 26 GND OV 27 Z6 Out Low...

Page 32: ...0 Out In Return data to the Z 80 46 R23 Out In 47 R22 Out In 48 R21 Out In 49 R20 Out In LSB 50 VRL NC 51 SIN In NC 52 VOO High power supply voltage level VGG 53 R13 In In MSB 54 R12 In In 55 Rll In In 56 Rl0 In In Command from the Z 80 57 R03 In In 58 R02 In In 59 ROl In In 60 ROO In In LSB 61 Q3 In Low In Hardware sensed weak battery detection signal A high on this line causesthe CPU to force th...

Page 33: ...input The signal goes low when the BREAK ON key is depressed otherwise it is in a high state 6 KCl In Signal input from the analog Input connector 7 CL2 In Sub CPU 1 229MHz clock Input 8 RD Out Low Read signal created by five signals M EO ME1 00 CKOS and BRO which are externally wired OR with RD of the Z 80 When the Z 80 is in operation RD is at a high impedance 9 16 R20 R33 In Return data from th...

Page 34: ...en this signal is at a low level it forces A 16A to high A 15A to low and A14A to high 39 A13 In CPU address A 13 40 A14 In Input of the CPU address A14 insigni1icant 41 OSR Out Not used 42 CLKl Out When the system is on CL2 is issued on this line and becomes the basic clock for the UART A low is on this line when the system is off 43 KH Out High Opposite polaritv of the BREAK ON key Input is sent...

Page 35: ...ntronics parallel interface When the 8 bit data are received from the CPU in the transmit mode astrobe of the programmed pulse width is automatically issued In the receive mode when data are received with astrobe singal from the external source a busy singal is returned to auto matically inform the CPU Pin Symbol ln Out Active Function No level 1 NC Not used 2 RD In Low A low on this line causes t...

Page 36: ... bit 5 of the command bvte it is set to 0 The signal is normally used by the modem control as arequest to send 34 DSR In Serial mode data set ready signal A general purpose 1 bit input port in the reverse phase It is possible to know the state of the signal by interrogating the status information bit 7 of the serial interface This signal is normally used for tests by the modem for such as a data s...

Page 37: ...3 P5V ln Out Parallel mode signal which is fixed to GND When CDS is 1 it serves as a I bit output port When CDS is 0 it serves as a supply voltage input of the external device 44 PE ln Out Parallel mode paper end signal When CDS is 1 it serves as a I bit outpur port When CDS is 0 it receives the paper end signal from the external device _ ...

Page 38: ... PWB PinNo Signal name PinNo Signal name PinNo Signal name PinNo Signal name 1 VCC 18 00 35 PA2 52 COA 2 GNO 19 01 36 PAl 53 P5V 3 KINO 20 RO 37 PAO 54 OTR 4 KIN1 21 02 38 E 55 OATA8 5 KIN2 22 03 39 10SU 56 OATA7 6 KIN3 23 04 40 CKO 57 OATA6 7 KIN4 24 05 41 RSTIN 58 OATA5 8 KIN5 25 06 42 VGG 59 OATA4 9 KIN6 26 07 43 RXO 60 OATA3 10 KIN7 27 INTO 44 TXO 61 OATA2 11 WR 28 PC6 45 PR1 62 OATA1 12 A5 29...

Page 39: ...A4 10 AIN 30 RAMl 50 00 70 A5 11 SOF 31 Sl 51 01 71 A6 12 ROF 32 S2 52 02 72 A7 13 Ql 33 S3 53 03 73 A8 14 LB 34 KO 54 04 74 A9 I 15 BFO 35 Kl 55 05 75 Al0 16 GNO 36 K2 56 06 76 All 17 VCC 37 RO 57 07 77 A12 18 VGG 38 WR 58 KC2 78 A13 19 VEE 39 N C 59 PVOUT 79 A14 20 CS24 40 MREQ 60 PU 80 A15 t CN 3 key PWB and program mable function key PinNo Signal name 1 PA6 2 KIN4 3 KINl 4 PAl 5 PA4 6 PA5 7 PA...

Page 40: ...vcct VcC2 vcc 1 SD RD GND CN 7 81 slot 1 connector Pin No Signal name Pin No Signal name Pin No Signal name Pin No Sig al name 1 vee 11 03 21 Ne 31 A6 2 PVIN 12 02 22 A15 32 A5 3 PU 13 01 23 A14 33 A4 4 RAM2 14 00 24 A13 34 A3 5 PVOUT 15 INH 25 A12 35 A2 6 MREQ 16 S1 26 A11 36 A1 j 7 07 17 S2 27 A10 37 AO 8 06 18 S3 28 A9 38 RO 9 05 19 PT 29 A8 39 WR 10 04 20 VGG 30 A7 40 GNO ...

Page 41: ...l0 48 NC 4 A4 19 05 34 A 11 49 MREQ 5 A3 20 04 35 A12 50 BFO 6 A2 21 03 36 A13 51 eos 7 Al 22 02 37 A14 52 GNO 8 AO 23 01 38 A15 53 GNO 9 INTl 24 00 39 VGG 54 GNO 10 Ml 25 INH 40 NC 55 NC 11 VCC 26 IORQ 41 VCC 56 OMEO 12 NC 27 CMTIN 42 NC 57 WR 13 RSTE 28 WAIT 43 FG 58 ELH 14 PT 29 CMTOUT 44 FG 59 10E 15 PU 3D IRQ 45 VBAT 60 RO CN 10 AC adaptor CN 11 LCD rubber connector E C e 8 l__ EB CN 12 PWB m...

Page 42: ... 11 CIRCUIT DIAGRAM PARTS POSITION KEY P W B LCD SIDE 39 ...

Page 43: ...PC l600 40 ...

Page 44: ...PC 1000 KEY P W B LSI SIDE 41 ...

Page 45: ... 42 ...

Page 46: ... M 96 M I CL2 AR10 CL VV CR VV V v v v VV v v V R A vv VV VV vv E E G ce CD R 66551 1 22 E E C S D 11 22 33 44 E E N S S S D D D D D 0 I RLRLRLRLEE EC CRLRLRLRL21D1231Wel1 3451 f1 rJ 0 _ I q _ N I I 0 1EE Nl ICaCNl 01 jND CNl 0 _ I K0CNl 40 1 Nl 42 El N1 38 f H C7 A0ICNl 17 Al lCNl l 6 t r l U I A21CNl 15 lD üNI A3 CN1 14 ePGGCCPAAr 86 C A4 CNl 13 XCLKlCNl 47 4 C TD501C A01C IO WCNl 39 es k C C S ...

Page 47: ... PC l600 LF 7204E y 6 1 y 6 4 y 1 4 2 Y 1 y 6 4 HD61102 IC3 r I I 1 r PB6 CN3 PA HCN3 4 PA2lCN3 8 J PA3 C N3 9 PA4 C N3 5 r I PA5 CN3 6 PA EXCN3 1 PA 7 CN3 7 KINlI N3 3 KIN 1IOß 2 44 I I I t J y SHEET ...

Page 48: ... PC l600 F P C P W B 45 ...

Page 49: ... Kn 46 ...

Page 50: ...CN2 45 I CMTOUT CN2 46 I CMTIN CN2 48 Wlli CN2 47 I INTItC N2 64 RAMHCN2 JIIJ AAM2tCN2 29 I __ R 2 A_ RAM3 N2 28 LHA90tC N2 27 _ CN2 20 EST2JtCN2 26 RI c smtCN2 25 mtCN2 63 Gf S EtCNI 38 ARJ 56 E AAl3 CK tCNI 4El CK0 B IOSu CNI 39 T105 U 1 R 14 INHHCNI 21 1 INT0 PC6tCNI 28 PCS P86tCNI 29 U P86 PA illCN 37 bJ PAß PAltCN1 36 64 PAI PA 2 CN1 35 6 PA2 PA JtCN1 3 61 PA3 PA 4 CNI 33 q PA4 PA5 CNH2 PAS P...

Page 51: ...I I I I 1111 11111 R2L Ifllr t LR 38 041 rC4 t 1111 111 ul 11 4PU CN2 611 R 40 JR 9 rxI Iw4 ___ _ SDAICN 2 02 I RDAICN2 03 I SDFCN2 11 RSS RDF CN2 12 48 PC 1600 R 41 121129 I I I I I I I I I I J J 1111I1 I 111 1111 f 10A oIICtl2_49 PR ICN2 08 r N2 38 RTiICN2 37 R ßtCN t 4 OTlIICN2 09 DRACN2 06 CDAICNl 11 CSACN2 15 J3 s a R 50 To IC4 PIN5 A0 CN2 ss A HCN2 66 A2 CN2 67 A3 CN2 68 A4ICN2 69 IloA5CN2 7...

Page 52: ... PC l600 CONNECTOR P W B 49 ...

Page 53: ... 50 ...

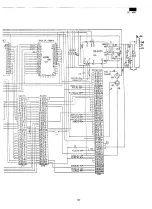
Page 54: ...D 13 I I RTS _ VGG CS24f Lf i 4R ICl RSe __ I a r CTS RAi 13 INHZ3 5 _y r Ä C S 17 t rs t1 DSB B_A13 00 22 d _ l P OR 16 T 0 GND 41 r VM 01 2j CO T I t c Jjr L i 02 fr 7 r v crf l I _ 1 hL_ A 9 J D3 lJ rr I r 1 7 r I IV 04 rr 31 n l 1 ERd 1 r N n 1Wk 05 1 __LI GNO VEEI h F F 1 0 061 l r iß l r H1 A 1 o7iJf I r I DTR A rl rl 01 I I VZI 3 A13r h TCl N4 I J A A A12t AG All TPl 1 2 FIVER A7 l A10 5 CI...

Page 55: ... __ PC l600 tli I ONLY Pc 1600K I I 1 I 52 l J ...

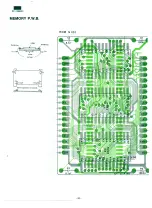
Page 56: ... PC l600 K MEMORY P W B ROM Cut c IJ O lJ1F C O lJ1F I Bend capacitor to inward ROM SIDE 53 ...

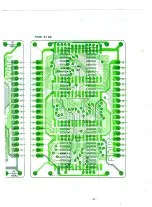
Page 57: ...RAM SIDE 54 ...

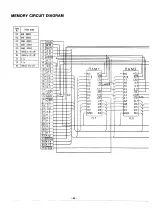
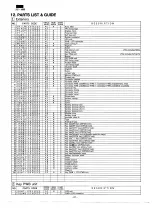
Page 58: ...NC VCC f NC vce 1 12 D7 A12 WR t A12 WR I 13 06 A7 eS2 I A7 CS2 14 D5 AG A8 AG A8 v 15 D4 V A9 LHA9 A5 A9 AS V 16 D3 V A4 A 11 A4 A 11 v 17 INH f f V OE A3 OE A3 v 1 ____c 18 VCC C1T T C2 A2 A10 A2 A10 AB v 1 9 GND A1 eSl A1 es k V 20 eS001 AO 07 f A 07 f 21 i 0 2 V D0 D6h 1 _ r 00 06 22 D 1 D1 DSh D1 D5 h 23 D 0 D4 02 D4 h V v D2 A 0 GNO 03 h GNO 03 h 25 Al 26 A 2 IC 1 IC2 1 27 A 3 28 A4 29 AS 3 ...

Page 59: ...A 8 AG A 8 f A9 A5 A9 A5 A 9 A5 A 9 r R2 All A4 All A4 All A4 A 11I OE A3 OE t I A3 OE I A3 OE A10 A 1 1 IA 2 Alt A2 Alt A2 A Jß CS1 Al CEr A 1 CE r A 1 CE 07 Af o 7 I Af o 7 A0 o 7 I 06 h 00 06 I 00 o 6 hv 00 06 h 05 o 1 05 h 01 o 5 h o 1 o 5 I 04 h 02 04 02 o 4 h 02 04 I 03 h GND 03 GNO D 3h GND 03 h I 2 IC 3 IC 4 Rl R3 I C 5 I 56 M6A ...

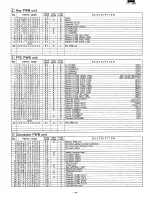
Page 60: ...ZZ AA N C Screw 36 X B S S D 2 0 P 0 8 0 0 0 AA N C Screw I 37 QTANZl186CCZZ AA B Battery terminal EB 38 QTANZ1362CCZZ AA B Battery terminal EB 8 39 QTANZ1363CCZZ AA B Battery terminal EB 81 40 QTANZ1055CCZZ AA B Battery terminal e 41 GFTAU1268CCSA AB N D Module cover 42 GFTAB1004ECZZ AC N D Battery cover 43 P Z E T L 1 0 1 6 E C Z Z AA N C Insulator sheet B 44 P T P E H 1 0 1 3 E C Z Z AA N C Tap...

Page 61: ...I I 2 3 4 42 58 ...

Page 62: ...Resistor l 4W IKO 5 R60 15 VRD HT2EY563J AA N C Resistor 1 4W 56KO 5 lR61 16 VCCCTV1H3101J AA N C Capacitor 50WV 100PF LCI 24 5J 17 RC KZ2243YAZZ AB N C Capacitor _ _O l µF _ C36712 18 V CC C T V 1 H 3220 J AA N C Capacitor 50WV 22PF C8 9 19 VCCCTV1H3470J AA N C Capaelter 50WV 47PF ClD 11 20 VCCCTVIH3471J AA N C Capaeiter 50WV 470PIJ_ LCI3 I 21 R C R 5 Z 1 0 0 2 E C Z Z AF N B Crystal 3 58MHZ Xl 2...

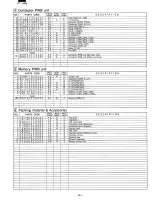
Page 63: ...S CODE PRICE NEW PART DESCRIPTION RANK MARK RANK 1 QCNW 1002ECZZ AG N C Jumper wire 2 RC KZ1054CCZZ AB C Capacitor 50WV O lµF 3 V HiT C 5 5 6 5 F 1 5 L AW B IC TC5565F15L 4 VHi27C256FA51 BC N B IC 27C256FA51 5 VHi27C256FPA5 BC N B IC 27C256FPA5 6 VHi27C256FPA6 BC N B IC 27C256FPA6 7 VHi27C256FPA7 BC N B IC 27C256FPA7 8 VRD HT2EY103J AA C Resistor l 4W 10Kn 5 9 V R D S T 2 B Y 1 0 4 J AA C Resistor...

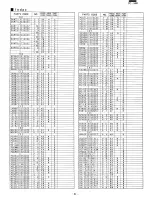
Page 64: ... C PTPEHI224CCZZ 4 5 AA C PTPEZI009ECZZ 6 10 AB N C PZETLI004ECZZ 1 20 AB N C P_li_IL10 12 ECZZ 1 61 A_A N C PARTS CODE NO PRICE NEW PART RANK MARK RANK PZETLIOI2ECZZ 4 6 AA N C PZETLIOl5ECZZ 1 27 AB N C PZETLIOl6ECZZ 1 43 AA N C PZETLIOl8ECZZ 1 64 AB N C PZETLIOl9ECZZ 1 66 AA N C PZETL 12 9 6CCZZ 1 68 AA C Q 1 QCNCWI002ECOE 4 7 AK N C QCNCWI293CCZZ 4 8 AY C QCNCWI294CCZZ 4 9 AX C QCNCWI368CCIE 4 ...

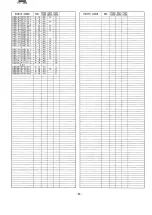
Page 65: ... VRS TP2BD104J 2 12 AA C i VRS TP2BDI13J 2 13 AA C VRS TP2BD362J 2 14 AA N C VRS TV2AD102J 3 11 AA N C VRS TV2ADI03J 3 12 AA N C VRS TV2ADI04J 3 6 AA N C 1 3 6 AA N C VRS TV2ADI05J 3 10 AA N C VRS TV2AD223J 3 13 AA N C VRS TV2AD333G 3 9 AA N C VRS TV2AD472J 3 7 AA N C VRS TV2AD473G 3 8 AA N C VSDTAI43XF I 4 35 AC B VSDTCI44 1 4 36 AC B X J XBBSD20P08000 4 37 AA C XBSSD20P08000 1 36 AA N C XNESD20 ...

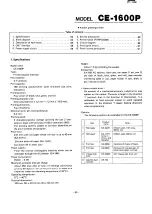
Page 66: ...be recharged through the AC adaptor EA l60 Power consumption 6VDC 5 7W Maximum printable lines per charge About 250 lines after 8 hours of recharge continuous printing 40 digits of 5 of the print size 2 in black on a single line under the operating temperature of 20 C Operating temperature 5 C 40 C Physical dimensions 320 mm W x 221 5 mm D x 46 mm H Weight About 1 6 kg including the pocket Accesso...

Page 67: ...Relay drive LB1247 x2 signal Printer and relay drive signals Others Remote CR SO pin detection Read signal male Gate arrav Cassette I rv LR38045 interface r I Write signal Chip select 32KB ROM SC27C256 I 50 pin Address Data female it Power suppl REM MIC CE 152 EAR cassette tape recorder y EA 1SO AC sdaptor l assenerecortrer 1 interface CE 1600F software VCCl rn memory I PC 1600 Power supply circui...

Page 68: ... set with 1 Fig 3 shows the quivalent circuit of the interrupt circuit IRQ p r r QO PAOI QI PAlI Q2 PA21 Q8 PA81 Q4 PA 41 Q6 PAS I Q6 PA61 To multiplexer Fig 3 Interrupt circuit RST FFl 3 are reset by this circuit when a reset reset circuitl signal is received on RSTI At the sametime the 2 5 FDD reset signal RSTN is issuedwhich will be keot active until cleared by software _L 65 PC l600 Block Func...

Page 69: ...ut port port address 83H DO D7 correspond to PCO 7Nvia FF3 9 16 PB7N PBON Out Low High 8 bit outpur port port address 82H DO D7 correspond to PBO 7N via FF2 17 NCI 18 PUl In Low PU signal input Used for creation of a 32KS ROM signal J 19 PTI In High PT signal input CSNO 20 EZI In High ELH signal input 21 MINI In High Ml signal input Used for creation of the 107N and gate J 22 10RQ In High 10RQ sig...

Page 70: ...or the driver 2 Romote vcc VP Driver 2 F PB4N JIN6 OUT5 RRv ga array OUT61 RRY OFF PB5N INS OFF ON REM 3 o I fu 0 ll Driver As shown above the output transistor within the driver is turned active in the period that the driver input signal signal from the gate array is low level so that current flows across the load connected to the output terminal of the driver Fig 7 shows the equivalent circuit o...

Page 71: ...liseconds than that mentioned in the relay specification With the CE 1600P it is set to about 10 milliseconds The following signal formats are used for the cassette interfacing signals Write PWM method 1600 method Read PWM method 1600 method and 1500 method 5 Power supply circuit 5 1 Power supply VP VBAT and battery recharge circuits 01 RM l0Z x2 02 03 AC Adaptor About 8 4V liIoI VP 6 4V RK 13 AAx...

Page 72: ... RS 232C not in operation Printer Gate array LR38045 Max 3 25mA at 1 3MHz ROM SC27C256 Max 3 20mA At 400KHz Driver LB1247 Max l00mA When 45 dotted line Max S03mA is printed When print ASCII Max 638mA character When 555 Max 605mA printed When the carriage is Max 242mA is returning 45 dotted line Max 959 45mA ASC II character Max 794 45mA I 555 Max 761 45mAI NOTE Printing character standard 2 Maximu...

Page 73: ...ength as the shorter con nector Connector holding screws 60 pin male Solder terminal FPC back side Connector holding screws 1 0mm reinforcing plate 60 pin female connector 6 3 Soldering the FPC PWB DUNTK 1060ECZZ and main PWB CD Fold the FPC in reference to the line shown on the surface of the FPC the side the solder terminal is not on Folding line 60 pin female connector r J 1 L_ CID Evenly solde...

Page 74: ...axis 0 1 mm Pen plotting speed 65mm second X and Y axis 92mm second 45 degrees Character size Character size differs depending on the character form 5 x 7 matrix I I 2 4 I Character dimensions 0 8mm x 1 2mm minimum 1 05mm x 1 45mm in the case of 0 25mm line width Print pitch 1 2mm 10 Paper feed pitch 2 4mm 10 Character size 1 2 3 4 5 6 7 8 9 Characters Line 160 80 53 40 32 26 22 20 17 Character he...

Page 75: ...CO LTD Figure VII 1 Wiring Diagram 4 Circuit Oiagram Below is a circuit diagram of the PTMPG Printer Circuit Board Name PhaseI Color I No Circuit Blue 2 Carriage Position Detector B 17 A 16 X motor COM Black 15 Carriage Movement 0 Red 14 C I White I 13 B I Blue I 12 A I Vellowl 11 V motor Paper Feeding COM I Black I 10 o I Red I 9 C I White I 8 B I Blue I 7 A I Vellowl 6 COM I Black I 5 Z motor Pe...

Page 76: ...inq Plate left Platen Roller unit 4 The Pen Drive Mechanism Color Change Mechanism This part consists of two main blocks the pen drive mechanism and the color change mechanism each of which is described below PC l600 1 The Pen Drive Mechanism The pen drive mechanism consists of a Z motor unit a Z cam gear an ejection lever shaft unit a roller lever and a ball point pen The pen s up down movements ...

Page 77: ...gear unit 4 3 NOTE 1 00 not deform the plastic part of the ejection lever shaft unit NOTE 2 00 not lose the washer WF2 2 inside of the Z cam gear unit 2 3 3 Platen roller unit 1 Remove the retaining ring E type RE2 at the outsidi left of the frame from the platen roller unit 3 31 with a Keystone screwdriver NOTE 1 00 not deform the paper holder plates thin plates of the paper holder installing res...

Page 78: ...2 x 3 5 Phillips round head screws 2 SP2 x 2 5 I Phillips round head screws 2 3 1 I V motor unit SP2 2 x 3 5 I Phillips round head screws 2 SP2 x 2 5 I Phillips round head screw 2 I __ SP2x 2 5 4 7 Switch unit SP2 x 3 5 Phillips round head screws 2 6 1 I Rubber bushing 6 3 I Lead guide left 6 4 I Lead guide right I sA S 1 1 6 1 2 I 3 3 Platen roller unit 3 6 Platen spring I WF3 3 I WF3 3 Washer 2 ...

Page 79: ... holder installing plate right unit Phillips round head screws 2 Pulley support rest left unit Stopper Phillips round head screw Idler gear Retaining ring E type Pulley gear unit Retaining ring E type The screw tightening torque is 2 5 kg cm After tightening the screws hook the paper holder spring onto the hook of the paper guide A of the frame 1 1 Press the pulley support rest Ieft unit 2 5 into ...

Page 80: ...e coq and set the idler gear 3 2 Mark the cog first RE2 4 5 Slider unit Press the pulley support rest right unit 2 6 into the frame 1 1 7 2 7 Slider shaft RE4 Retaining ring E type 2 6 Pulley support rest rightl unit 2 4 1 Wire unit A 8 2 4 2 Wire unit B 2 4 3 Wire spring 1 Move the slider unit 4 5 to the right side of the printer and hook the end of the wire unit B the shorter one onto the hook o...

Page 81: ...d the pulley gear unit 2 3 The position of the second figure is shown be lox Wind the Wire Four Times Slit of the Pulley Gear Unit 3 Passthe wire through the slit of the pulley gear unit and wind it around the other pulley of the pulley support rest left unit 2 5 Then hook it onto the left side hook of the slider unit 4 Test to confirm the condition of the wire unit by checking whether the slider ...

Page 82: ...to deform the plastic part of the ejection lever shaft unit Adjust the motor phase and pen stroke when setting the Z motor unit 4 1 10 Z motor unit 1 Setting the Zsmotor unit remove the screw SP2 x 5 which is tacking the Z motor spacer unit 4 4 and set the Z motor unit At this setting the cam of the Z cam gear unit 4 3 should be in the pen up position E position on page 34 and the Z motor should b...

Page 83: ...sition the horizontal part of the Z cam gear in Figure Vl 4 To make the pen stroke smaller move the pen stroke adjustment jigs of A and Bin each direction indicated by the arrows in the figure below After adjustment apply the Screw Locking Agent to position E in the above figure 3 Adjustment of the Z motor phase adjust the rnotor setting angle by printing characters with a standard pen L 23 3 0 or...

Page 84: ...technician has little experience He has general knowl edge of the principles of operation and structure of the printer He does not require extensive experience or skill For example suppose the printer does not print The Level A technician would first check to see if the solenoid were energizing If necessarv he would replace it or repair the driving circuit If the solenoid were enegizing properlv h...

Page 85: ...ech nician Checking Method This column describes the points in the printer to be checked to locate the malfunctioning part Repairing Method This column contains instructions for repairing the printer Look up Problem on Table X l first to identify your problem and find its Cause The reference numbers of each Cause correspond with the ones of the Checking Method and Repairing Method on Table X 2 in ...

Page 86: ...matertals Remove foregin materials X drive gear 9 The battery voltage drops 0 0 0 0 0 0 0 0 0 0 B Check the batterv voltage make sure 1 Charge or replace the battery thevoltage is more than 5 15V 10 Unsmooth sliding of slider unit 0 0 0 B Remove the wire and make sure that 1 Remove foreign materials the slider unit can be moved smoothly 2 Replace the slider unit from side to side by hand 3 Clean t...

Page 87: ...formation or breakage Replace the slider unit penreturn spring of the slider unit of the pen return spring 27 Deformed or broken detent plate 0 0 0 B Check for deformation or breakage Replace the slider unit of the slider unit of the detent plate 28 Removed holder ring of the slider 0 0 A Check if the holder ring is removed Set the holder ring in the rotary unit from the rotary holder holder prope...

Page 88: ...in IORQ r GNO MREQ VP VBAT I PVout c horn PC 1600 It_ _ Anr PU PT 1IIIIIqfztr FGNO FG RSTE i vcc l g fB I 1I1 IR sET MT r INT1 00 7 Data Bus Address Bus AO 15 VP GNO I07N I Gate Array LR38045 35 40 45 RSTN FGNO FG 1 I INTF I 11I VBAT Vp GND 85 ...

Page 89: ...OOK ölJl tm7 Array rull 60 f 100 K 10 11 1 AG82290r GSAK 287P PA5 3045 IDt lIZ 55 f lOK o D 10 2 Vn AJ 45 50 jO OI V 1 1 1 1 1r 11f 11 1 1 1 PRINT Pl U18U1g lOOK PA4i P I 7 _ 1 lOOK PA2i m I lOOK PA1i m RE1 OFF ON lOOK PAOi ___ t REMOTE lOOK CMTout 12 K 0 0047 1 n 6 8K 0 1p 680n GNU EAR 2 J 1K lfOJ n 28 A14 Af3 32KB A9 P ROM RK 13 RM10Z xZ VP 2 OE AC Adaptor 1 t EA 160 10n tW SC27C256 g 07 S FPA4 ...

Page 90: ...POWER SUPPLY P W B FRONT VIEW 9 PARTS SIGNAL POSIT Q PWB F 1OaSE C Z Z Par sside QP 0000000 Tae SW IQSW M0131FCZZ 1 3 o REMOTE PRINT OFF ON P o I amo I I 1Il10 Slide SW IQSW Sl074CCZZ x 21 87 ...

Page 91: ...ONNECTOR SIDE o capaeuer l000µF lOV mounting Bent Keep the capachor inside of P W B No gap between P W B QPWB F 1008 ECZ Z Pattern Side o o NO ON wwZ a a Cl r Lead with 7pin connector F o I lJO aJ o 11 Ql Ü Q n l i 88 PC l600 o ...

Page 92: ... PC l600 POWER SUPPLY P W B BACK VIEW MAIN P W B I Capacitor l00µF 10V mounting 20 25 tJ WB Oo 89 ...

Page 93: ... P W B LSI SIDE t 90 ...

Page 94: ...ing_angle 34 QCNCM5016SCOG AB C Connector 7pin 35 QCNCW1008ECOB AB N B Connector 2pin 36 Q JAK C 1 0 0 3 C C Z Z AO B Jack for AC adaptor 37 QJAKC1016CCZZ AC C Jack socket for Remote 38 QJAKC1013CCZZ AC B Jack for MIC 39 QCNCM1338CCOB AA B Connector 2pin 40 QCNW 1011ECZZ AC N C FPC 41 DUNTKI059ECZA BT N E Main Pewer supply PWB unit USA onlyl This inciudes No 28 33 34 36 40 OUNTK1059ECZZ BT N E Mai...

Page 95: ... PC 1600 I rr 25 c oA C Screws are required torque control See service precation on section 6 page 69 93 ...

Page 96: ...W PART DESCRIPTION RANK MARK RANK 1 QCNCW1293CCZZ AY C Connector 60pin _ 2 QCNCM1295CC6J AV C Connector 60pin 3 X B B S 0 2 0 P 0 8 0 0 0 AA C Screw 2X8 4 X B B S 0 2 0 P 1 0 0 0 0 AA C Screw 2 Xl 0 5 XNES020 1 6 0 0 0 AA C Nut M2 Unit 901 OUNTKI060ECZZ BN N ___ E FPC__PWB tmit AJ Switch PWB unit NO PARTS CODE PRICE NEW PART DESCRIPTION RANK MARK RANK 1 QCNCW1007ECOG AE N C Connector 7pin 2 QSW M0...

Page 97: ... 22 00 P 19 G 0369 AD C Paper holder spring 3 5 1 23 00PI9G0365 AC C Platen spring 3 6 24 OOP12G0204 11 AE C Releaselever R ray 3 7 25 00PI9G0391 AD C Releaselever spring 3 8 27 OOP30 0409 o 0 AA C Screw SP2 3x3 5 29 o 0 P 2 7 o 0 0 3 1 9 AA C E type ring RE2 30 00P23G0056 01 AC C Washer WF3 3 31 OOPDG224 BG C Z motor uni 4 1 32 00PDG260 AZ C Eiection lever shaft unit 4 2 36 00PI9G0370 AD C Z leve...

Page 98: ... 4 AQ C QSW MOI3IFCZZ 1 16 AC B 11 4 2 AC B PARTS CODE NO PRICE NEW PART RANK MARK RANK QSW SI074CCZZ 1 15 AE B 11 4 3 AE B QTANZI003ECZZ 1 10 AC N C R 1 BM RADPAI004ECZA 5 5 BN N B RADPAI004ECZB 5 5 BN N B RADPAI004ECZC 5 5 BN N B RADPAI004ECZD 5 5 BN N B RADPAI004ECZE 5 5 BN N B RADPA 100 HCZ F 5 5 BN N B RADPA I0 0 HCZG 5 5 BN N B RADPAI004ECZH 5 5 BN N B RADPAIOO4ECZi 5 5 BN N B RADPAIOO4ECZJ ...

Page 99: ...6 47 AC C 00P13G0559 6 102 AD C 00 P 1 7 G 0028 6 7 AR C 00P17G0029 6 6 AR C 00P19G0365 6 23 AC C 00P19G0367 6 8 AD C OOP19G0369 6 20 AD C 6 22 AD C 00 P 1 9 G 0370 6 36 AD C 00 PI 9 G 0372 6 46 AD C 00P19G0381 6 52 AC C OOP19G0391 6 25 AD C 00P23 0057 6 57 AA C 00 P 2 3 G 0 0 4 9 6 58 AE C 00P23G0056 01 6 30 AC C 00P24 0008 00 6 63 AC C I 00P27 0002 19 6 14 AA C 00P27 0003 19 6 29 AA C 00P27 0006...

Page 100: ... connected Power consumption 2 5W Operating temperature 10 C 35 C drive operating requirement Humidity 20 80 without moisture condensation Physical dimensions 96mm W x 122mm D x 39mm H Weight 470 grams Accessories 2 5 two sided floppy disk x 1 instruction book x 1 Option CE 1650F contents of 102 5 two sided floppy disks NOTE 2 5 63 5 mm indicates the diameter of the floppy disk media 2 Cautions in...

Page 101: ...ithin the 2 5 floppy disk drive unit and directly interfaced with the bus line data line and control signals are directly con nected So only the power on reset signal generation circuit and the amp s 5VC 5V supply regulator circuit are provided for circuit I I VCC y VCC I 5 0 Delay lJ H L ____ __ System reset 4 2 Power on reset signal generation circuit Reset n t period U H L VCC VCC Fig 2 Raset t...

Page 102: ...3 A 2 15 41 A 14 A 1 16 A 15 A 0 17 14 B F 0 M R E 0 18 loIA IOR 107 N 19 14 WA I T n 146 ITfi R1i 21 147 G N 0 G NO 2 l4t V GND 3 149 V p Vec 4 se V p V 5 CO N1 5 Brief description of floppy disk drive PC l600 The floppy disk controller is implemented within the 2 S floppy disk drive and the floppy disk driving and head seeking are done by one motor The floppy disk is driven by the belt and the h...

Page 103: ...CM 1003EC5J ANODE A R Red Jl lSS108 A K A Anode K Cathode Pattern side NOTE Slack in the jumper J1 I must be treated in the opposite direction as the 25 pin connector be cause the rib is provided between the connector and Jl Note the notch E C Diode GL9EG2 The anode must be installed to the side A of the board Tantalum capacitor Black whlte A K A Anode K Cathode I 0 I Green blue 1S1588L1 1 K K Cat...

Page 104: ...ommand LOAD X WMEDIA and push thelENTE Rlkey 4 When the prompt symbol appears remove the test program stored disk and ensure that the machine is in the RUN mode Next type the command R RUN then push thelENTERlkey Step Display message Note RUN I ENTERI INIT DATA WRITE l Set the blank SET BLANK MEDIA media HIT ENTERl KEY I CE 1650F Set the side A of a blank disk CE 1650F ENTER 1 Set diskette for X I...

Page 105: ... now to check the function of the write protect switch If it has been successful the description is printed and the test terminates 141 During this write protect test period measure the 5VC check point of the interface board with the dc voltmeter to check that it is within a range of 4 5VDC to 5 5VDC 5V 0 5V 7 5 Write protect test This test is conducted to check proper functioning of the write pro...

Page 106: ...C Connector 50pin 102 QCNCW1005EC2E AF N C Connector 25pin 103 VCTYPU1NX104M AB C Capaetter l2WV 0 10µF 104 VCSATU1AE106 M AD C Capacitor lOWV 10µF 105 VHDDS1588L2 1 AB B Diode D51588L2 106 VHD1S5108 1 AB B Diode 1551081 107 VHPGL9EG2 1 AB N B Photo transistor GL9EG2 108 VRD ST2EYI04J AA C Resistor 1 4W 100KO 5 109 VRD S T 2 E Y 4 7 2 J AA C Resistor 1 4W 4 7KO 5 110 VRD ST2EY474J AA C Resistor l ...

Page 107: ...m battery in the main unit instruction book 2 Parts identification Terminal cover Protect switch When the switch is set to the side marked with memory write is prohibited so that it disables to write erase and revise the memory contents When the switch is at the side not marked the write protect is deared When it has been write protected cover the switch with the cover label to avoid incidental ma...

Page 108: ...ory and memory 510t memory map 106 PC 1600 When the CE 1600M is connected to S2 8000H V User area 44 612 bvtes maximum COOOH EFOOH FFFFH Bank 0 Bank 2 Bank 3 When the CE 1600M is connected to Sl 8000H V User area 44 612 bvt BOOOH EFOOH FFFFH es maximum Bank 0 Sank 1 When the CE 159 is connected to Sl and the CE 1600M is connected to S2 User area 52 794 bvtes maximum FOOOHl I I FFFFH Bank 0 Bank 2 ...

Page 109: ...odule With this usage the completed program or data are saved into the memory module to be loaded onto the user area when so required If used as a RAM module the rnodule is not included in the area CD The module that can be used the RAM file module is the CE 161 and CE 1600M The RAM file module can be accessed free from the main unit While it is removed from the main unit the contents are retained...

Page 110: ...rll _ g r v Ir 14 GND J 04 15 r l4 15 r14 15 r14 15 v 00 0 E o l A cn 0 0 Uli o E I 1 I r rz l 15 I Cl a I F 4 lYO r I rs Cl ß cc sc 2Yl 11 r r1Ya T1 rmrw f I F 8 2Y3 9 I i i i 0 0 0 0 0 0 0 0 00 tn 0 0 r l 0 e 0 C t l C r tr c D Z l I I I I tl tn L __ I 1 J 1 1 J_ J J J J i J 1 I I C1 Z 0 eo 00 0 tl t t r I I I I I fc I I Ic c f cc cc L L E L c e co NOTE Replacement is not permitted tor the RAM c...

Page 111: ... E C Z Z AB N C Spring fixing sheet 14 MSPRC1202CCZZ AC C il2g_ 15 GcABC2672CCSA AC N D Terminal cover 16 GCABA1004ECZZ AF N D Bottom cabinet 101 Q5W 51347CCZZ AH B 51ide switch 102 RC 5Z1007CCZZ AF C Capaeiter 1µF 103 RH DZ1008CCZZ AC B Diode DAN202 104 VHD1S598 1 AD B Diode 1559S 105 VHiTC74HC139F AH N B IC TC74HC139F 106 VRS T P 2 B D 5 6 4 J AA C Resistor 1 SW 560KO 5 201 GCASP1091CCZZ AE D Ca...

Page 112: ... fiber cable No service parts is available for this product Appearance of cable and pin configuration 3 1 Pin No Signal name 1 RD 2 GND 3 SD 1 Vcc 5 Vcc 2 5 4 Socket Plug I c i c i c SD CD RD CD Pin name and circuit configuration 110 ...

Page 113: ...is product Appearance of cable and pin configuration Pin description Cable length 1 meter PC 1600 MODEM SIDE Pin No Signal name Pin No Signal name 1 FG FG 1 2 SD TXD SD 2 3 RD RXD RD 3 4 RS RTS RS 4 5 CS CTS CS 5 6 DR DSR DR 6 7 GND SG 7 8 CD CD 8 14 ER DTR ER 20 9 CI CI 22 n 30 3 ooIl 1 5 O 5 1m Shielded wire M2 6 pitch 0 45 screw 111 ...

Page 114: ...rts is available for this product Appearance of cable and pin configuration Pin description Cable length 1 5meter PC 1600 MZ 5600 MZ 5500 Pin No Signal name Pin No Signal name 3 RXD RD SD 2 2 TXD SD RD 3 8 CD RS 4 1 RTS RS CS 5 5 CTS CS READY 6 7 SG GND 7 i 14 DTR ER DR 8 I 6 DSR DR ER 12 0011 1 5 O 5 I I Shielded wire I 112 ...

Page 115: ...or this product Appearance of cable and pin configuration Pin description Cable length 1 5meter PC 1600 PC 5000 CE 158 I Pin No Signal name Pin No Signal name I 1 FG FG 1 3 RXD RD TXD 2 2 TXD SD RXD 3 8 CD RTS 1 8 CD CTS 5 14 DTR ER DSR 6 7 SG GND 7 4 RTS RS CD 8 CRR 11 5 CTS CS DTR 20 1 5 m 30 3 1 5 O 5 Shielded wire M2 6 pitch 0 45 screw 11 ...

Page 116: ...ilable for this product Appearance of cable and pin configuration Pin description Cable length 1 5meter PC 1600 PC 7000 Pin No Signal name Pin No Signal name 1 FG FG 1 3 RD SD 2 2 SD RD 3 8 CD RTS 1 8 CD CTS 5 14 ER DSR 6 7 SG GND 7 1 RS CD 8 5 CS DTR 20 C Cl 22 _ 1 5 m 30 3 1 5 O 5 Shielded wire I M2 6 pitch 0 45 screw 114 ...

Page 117: ... PC I600 ...

Page 118: ... PC l600 SHARP SHARP CORPORATION Information Systems Group Quality Reliability Control Center Yamatokoriyama Nara 639 11 Japan 1986 June Printed in Japan ...

Reviews:

Related manuals for PC-1600