background image

13

CD-DVD500H

ENGLISH

1

2

3

4

5

6

7

8

9

10

11

12

13

14

15

Preparation for use

 Speakers 

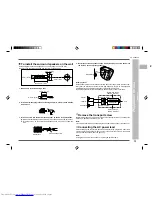
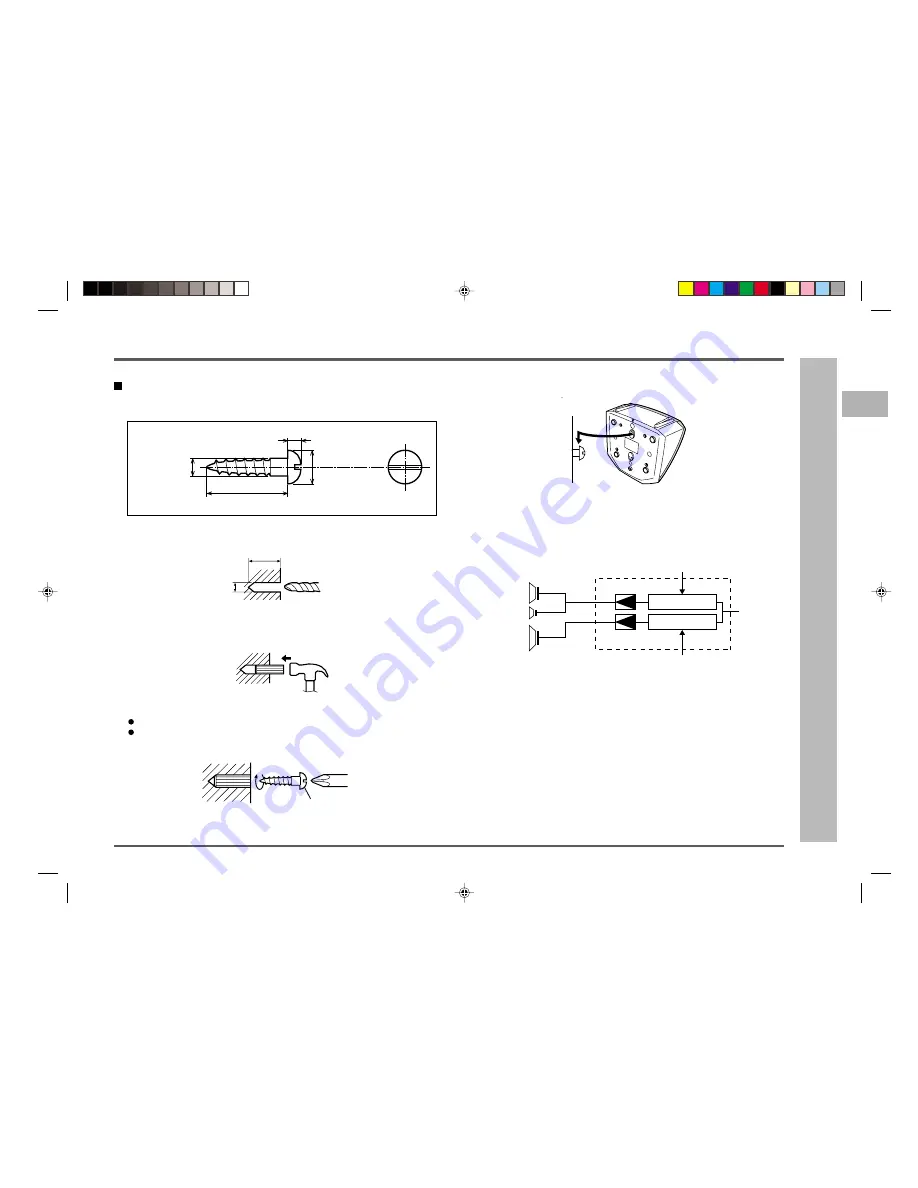
To install the surround speakers on the wall

Sharp designed the surround speakers so you may hang them on the wall.
Be sure to use the correct type and size of screw, as shown below.

1. Make a hole in the wall using a drill.

2. Drive a wall mount plug into the hole using a hammer, until it is flush with the

wall surface.

3. Drive one screw into the wall for each speaker, as shown in the illustration.

Make sure that both the screw and the wall can support a load of 20 kg (45 lbs.).
Drive the screws, so the screw head extends about 5 mm (3/16") out from the
wall.

Speakers (continued)

3.2 mm (1/8")

5 mm (3/16")

Min. 22 mm (7/8")

9 mm (3/8")

Bi-amp system:
Each speaker unit has a built-in subwoofer (low frequency range) which is driven sepa-
rately from the woofer and tweeter (mid-to-high frequency range). Two independent
amplifiers which have individual frequency characteristics are used.
By amplifying separately the two frequency bands, clearer sound is achieved.

Remove the transport screw

Before turning the power on, be sure to remove the transport screw on the back of the
unit using a flat-blade screwdriver or a coin.

Note:
This screw is required when transporting the unit again. Please keep it (see page 72).

Connecting the AC power lead

After checking all the connections have been made correctly, plug the AC power lead
of this unit into the AC socket. When you plug in the unit for the first time, the unit will
enter the demonstration mode (see page 14).

Note:
Unplug the unit if it will not be used for a prolonged period of time.

4. Install the surround speakers on the wall by inserting the screw heads into

the slots on the back of the speakers.

32 mm (1-1/4")

8 - 9 mm (3/8")

Wall surface

Wall mounting screw

Wall surface

Subwoofer

Woofer

Tweeter

Power amplifier

Mid-to-high range
(200 Hz - 20 kHz)

Pre-amplifier

Power amplifier

Pre-amplifier

Ultra-low range
(60 Hz - 200 Hz)

L-ch

Summary of Contents for CD-DVD500H

Page 1: ...500H DVD Mini Component System consisting of CD DVD500H main unit CP DVD500H front speaker GBOXS0064AWM5 centre speaker GBOXS2008AWM5 right sur round speaker and GBOXS4008AWM5 left surround speaker If you require any advice or assistance regarding your Sharp product please visit our web site www sharp co uk support Customers without Internet access may telephone 08705 274277 during office hours or...

Page 2: ...the plug cover make sure that If the new fitted plug contains a fuse its value is the same as that removed from the cut off plug The cord grip is clamped over the sheath of the mains lead and not simply over the lead wires IF YOU HAVE ANY DOUBT CONSULT A QUALIFIED ELECTRICIAN SERVICE INFORMATION In the unlikely event of your equipment requiring repair please contact the dealer or supplier from who...

Page 3: ...on Acts 1963 and 1972 and to any subsequent statutory enactments and orders This equipment complies with the requirements of Directives 89 336 EEC and 73 23 EEC as amended by 93 68 EEC Copyright Information Unauthorised copying broadcast public display transmission public performance and rental regardless of whether or not such activities are for profit of disc con tents are prohibited by law This...

Page 4: ...5 Zoom function 36 Repeat playback 37 Programmed playback 38 39 Selecting titles from the menu 40 Setting parameters using the disc menu 40 Contents Surround operation Page Enjoying the surround sound 41 42 Changing the speaker setting 43 46 Description of terminology 47 CD playback Listening to a CD CDs 48 50 Repeat or random play 51 Programmed play 52 Radio Listening to the radio 53 Listening to...

Page 5: ... for use in moderate climate This unit should only be used within the range of 5 C 35 C 41 F 95 F Warning The voltage used must be the same as that specified on this unit Using this product with a higher voltage other than that which is specified is dangerous and may result in a fire or other type of accident causing damage SHARP will not be held responsible for any damage resulting from use of th...

Page 6: ...ning and Time Up Button 16 53 14 DVD CD Tape Stop Button with Indicator 28 49 62 15 DVD CD Button 19 48 16 Tuner Band Button 53 17 Tape 1 V V V V V 2 Button 62 18 Video Auxiliary Button 70 19 Dimmer Button 14 20 Clock Button 16 67 21 Timer Sleep Button 67 68 22 Headphone Socket 69 23 DVD CD Tape Play Button with Indicator 28 49 62 72 24 DVD Chapter skip DVD CD Tape 2 Fast Forward or Tuner Preset U...

Page 7: ...0 29 28 23 24 25 26 27 33 32 20 Disc Number Indicators 21 CD Music Schedule Indicators 22 Disc Types Indicators 23 Programme Type Indicator 24 Traffic Information Indicator 25 Radio Text Indicator 26 Traffic Announcement Indicator 27 Sleep Indicator 28 RDS Indicator 29 Dynamic PTY Indicator 30 EON Indicator 31 FM Stereo Receiving Indicator 32 Dolby Pro Logic Indicator 33 Dolby Virtual Indicator 34...

Page 8: ...15 Shift Button 20 16 Surround Button 42 17 Disc Number Select Buttons 18 DVD CD Memory Button 38 52 19 DVD Menu Button 40 20 Menu Select Buttons 20 21 Return Button 20 22 DVD CD Tape Play Button 23 DVD CD Pause Button 30 49 24 DVD Chapter Skip or DVD CD Tape Fast Forward Button 25 DVD Slow Button 29 26 DVD Angle or RDS ASPM Auto Station Programme Memory Button 34 57 27 DVD Zoom or RDS Display Mod...

Page 9: ... 2 1 4 8 10 9 5 6 7 2 1 Centre speaker 01 Full Range Speaker 02 Speaker Wire 1 2 Surround speaker left 1 2 Surround speaker right Front speaker left Front speaker right 2 1 3 2 1 3 4 5 6 4 5 6 Remote control with shift button Reference page 01 DVD Setup Button 20 02 DVD CD A B Repeat Button 37 51 03 DVD Digital Gamma Button 35 04 DVD CD Display Button 27 05 DVD CD Clear Button 38 52 06 PAL NTSC Bu...

Page 10: ...onnections AM loop aerial Front speaker right Surround speaker left Surround speaker right Centre speaker Transport screw Before turning the power on be sure to remove this trans port screw on the back of the unit using a flat blade screw driver or a coin This screw is required when transporting the unit again Please keep it ...

Page 11: ...ocket as shown Use speakers with an impedance of 6 ohms or more as lower impedance speakers can damage the unit CENTER Surround speakers Connect each surround speaker wire to the SURROUND SPEAKERS socket as shown Use speakers with an impedance of 8 ohms or more as lower impedance speakers can damage the unit SURROUND SURROUND L R Right Left Aerial connection Supplied FM aerial Connect the FM aeria...

Page 12: ... enjoy realistic powerful sound by playing the soundtrack through 5 channels the front left front right centre surround left and surround right speakers The best sound will be achieved by placing each speaker at the same distance from the listener Arrange the speakers so that the layout is as close as possible to the diagram shown in this illustration Front speakers The front left and right speake...

Page 13: ... Two independent amplifiers which have individual frequency characteristics are used By amplifying separately the two frequency bands clearer sound is achieved Remove the transport screw Before turning the power on be sure to remove the transport screw on the back of the unit using a flat blade screwdriver or a coin Note This screw is required when transporting the unit again Please keep it see pa...

Page 14: ...ghting or the direction of the unit Keep the remote control away from moisture heat shock and vibrations Test of the remote control Face the remote control directly to the remote sen sor on the unit The remote control can be used within the range shown Press the ON STAND BY button Does the power turn on Now you can enjoy your system Remote control Preparation for use Remote control General control...

Page 15: ...cies and X BASS will appear To cancel the extra bass mode press the X BASS DEMO X BASS button Equaliser When the EQUALIZER button is pressed the current mode setting will be displayed To change to a different mode press the EQUALIZER button repeatedly until the de sired sound mode appears 0 1 2 29 30 MAXIMUM X BASS indicator The sound is not modified Bass and treble are emphasised Bass and treble ...

Page 16: ...W W W W button to select the 24 hour or 12 hour display and then press the MEMORY SET button 4 Press the TUNING TIME X X X X X or W W W W W button to adjust the hour and then press the MEMORY SET button Press the TUNING TIME X or W button once to advance the time by 1 hour Hold it down to advance continuously When the 12 hour display is selected AM will change automatically to PM 5 Press the TUNIN...

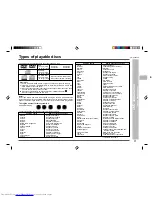
Page 17: ...s Czech The Czech Republic Denmark Kingdom of Denmark Egypt Arab Republic of Egypt Faeroe Islands Faeroe Islands Finland Republic of Finland DVD explanation Types of playable discs Common names Names of nations and areas France French Republic Germany Federal Republic of Germany Gibraltar Gibraltar Greece Hellenic Republic Greenland Greenland Hungary Republic of Hungary Iceland Republic of Iceland...

Page 18: ...reen and fail to play the disc correctly Refer to the instructions on page 5 and clean discs before attempting to play them Whilst a disc is playing soiling or scratches on the disc may disrupt the image appearing as blocks on the screen When the image is disrupted the system automatically restores the correct image after 2 or 3 seconds Note 2 The specific playback functionality for some DVD discs...

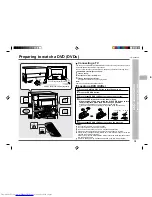
Page 19: ...ton to turn the disc tray then place the DVD in the open position DVDs can be placed on any open position on the disc tray Be sure to place 8 cm 3 DVD s in the middle of the disc positions 5 Press the 7 7 7 7 7 OPEN CLOSE button to close the disc tray Caution Do not place two discs in one disc position Do not push the disc tray whilst it is moving Do not turn the disc tray by hand This may cause m...

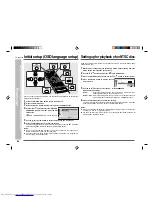
Page 20: ...ting of NTSC PAL or NTSC can be used on a PAL TV or a Multi System TV You can also select the PAL or NTSC by pressing the PAL NTSC button whilst pressing down the SHIFT button M T V ODE E S TUP M T V ODE LB 4 3 C NT S C NT S C NT S L PA C NT S Setting up for playback of an NTSC disc When you use the unit for the first time you should set the language to be used for the OSD On Screen Display 1 Pres...

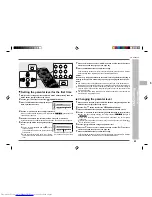
Page 21: ...Using letter box Select LB 4 3 When playing a wide image disc black bands are inserted at the top and bottom to make a 4 3 size image A 4 3 disc is played in 4 3 1 Whilst a disc is stopped press the SET UP button whilst pressing down the SHIFT button to display the setup screen 2 Use the or button to select the TV MODE SETUP 3 Press the ENTER button and then use the or button to select TV MODE 4 P...

Page 22: ...e on a disc Notes You can use the parental lock function only with DVDs that are equipped with the parental lock feature The parental level depends on countries If you do not set the country code cor rectly it fails to work correctly When you cancel parental setting DVD discs can be played back regardless of the parental level On some DVDs the parental level setting is fixed and cannot be modified...

Page 23: ...SETUP 3 Press the ENTER button to display the password verification screen 4 Use the 0 9 buttons to enter the 4 digit password that was set previously When you have finished entering your 4 digit number changes to If you enter the wrong number three times in succession the normal screen reappears If you forget your password you can erase your current password by pressing STILL button four times 5 ...

Page 24: ... ting this unit enters the Dolby Pro Logic surround mode To play the disc in the Dolby Digital mode use BITSTREAM Refer to page 47 for details Down Mix PCM Audio setting COMPRESS I ON OF F DEUT SCH I T A L I ANO E SPAÑOL L ANGUAGE ENGL I UD O E S TUP A D MPEG IGITA L BITSTREAM BITSTREAM D PCM DVD setting Audio setting Setting the MPEG audio 1 Whilst a disc is stopped press the SET UP button whilst...

Page 25: ...laying such discs try using the function control page 31 Setting SUBTITLE AUDIO and MENU languages from 8 languages Example Selecting FRENCH 1 Whilst a disc is stopped press the SET UP button whilst pressing down the SHIFT button to display the setup screen 2 Use the or button to select the DISC LANGUAGE 3 Press the ENTER button and then use the or button to select SUB TITLE AUDIO or MENU You can ...

Page 26: ...ingala LO Laotian LT Lithuanian LV Latvian Lettish Language code list for disc language MG Malagasy MI Maori MK Macedonian ML Malayalam MN Mongolian MO Moldavian MR Marathi MS Malay MT Maltese MY Burmese NA Nauruan NE Nepali NL Dutch NO Norwegian OC Occitan OM Afan Oromo OR Oriya PA Panjabi PL Polish PS Pashto Pushto PT Portuguese QU Quechua RM Rhaeto Romance RN Kirundi RO Romanian RU Russian RW K...

Page 27: ...splay indicators that appear during DVD playback Play attempted without a disc C 0 1 8 3 1 5 0 2 3 4 0 NO S D I C Play attempted with a non compatible disc C 0 1 8 3 1 5 0 2 3 4 0 WRONG D C I S T E Y P Loading data being read from disc D A C 0 1 8 3 1 5 0 2 3 4 0 NOW E R AD I NG Stop C 0 1 8 3 1 5 0 2 3 4 0 D D V Play C 0 1 8 3 1 5 0 2 3 4 0 D D V Appears when display mode is on Pause C 0 1 8 3 1 ...

Page 28: ...e disc you are using is damaged if you load the disc upside down or if the region number of the disc you are using is one that is not supported by this unit If the above indicator appears reload the disc or replace it with another one A safety feature automatically sets the unit to the power stand by mode if you set the volume level too high whilst playing certain types of discs If this happens lo...

Page 29: ...s from a point slightly before the point it was stopped Press the 0 button to resume disc play if auto playback starts from the begin ning of the disc when you reload the same disc after removing it This resume operation does not work in the following cases If you press the button twice If you press the button during auto playback If you remove a disc and then load another one Notes Resume playbac...

Page 30: ...utton for more than 0 5 seconds whilst a disc is playing The disc begins fast scan at x 2 speed 1 Three speeds are available Each time the PRESET X or W PRESET but ton is pressed the speed of fast scan changes in the sequence shown on the right You can also press the or button on the remote control for the same op eration 2 Press the 0 0 0 0 0 button to return to normal playback Notes On some disc...

Page 31: ...currently played back is displayed You can skip directly to the desired chapter 3 Direct time skip page 33 Elapsed time from the beginning of the disc is displayed You can skip directly to the point from which you want to start playback 4 Subtitle language setting page 33 The subtitle number and language currently selected are displayed When a disc with only one subtitle is played back xx is displ...

Page 32: ... 8 3 0 3 0 0 8 5 D D V 5 Using the function control continued Direct chapter skip Example Selecting chapter 10 1 Press the DIRECT button twice whilst press ing down the SHIFT button to select 2 Use the 0 9 buttons to select the chapter number to which you want to skip When the 10 button is pressed after the number is entered with the 0 9 but tons the last digit will be erased You can also select t...

Page 33: ... to select and then press the ENTER button 3 Press the or button to select the sub title language you want to use You can also toggle the setting between ON and OFF by pressing the or button 4 Press the ENTER button to confirm the setting You can exit the function control screen by pressing the SET UP button whilst pressing down the SHIFT button or the RETURN button Notes You can also press the SU...

Page 34: ...same operation in step 3 You do not need to do the steps 1 and 2 Angle setting You can change the angle of view when playing a DVD video disc that contains scenes recorded from multiple angles 1 Press the SET UP button whilst pressing down the SHIFT button during playback The function control screen appears 2 Use the or button to select and then press the ENTER button 3 Press the or button to sele...

Page 35: ...ion control continued Digital gamma setting Digital gamma is a digital image quality enhancement function that gives a richer im age by brightening the darker and more obscure portions of the image without altering the brightness of the brighter portions thereby making the entire image easier to see Use the following procedure to change the setting between ON and OFF and the level for the digital ...

Page 36: ...you press the button or the SET UP button whilst pressing down the SHIFT button the zoom operation is cancelled and the image returns to normal size The zoom setting is cancelled automatically whenever you display a DVD screen that enables you to change the scene by pressing the or button Subtitles cannot be zoomed The ZOOM indicator changes from white to red to inform you that you are trying to p...

Page 37: ...ion with some discs Advanced DVD features Repeat playback 2 0 1 8 3 2 5 0 3 0 0 8 NGL I SH E C D D V 2 0 1 8 3 2 5 0 3 0 0 8 NGL I SH E T D D V A B repeat 1 When playback reaches the start point of the scene press the A B REPEAT button whilst pressing down the SHIFT button This displays A repeat indicator This registers the start point A 2 When playback reaches the end point of the scene press the...

Page 38: ...ogramme press the 0 button after the MEMORY but ton Repeat play of a programmed sequence is not possible Programmed playback You can programme your system to play titles or chapters in the sequence you want Title programmed playback This function can be performed with only discs that have been played once totally or partially For example To play the 12th title first 1 Start playing the disc and th...

Page 39: ...tart play Chapters are played in the sequence you specified Advanced DVD features Programmed playback To stop programmed playback Press the button Notes You cannot programme the sequence whilst a disc is playing Sequence programming does not work with a disc that does not include chapter information Sequence programming does not work with a disc that disables programming The indicator is displayed...

Page 40: ...ing parameters using the disc menu Some DVDs include a disc menu that you can use to select subtitle set audio channel and Dolby Digital 5 1 channel DTS or MPEG audio You can also turn disc menu on and off To turn on subtitling example This function can be performed with only discs that have been played once totally or partially 1 Whilst the disc is stopped press the MENU button to display the dis...

Page 41: ... centre speaker When playing a disc with the trademark you can enjoy realistic powerful sound by playing back the recorded signal through 5 speakers with the sound coming from the front left front right centre surround left and surround right speakers To listen to a disc in the Dolby Digital mode 1 Press the ON STAND BY button to turn the power on 2 Press the DVD CD button 3 Load the DVD disc s 4 ...

Page 42: ...t and surround right speakers If the surround signal only contains 1 channel the same monaural channel will be output from the left and right surround speakers For a Dolby digital 1 0 input sound will only be output from the centre speaker PHANTOM The difference between this mode and the normal mode is that no sound is output from the centre speaker The centre speaker signal is split equally and a...

Page 43: ...ke The initial setup was made when shipped from the factory The unit can be used as it is straight out of the box 4 Repeat the operation in steps 2 and 3 above to select CENTER SUR ROUND and S WOOFER Each of these items can be set separately Centre speaker Surround speakers Subwoofers YES When the speakers are connected NO When no speaker is connected When NO is selected the indicator for that spe...

Page 44: ...s SURROUND 0 ms 15 ms Can be changed in 1 ms steps Notes 1 ms indicates approximately 30 cm 12 added to the current distance between where the speaker and the listener are located If the delay time for the surround speakers is set to a large value a large sound space will be created If it is set to a small value the sound space will be small and intimate Surround operation Changing the speaker set...

Page 45: ...d 1 Press the SP MENU button repeatedly whilst pressing down the SHIFT but ton to select SP LEVEL 2 Within 8 seconds press the or button repeatedly to select the speaker CENT RSUR LSUR or SWFR you want to adjust 3 Within 8 seconds use the or button to adjust the level You can change the level within the range of 10dB to 10dB at 1dB intervals The centre speaker level can be changed within the range...

Page 46: ...e You can check and adjust the speaker level by listening to the sound output from each speaker individually in the actual listening position in the room The speaker level can be adjusted using the remote control 1 Press the SP MENU button repeatedly whilst pressing down the SHIFT but ton to select TEST 2 Within 8 seconds press the or button The test tone will be heard from each speaker in order a...

Page 47: ...ng of being at a live performance as if the action is taking place right in front of you LFE Low Frequency Effect This refers to the special low frequency sound effects used in Dolby Digital recordings When a signal containing LFE encoding is played by this unit LFE will appear in the display PCM Pulse Code Modulation This is a recording transmission system used for digital audio signals This unit...

Page 48: ...5 Press the 7 7 7 7 7 OPEN CLOSE button to close the disc tray The music schedule will display only the number of tracks on the disc If the CD contains more than 15 tracks C will appear 6 To select the CD you want to listen to first press one of the s s s s s 1 s s s s s 3 buttons 12 cm 5 8 cm 3 CD playback Listening to a CD CDs Total number of tracks on the CD whose number is flashing Total playi...

Page 49: ...ER CD20 will appear in the dis play and the unit will not function If this occurs press the ON STAND BY button to enter the stand by mode and then turn the power on again If TV or radio interference occurs during CD operation move the unit away from the TV or radio If a disc is damaged dirty or loaded upside down the disc will be skipped CD playback Listening to a CD CDs Starting playback with a d...

Page 50: ...ESET 2 4 button repeatedly until the desired track number appears To restart the track being played Press the 5 3 PRESET X button for less than 0 5 seconds during playback You can skip to any track by pressing the 5 3 PRESET X button repeatedly until the desired track number appears Notes You can locate the beginning of a track on a single disc only The 5 3 or 2 4 button on the remote control allo...

Page 51: ...e random operation On the other hand the 5 3 PRESET X 5 3 button does not allow you to move to the previous track The beginning of the track being played will be located In random play the CD player will select and play tracks automatically You cannot select the order of the tracks The DVD disc will be skipped and random playback will be disabled Caution After using repeat or random play be sure t...

Page 52: ...s the MEMORY button 2 Press the CLEAR button whilst pressing down the SHIFT button Each time the button is pressed one track or disc will be cleared beginning with the last track or disc programmed Notes If there is no disc to select the disc number or there is a DVD disc the disc will be skipped Opening the disc tray automatically cancels the programmed sequence Even if you press the ON STAND BY ...

Page 53: ...stop automatically at that point Auto scan tuning will skip weak signal stations To stop the auto tuning press the TUNING TIME button again When an RDS Radio Data System station is tuned in the frequency will be displayed first and then the RDS indicator will light Finally the station name will appear Full auto tuning can be achieved for RDS stations ASPM see page 57 FM stereo mode indicator FM st...

Page 54: ...teps 1 4 to set other stations or to change a preset station When a new station is stored in memory the station previously memorised will be erased Note The backup function protects the memorised stations for a few hours should there be a power failure or the AC power lead disconnection Preset channel Frequency and frequency band Radio Listening to a preset station Listening to a preset station To...

Page 55: ...ies traffic information and TA Traffic Announcement will appear whilst a traffic in formation is on air see page 61 EON will appear whilst the EON Enhanced Other Networks information data is broad cast PTYI Dynamic PTY Indicator will appear whilst the Dynamic PTY station is received RT Radio Text will appear whilst the unit receives the Radio text data Information provided by RDS Each time the DIS...

Page 56: ...publicly expressed views reportage and actuality Topical programme expanding or enlarging upon the news generally in different presentation style or concept including debate or analy sis Programmes whose purpose is to impart advice in the widest sense Programme concerned with any aspect of sport Programme intended primarily to educate of which the formal element is fundamental All radio plays and ...

Page 57: ...f you want to redo the ASPM operation erase the preset memory If no stations have been stored in memory END will appear for about 4 seconds If the RDS signals are very weak station names may not be stored in memory To erase all of the contents of preset memory 1 Press the ON STAND BY button to enter the power stand by mode 2 Whilst pressing down the TUNER BAND button and the X BASS DEMO button pre...

Page 58: ...has stopped flashing start again from step 2 If the unit finds out a desired programme type corresponding channel number will flash for about 4 sec onds and then the station name will flash for 7 seconds and then will remain lit If you want to listen to the same programme type of another station press the PTY TI button whilst the channel number or station name is flashing The unit will look for th...

Page 59: ...PTY TI button The selected programme type and WAITING will be displayed for 2 sec onds each PTY will appear and the unit will enter the EON PTY stand by mode 5 When the specified programme starts on an ON other network station the unit will automatically switch to the station and PTY will flash 6 When the programme is over the unit will automatically return to the original station Checking the sta...

Page 60: ...stand by mode 3 Whilst they are displayed select the TI Traffic Information by pressing the PRESET X X X X X or W W W W W PRESET button 4 Within 4 seconds press the PTY TI button TI and WAITING will appear for 2 seconds each TI will appear and the unit will enter the EON TI stand by mode 5 When a TA specified starts on an ON other network station the unit will automatically switch to that station ...

Page 61: ... TA indicators In the following cases the EON stand by mode will be cancelled When you press the ON STAND BY button to enter the stand by mode When the unit is switched to another band in the EON stand by mode When you change the FM station whilst in the EON stand by mode When a preset call is made Notes Whilst the same programme as the specified PTY or TA is being broadcast the unit will not swit...

Page 62: ...W PRESET 2 4 2 4 button To rewind it press the 5 3 PRESET X 5 3 button Caution To remove the cassette press the button and then open the compartment Before changing from one tape operation to another press the button If a power failure occurs during tape operation the tape head will remain en gaged with the tape and the cassette door will not open Wait until the power is restored Before playback F...

Page 63: ... recording To stop recording Press the button It will stop the tape only Another press of the button will stop DVD playback Even when the DVD playback is finished the tape will not stop To stop the tape press the button Recording from a DVD DVDs Erase prevention tab of cassette tapes When recording on a cassette tape make sure that the erase prevention tabs are not re moved Cassettes have removabl...

Page 64: ...6 I6 I6 I6 I6 I6 I6 I6 I6 I6 button Recording will be paused 6 Press the 0 0 0 0 0 button to start recording CD playback will start approximately 7 seconds after the tape starts Recording is started from the selected CD When the playback of the last disc is finished or the end of the tape is reached the CD and the cassette will stop automatically To perform programmed recording 1 Programme discs a...

Page 65: ...ecording cannot be performed 3 Press the REC PAUSE I6 I6 I6 I6 I6 I6 I6 I6 I6 I6 button Recording will be paused 4 Press the 0 0 0 0 0 button to start recording To interrupt recording Press the REC PAUSE I6 I6 button To resume recording press 0 button To stop recording Press the button Note If you hear a whistling noise whilst recording an AM station move the AM loop aerial Recording from the radi...

Page 66: ... V 2 button until TAPE 1 appears in the display 4 Press the REC PAUSE I6 I6 I6 I6 I6 I6 I6 I6 I6 I6 button Recording will be paused 5 Press the 0 0 0 0 0 button to start dubbing To stop dubbing Press the button TAPE 1 and TAPE 2 will simultaneously stop Erasing recorded tapes 1 Load the tape to be erased into the TAPE 2 cassette compartment 2 Press the TAPE 1 V 2 button until TAPE 2 appears in the...

Page 67: ...the timer recording source TUNER BAND When you selected the TUNER BAND tune in to the desired station 3 Adjust the volume using the VOLUME control Do not turn the volume up too high 4 Press the TIMER SLEEP button repeatedly until f f f f f PLAY or f f f f f REC is displayed 5 Press the TUNING TIME X X X X X or W W W W W button to specify the hour to start then press the MEMORY SET button The illus...

Page 68: ... time is set the setting will be retained until a new time is entered When performing timer playback or recording using another unit connected to the VIDEO AUX IN sockets select VIDEO AUX in step 2 At this time only this unit will be turned on or enter the power stand by mode automatically Another unit will not be turned on or off DVD timer playback may not be possible with some discs Timer operat...

Page 69: ...ted you need commercially available leads Enhancing your system Advanced features Enhancing your system To the digital input socket Optical digital lead not supplied To the line output sockets MD recorder Dolby Digital 5 1 ch DTS MPEG audio processor or amplifier RCA lead not supplied Speaker with a built in amplifier VCR etc TV ...

Page 70: ...isc menu screen page 40 or the function control screen page 31 to select DTS audio After making the connection Set the DIGITAL or MPEG in AUDIO SETUP to BITSTREAM see page 24 Notes To play a disc recorded with DTS you need to use a DTS processor or amplifier This connection is not possible if the processor or amplifier to which you want to connect does not have an optical digital input socket Refe...

Page 71: ...ol Symptom The remote control does not op erate Possible cause Is the AC power lead of the unit un plugged Is the battery polarity wrong Are the batteries dead Is the distance or angle incorrect Does the remote control sensor receive strong light Tuner Symptom Radio makes constant unusual noise or static Possible cause Is the unit placed near the TV or com puter Is the FM aerial orAM loop aerial p...

Page 72: ... flat blade screwdriver Clearing all the memory reset 1 Press the ON STAND BY button to enter the power stand by mode 2 Whilst pressing down the 0 0 0 0 0 button and X BASS DEMO button press the ON STAND BY button until CLEAR AL appears Caution This operation will erase all data stored in memory including clock timer settings and tuner preset References Troubleshooting chart Condensation Sudden te...

Page 73: ...ically wipe the cabinet with a soft cloth and a diluted soap solution then with a dry cloth Caution Do not use oil solvents petrol paint thinners or insecti cides on the unit Maintenance Error indicators and warnings The error indicators and warnings described below appear on the display whenever there is a disc play problem operational problem etc Meaning The disc is not compatible with this unit...

Page 74: ...ications As part of our policy of continuous improvement SHARP reserves the right to make design and specification changes for product improvement without prior notice The performance specification figures indicated are nominal values of production units There may be some deviations from these values in individual units References Specifications DVD CD player Signal system NTSC PAL Supported disc ...

Page 75: ...of the objects DTS Theatre audio system by Digital Theater Systems Inc Six audio channels are used to create accurate sound field positioning and realistic sound Letter box LB 4 3 Screen size that black bands are inserted at the top and bottom of the image to allow playing of wide 16 9 software on a connected 4 3 TV Linear PCM audio Audio signal recording system used for audio CDs Pan scan PS 4 3 ...

Page 76: ... year from the date this product was purchased Proof of purchase must be provided 4 The guarantee does not cover carriage costs jewelled styli audio tapes compact discs or batter ies 5 In the unlikely event of this product requiring repair please contact the supplier from whom it was purchased Where this is not possible please contact the Sharp Customer Information Centre on the telephone number g...

Reviews: