


E-9
■
Bluetooth
Bluetooth
wireless technology is a short-range radio technology
that enables wireless communication between various types of
digital devices, such as mobile phone or computer. It operates
within a range of about 30 feet (10 meters) without the hassle of
having to use cables to connect these devices.
This unit supports the following:
Communication System:
Bluetooth
Specification version 2.1
Bluetooth
+ Enhanced Data Rate (EDR).
Support Profile : A2DP (Advanced Audio Distribution Profile)
and AVRCP (Audio/Video Remote Control Profile)
Notes when using unit with a mobile phone
●
This unit cannot be used to talk over the telephone even
when there is a
Bluetooth
connection made to a mobile
phone.
●
Please refer to the operating manual supplied with the mobile
phone for details on operation of your mobile phone while
transmitting the sound using a
Bluetooth
connection.
Bluetooth
devices need to be initially paired first before
they can exchange data. This unit can memorize up to a
maximum of 20 devices. Once paired, it is not necessary to
pair them again unless:
●
pairing is made with more than 20 devices. Pairing can
only be made one device at a time. If subsequent de-
vice is paired, the oldest device paired will be deleted
and replaced with the new one.
●
this unit is reset. All pairing information is deleted when
unit is reset.
Indicators:
Indicator
Condition
Bluetooth
status
Lights up
Connected
No indication
Unconnected
However, the indication status is not displayed during
Bluetooth
standby mode.
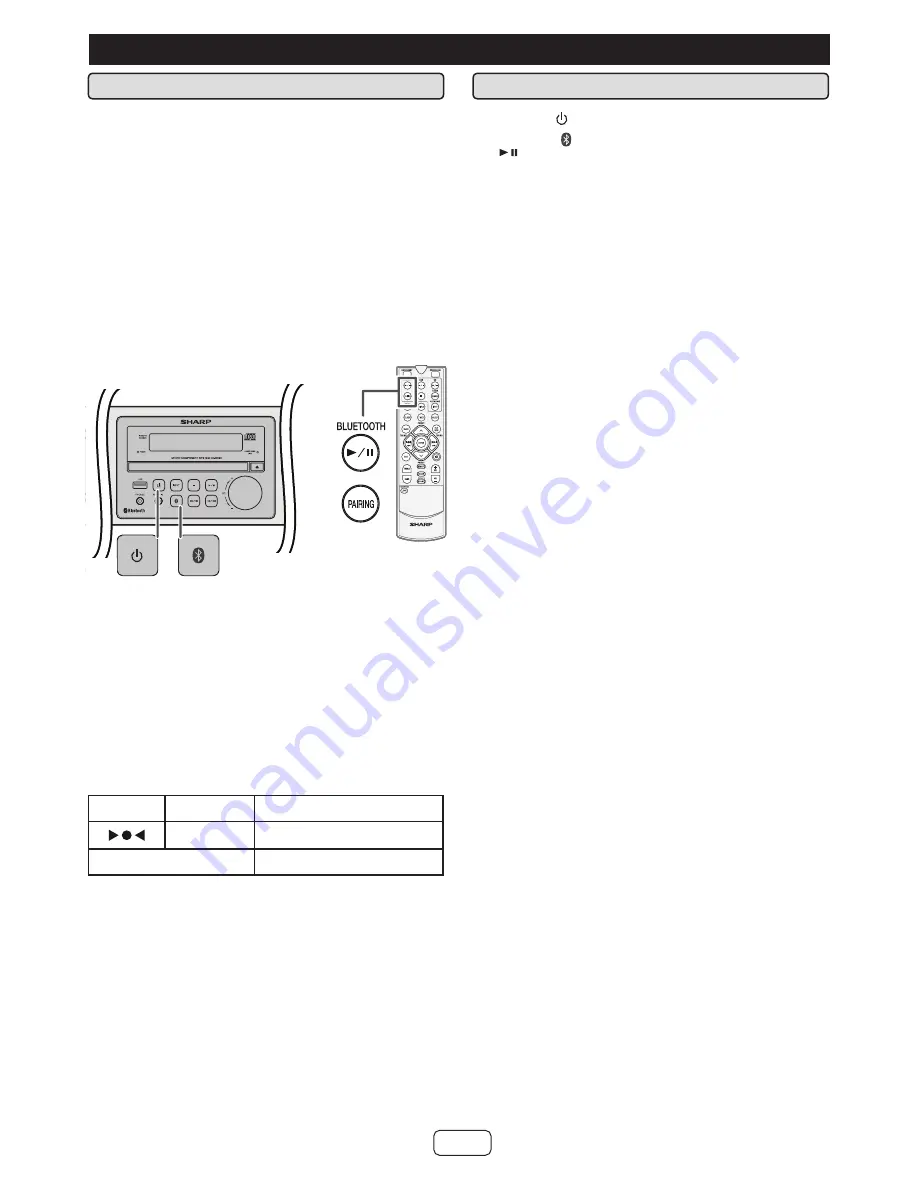
■
Pairing with
Bluetooth
source devices
1
Press the (ON/STANDBY) button to turn the power on.
2
Press the button on the main unit or
BLUETOOTH
/ button on the remote control to select Bluetooth
function. “
BLUETOOTH
” appears on the display.
3
Perform pairing procedure on the source device to detect
this unit. “CD-BH20 SHARP” will appear in the detected
devices list (if available) in the source device. (Refer the
source device operating manual for details).
Notes:
●
Place the devices to be paired within 3 feet (1 meter) of
each other when pairing.
●
Some source devices are unable to display lists of de-
tected devices. To pair this unit with the source device,
refer to the source device operating manual for details.
4
Select “CD-BH20 SHARP” from the source list. If Pass-
code* is required, enter “0000”.
*
Passcode may be called PIN Code, Passkey, PIN num-
ber or Password.
5
“Connected” appears on the display once the unit is suc-
cessfully paired with the source device. (Pairing information
is now memorized in the unit.) Some audio source devices
may connect with the unit automatically after pairing is com-
pleted, otherwise follow the instructions in the source device
operating manual to start connection.
6
Press the play button on main unit, remote control or source
device to start
Bluetooth
streaming playback.
Notes:
●
If a device such as microwave oven, wireless LAN card,
Blue-
tooth
device or any other device that uses the same 2.4 GHz
frequency is placed near the system some sound interruption
may be heard.
●
The transmission distance of the wireless signal between the de-
vice and the main unit is about 32 feet (10 meters), but may vary
depending on your operating environment.
●
If a steel concrete or metallic wall is between the device and the
main unit, the system may not operate at all, because the wire-
less signal cannot penetrate metal.
●
If this unit or the source device is turned off before
Bluetooth
con-
nection is completed, pairing will not be completed and the pair-
ing information will not be memorized. Repeat step 1 onward to
start pairing again.
●
To pair with other devices, repeat steps 1 - 5 for each device. This
unit can memorize up to a maximum of 20 devices. If subsequent
device is paired, the oldest device paired will be deleted.
●
Once a device is ousted or deleted from the pairing list, the pair-
ing information for the device is also deleted. To listen to the
sound from the device again, it needs to be re-paired. Perform
steps 1 - 5 to pair the device again.
●
Some music applications do not support
Bluetooth
Profile
AVRCP 1.4, hence there will be no volume synchronization and
no song information will be displayed even if your
Bluetooth
de-
vice supports such profile.
Listening to
Bluetooth
enabled devices


