7
Initial auto installation
When the TV powers on for the first time after
purchase, the initial auto installation wizard appears.
Follow the menus and make the necessary settings
one after another.
1
Press
POWER
on the TV.
• The initial auto installation wizard appears.
2
Press
a
/
b
to select the desired language,
and then press
ENTER
.
3
Press
a
/
b
to select “HOME” or “STORE”,
and then press
ENTER
.
Press
a
/
b
to select your county channels
listed on the screen, and then press
ENTER
.
Press
a
/
b
to select “ATV”, “DTV” or
“ATV&DTV”, and then press
ENTER
.
Press
a
/
b
to select “Scan” or “Skip Scan”,
and then press
ENTER
.
• Sound system is selected when the signal search
is set to “ATV” or “ATV&DTV” mode only.
• If you select “Skip Scan”, the channel scan could
be performed in Menu.
NOTE
• HOME mode: Settings are optimised for normal home
viewing and energy efficiency.
You may alter these settings to your personal preferences
by going to “Picture Mode” adjustments.
• STORE mode: Settings are designed for maximum impact
in retail store displays.
• To change the STORE mode to HOME mode, please refer
to page 12 to reset the unit.
Selecting a preset
Picture Mode
“Picture Mode” gives you several viewing options to
choose from to best match the system environment,
which can vary due to factors like room-brightness,
type of programme watched or the type of image
input from external equipment.
1
Press
AV MODE
.
2
Each time you press
AV MODE
, the mode
changes.
• You can also switch the mode in the “Picture
Mode” menu on the “Video” menu screen.
Selected item
Description
STANDARD
For a highly defi ned image in a normally
bright room.
MOVIE
For a movie.
GAME
For game play.
USER
Allows the user to customise settings as
desired. You can set the mode for each
input source.
DYNAMIC
For a clear-cut image emphasising high
contrast for sports viewing.
NOTE
• You can select a different Picture Mode item for each input
mode. (For example, select STANDARD for TV input and
DYNAMIC for VIDEO input.)
• You cannot select Picture Mode (
AV MODE
) for USB Media
Player mode.
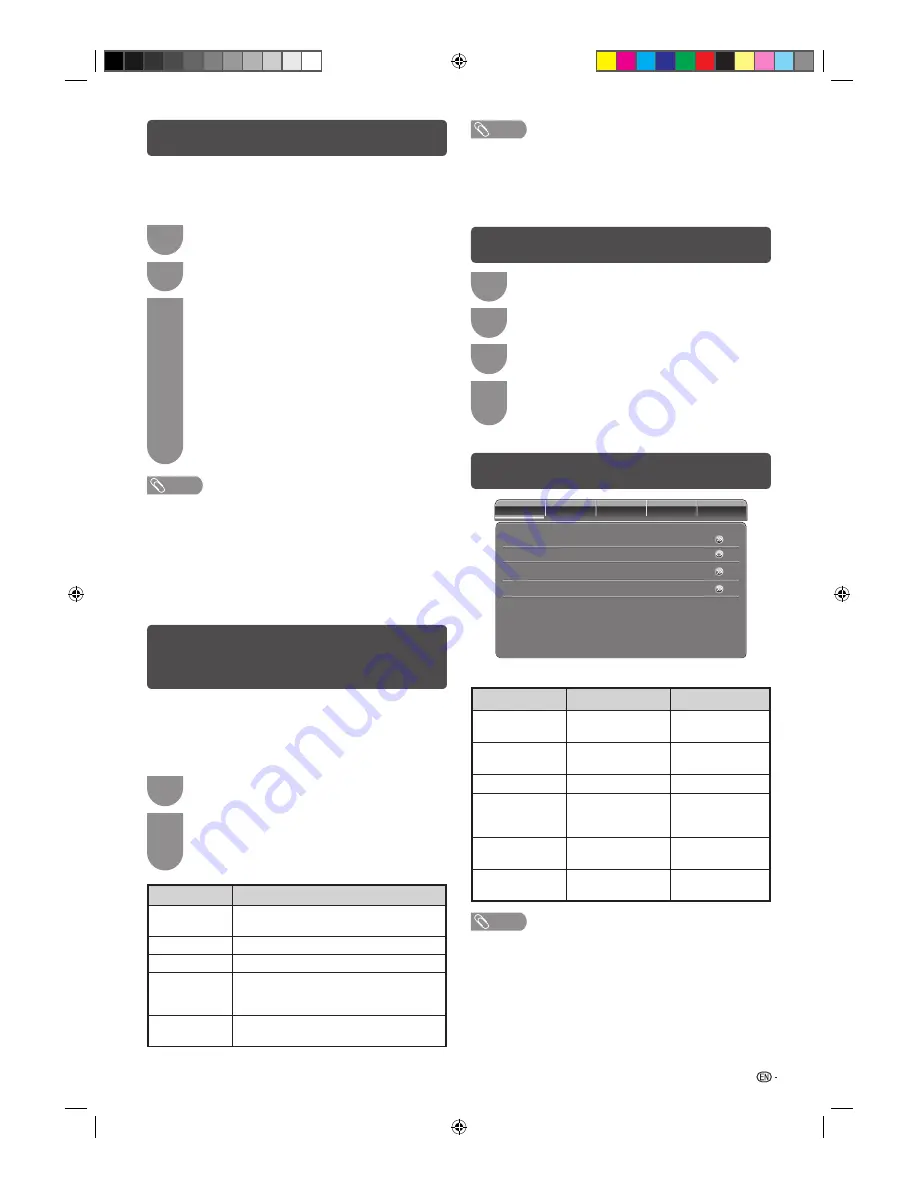
Menu operation
1
Press
MENU
and the MENU screen displays.
2
Press
c
/
d
to select the desired menu. (Video,
Audio, TV, Setup, Parental)
3
Press
a
/
b
to select the desired menu item.
Press
ENTER
to proceed if necessary.
4
Press
a
/
b
or
c
/
d
to select the desired item
or adjust the item to the desired level. Press
ENTER
if necessary.
Video menu
Video
Audio
TV
Setup
Parental
OPC
Colour Temperature
Advanced Video
On
Picture Mode
H
Picture Mode adjustments
Selected item
c
button
d
button
Back Light
The screen dims
The screen
brightens
Brightness
For less brightness
For more
brightness
Contrast
For less contrast
For more contrast
Saturation
For decrease
saturation of colour
For increase
saturation of
colour
HUE
For decrease HUE
of colour
For increase HUE
of colour
Sharpness
For less sharpness
For more
sharpness
NOTE
• For resetting all Picture Mode adjustment items to factory
preset values, press
a
/
b
to select “Picture Reset”, press
ENTER
, press
c
/
d
to select “OK”, and then press
ENTER
.
LC24LE430X_EN.indb 7
LC24LE430X_EN.indb 7
7/19/2011 9:38:13 AM
7/19/2011 9:38:13 AM
Summary of Contents for Aquos LC-24LE430X
Page 2: ...LC24LE430X_EN indb 2 LC24LE430X_EN indb 2 7 19 2011 9 38 04 AM 7 19 2011 9 38 04 AM ...
Page 24: ...Memo LC24LE430X_EN indb 22 LC24LE430X_EN indb 22 7 19 2011 9 38 17 AM 7 19 2011 9 38 17 AM ...
Page 25: ...Memo LC24LE430X_EN indb 23 LC24LE430X_EN indb 23 7 19 2011 9 38 17 AM 7 19 2011 9 38 17 AM ...
Page 26: ...Memo LC24LE430X_EN indb 24 LC24LE430X_EN indb 24 7 19 2011 9 38 17 AM 7 19 2011 9 38 17 AM ...
Page 27: ...LC24LE430X_EN indb 25 LC24LE430X_EN indb 25 7 19 2011 9 38 17 AM 7 19 2011 9 38 17 AM ...


