background image

26

27

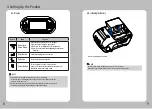
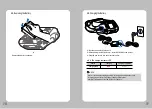
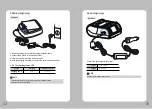
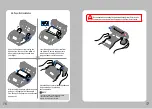
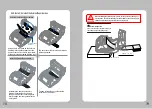
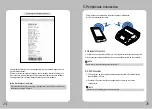
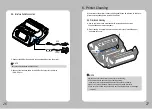
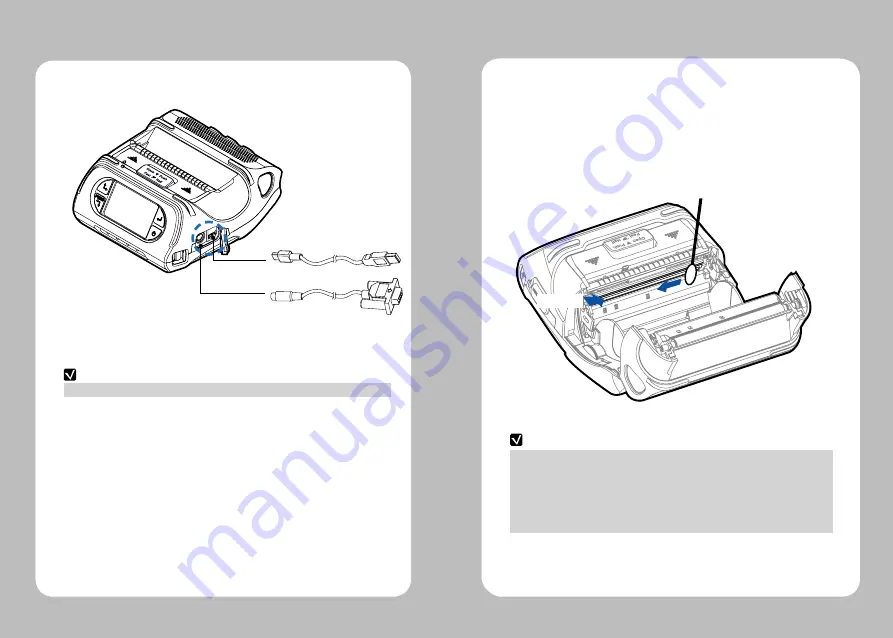
5-3.  Interface Cable Connection

1. Connect the USB or Serial cable to the applicable port on the printer.

2. Connect the interface cable to the USB or Serial port of the device

    (PDA, PC, etc.)

NOTE

Only use cables included with the printer.

Serial

USB

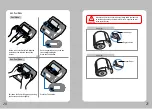
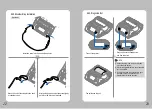
6-1. Print-Head Cleaning

6. Printer Cleaning

If the interior of the printer is dusty, printing quality can be reduced. In this case, 

follow the instructions below to clean the printer.


NOTE

1. Make

 sure to turn the printer power off prior to cleaning.

2. The print-head can become very hot during printing; 
    allow the printer approximately10 minutes to cool before cleaning.
3. Do not touch the print-head, it can be damaged by static electricity.

4. Take care not to allow the print head to become scratched and /or damaged 

    in any way.

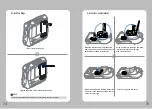
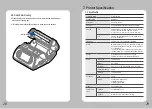
1. Use an applicator swab moistened with isopropyl alcohol to clean 

    the print-head and remove any dust.

2. Once cleaning is complete, allow the printer to dry then install the paper 

     and close the cover.

Print-Head

Summary of Contents for LK-P43

Page 1: ...to change without notice J STEPHEN Lab Ltd 28 6 Gajangsaneopdong ro Osan si Gyeonggi do 18103 Republic of Korea TEL 82 31 8077 5000 FAX 82 31 459 8880 http www miniprinter com P43 Peeler Rev H 01 18 USER S MANUAL Peeler MODEL LK P43 ...

Page 2: ...1 Risk of explosion if battery is replaced by an incorrectly type Dispose of used battery according to the local disposal instructions ...

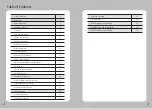
Page 3: ...9 Paper Roll Installation 16 4 10 Install Uninstall the External Paper Guides 18 4 11 Peel Mode 20 4 12 Shoulder Strap Installation 22 4 13 Diagnostic Test 23 5 Peripherals Connection 25 5 1 Bluetooth 802 11a b g Connection 25 5 1 Wi Fi 802 11a b g Connection 25 5 2 Interface Cable Connection 26 6 Printer Cleaning 27 6 1 Print Head Cleaning 27 6 2 Platen Roller Cleaning 28 7 Printer Specification ...

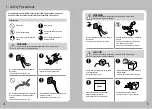
Page 4: ...f a power plug is broken or a plug is cut or worn do not use it Do not overload an electrical outlet WARNING Failure to follow these instructions could result in fire electric shock other injuries or property damage Failure to follow these instructions could result in fire electric shock other injuries or property damage Turn off the power using the power button May cause damage or injury Potentia...

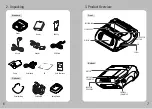
Page 5: ...R CONNECTOR COVER OPEN BUTTON Front Bottom PEELER BODY PEELER WING BATTERY BELT CLIP CONNECTOR SERIAL USB DISPLAY Printer Battery Belt Clip AC cord Optional Standard CD USB Cable Quick Reference Adaptor Paper Shoulder Strap Serial Cable Battery Cradle Car Adapter ...

Page 6: ... to turn power on Press for three seconds to turn power off Wakes the printer from sleep mode NOTE 1 The battery status LEDs indicate amount of power remaining Actual run time remaining depends on factors such as the contents of output distance to computer etc 2 When the battery level is very low high density printing can result in the printer switching off during printing resulting in possible lo...

Page 7: ...CK into the printer 3 Plug the power cord into the electrical outlet 4 4 1 The charge indicator LED Status Charging Charging Completed Charging Lamp Red Green If there is trouble while charging the battery the charge indicator LED blinks green Try unplugging and reconnecting charger charging should resume Charging is complete when the LED changes to solid green NOTE ...

Page 8: ...CK to the electrical outlet 3 Plug the power cord into the electrical outlet 4 Once the charging is completed remove the battery from the charger Optional In the case the battery is not inserted properly the red LED will blink Remove and reinsert the battery Connect the car charger to the printer 4 6 Car charger usage Optional Input 12V 24V 9 5V 3A Output Connect the car charger to the printer NOT...

Page 9: ... NOTE 4 8 Interface Cap Installation 1 2 3 4 When the Interface Cap is disconnected from the printer try to orient the Cap Hook horizontally as shown in the image Using a sharp tool insert the Cap Hook into the hole located on the right side of Interface Cap When the Cap Hook is inserted install the Cap Cover in the direction of the arrow as shown in the image Close the Interface Cap cover ...

Page 10: ...ter Open the Paper cover by pressing the Open button You can set the width of paper guide by turning the knob with your finger After inserting the paper adjust the paper guide so it is slightly wider than paper size Then pull the paper out and close the paper cover Close the Paper cover with both hands and feed some paper by pressing the Feed button Be cautious when handling the product while the ...

Page 11: ...d The two external paper guides will be installed on the printer External Paper Guides 4 10 Install Uninstall the External Paper Guides Uninstall the External Paper Guides Install the External Paper Guides 1 2 1 2 When installing the external paper guides set the printer on the edge of a flat surface Then insert the paper in the backside of the printer s paper slot and adjust the paper guide to fi...

Page 12: ... the peeler body until you see two complete triangles Press the Feed button Pull down the Peeler Wing while pressing the Cover open button slightly Paper 1 Label Paper Engraved Line Paper 2 Label Paper When users operates the peeler like the image below that has slits on the label 1 and the perforated label 2 there might be an error in the peeler function CAUTION ...

Page 13: ...nal 1 3 2 4 12 Shoulder Strap Installation 4 13 Diagnostic Test 1 2 3 NOTE Turn off the printer The self test will print Press and hold the Feed button and Power button 1 For Hex Dump mode do steps 1 2 then press the Feed button 2 After printing ASCII pattern the diagnostic test is complete 3 If the Feed button is not pressed to go to Hex Dump mode the printer exits diagnostics after three seconds...

Page 14: ...onds after continuously printing 1 5 meters 5 Peripherals Connection NOTE Please refer to the Configuration manual for detail This product can communicate with other devices via Bluetooth Wi Fi or a communication cable 5 2 Wi Fi Connection 1 The Printer can be connected to devices equipped with Wi Fi communication capacity PDAs PCs etc 2 Use the Wi Fi connection function supported by the device to...

Page 15: ...instructions below to clean the printer NOTE 1 Make sure to turn the printer power off prior to cleaning 2 The print head can become very hot during printing allow the printer approximately10 minutes to cool before cleaning 3 Do not touch the print head it can be damaged by static electricity 4 Take care not to allow the print head to become scratched and or damaged in any way 1 Use an applicator ...

Page 16: ...F417 Emulation ESC POS ZPL CPCL Command compatible Driver Windows Driver 10 2012 8 7 2008 VISTA 2003 XP 32bit 64bit Window CE Mobile Driver SDK CE 4 2 Mobile 5 0 Linux Driver Mac Driver OPOS Driver JavaPOS Driver iOS SDK Android 2 1 SDK Blackberry SDK Symbian Sensor Black Mark Upper Lower Gap Cover open Peeler Detect Peeler S W Media Width Detect Paper Paper Type Thermal Paper Width 50 112mm Thick...

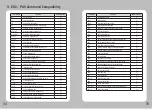
Page 17: ...0 Humidity Operation 10 90 Storage 10 90 8 CPCL Command Compatibility Printer Commands Compatibility PRINT FORM JOURNAL UNITS USING COMMENTS TEXT Compatibility TEXT FONT GROUP FG TEXT CONCATENATION MULTILINE ML COUNT SETMAG SCALABLE TEXT Compatibility SCALE TEXT SCALABLE CONCATENATION LINEAR BARCODES Compatibility BARCODE BARCODE TEXT COUNT Two Dimensional Bar Codes Compatibility PDF417 PORTABLE D...

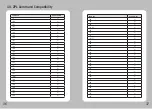
Page 18: ...P Line Print Mode Compatibility SETLP SETLF Moving With X and Y Coordinates LMARGIN SETBOLD SETSP Special ASCII Characters SETFF SET TOF SETLP TIMEOUT ADVANCED UTILITIES Compatibility VERSION CHECKSUM DEL DIR DEFINE FILE TYPE BAUD COUNTRY CODE PAGE TIMEOUT BEED ON LOW BATTERY LT SET TIME GET TIME SET DATE GET DATE PRINTING A TIME STAMP PRINTING A DATE STAMP PAPER JAM PRINTER ESCAPE Compatibility S...

Page 19: ... international character set ESC S Select standard mode ESC T Select print direction in page mode ESC V Set cancel 90 cw rotated character ESC W Set printing area in page mode Command Function Compatibility ESC Set relative position ESC a Align position ESC d Print and feed paper n lines ESC t Select character code table ESC Set cancel upside down character printing FS p Print NV bit image FS q De...

Page 20: ...bility Command Compatibility A B0 B1 B2 B3 B4 B5 B6 B7 B8 B9 BA BB BC BD BE BF BI BJ BK BL BM BO BP BQ BR BS BT BU Command Compatibility BX BY BZ CC CC CD CF CI CT CT DF DG FB FC FD FH FN FO FP FR FS FT FV FW FX GB GC GD GE GF GS ...

Page 21: ...38 39 Command Compatibility ID IL IM IS JR JS JS KL LH LL LR LS LT MC MD MN PM PO PQ PR PR PW SC SD SF SL SN SO ST Command Compatibility TA XA XF XG XZ ZZ P A T E N T ...

Reviews: