4
STEP 2: SHADE INSTALLATION
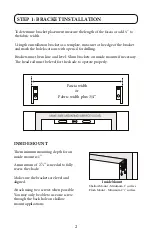
Push the rail back until it
is fully engaged
Center the shade in the window opening and push the head rail
into the mounting brackets as shown.
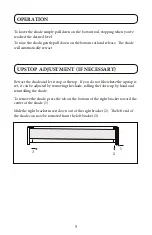
Once the brackets are secured and level, the fabric roll can be
inserted. Make sure your hands are clean to avoid soiling the
fabric.
While facing the inside of the shade, be sure the clutch and
roller end plug are inserted into the roller. Hold the shade with
the bottom of the clutch facing the floor, and the beaded cord
hanging straight down. Be sure the shade is fully rolled on the
tube.
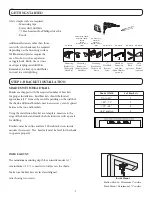
Insert the foot of the control-side bracket into the slotted
center hole of the clutch. Set the post of the end plug into the
V of the support bracket. Rotate the T-hook on the support
bracket to lock in the post and secure the fabric roll.
Fig.15
End Plug
Post
V slot
SHADES WITH HEAD RAIL
SHADES WITH FASCIA OR NO HEAD RAIL
Bracket
No head rail bracket pictured
STEP 3: FASCIA INSTALLATION (IF ORDERED)
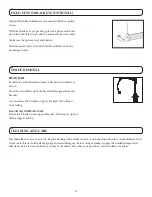
Attach the fascia by first hooking the top lip of the fascia panel
onto the bracket as shown.
Swing the bottom of the fascia panel towards the bracket and
gently press at the bottom of the panel until the lip on the fascia
engages and snaps lock to the bracket.


