C-3
© 2017 SeaStar Solutions
i7700 Installation Supplement, Rev. B
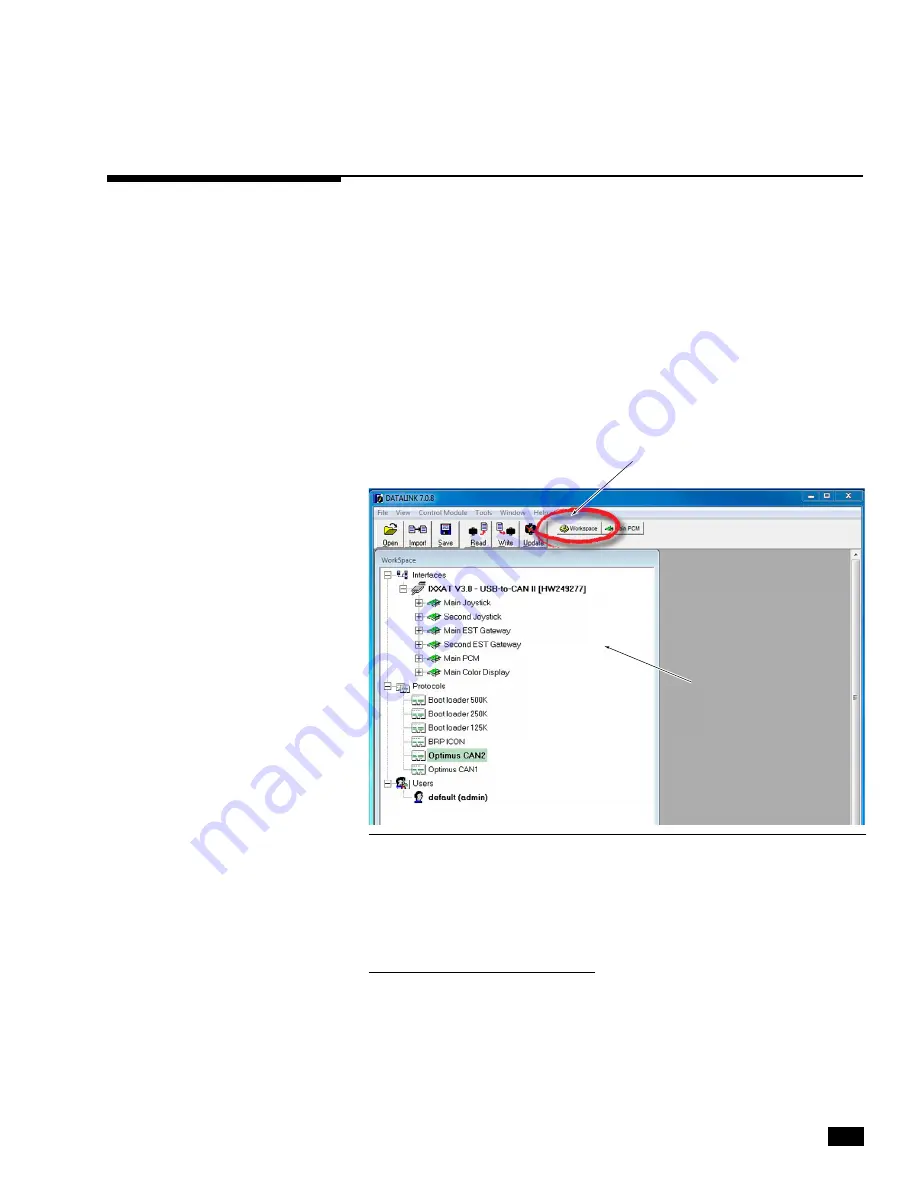
C.3 Navigating Datalink
When you run the Datalink software it will open up with a window
similar to the one shown in figure C-2.
At the very top of the display is a series of pull-down menus that
access various functions. Just below that is the toolbar, which
contains buttons for the most commonly used functions.
The pane on the left is called the Workspace. It is your primary
access point to the devices in your system. At the top of the
workspace is a list of available Interfaces; these are the devices on
the network defined by the selected protocol. In the figure you can
see under Protocols that ‘Optimus CAN2’ is highlighted, so the list
of Interfaces is a list of devices connected on the CAN2 network.
Figure C-2. Datalink Workspace. Your available interfaces may not be exactly as shown.
RETURN TO WORKSPACE BUTTON
ACTIVE WORKSPACE
Double click on a device in the Interfaces list to open the configuration
page for that device. Click Workspace in the toolbar at any time to
bring up the
Workspace
window.
Important notes about Datalink
Datalink is not like most software packages you are used to. Unlike
a word processor, you don’t open a file, make changes, and save
them. Instead, you open an Interface, which is actually a database
that is specially formatted on your screen. The parameter fields (any
box with editable values) are cross-referenced to data tables in the
devices, but it is not in real-time.


