B-3
© 2017 SeaStar Solutions
i7700 Installation Supplement, Rev. B
B.3 Initial Startup
B.4 Unlocking the Dealer Menu
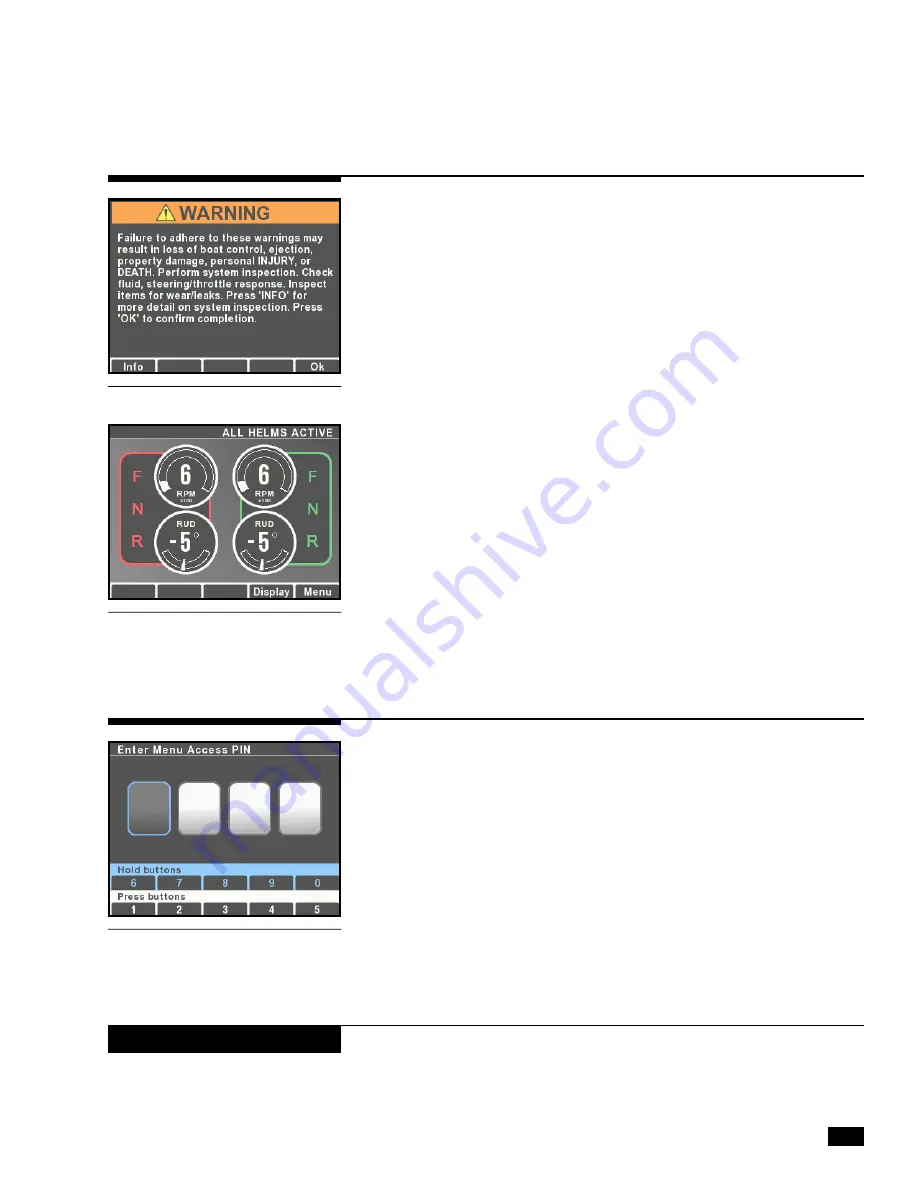
When the system power is turned on the CANtrak will display a
splash screen, followed by an initial warning screen that prompts
the user to perform a system inspection.
All setup and configuration tools are reached from the Dealer Menu,
which authorized installers can access with a four digit PIN code (if
you don’t have a code contact SeaStar Solutions technical support).
From the main run screen, press and hold
Menu
until you see the
PIN entry screen.
Use the buttons to enter your four digit PIN code. Press the buttons
briefly for digits 1-5, press and hold for digits 5-9.
If you enter the code incorrectly you will exit the screen and be
placed into the user menu. Press and hold
Menu
again to get back
to the PIN entry screen.
Once you have entered the correct code you will go directly to the
Dealer Menu. You won’t need to enter the code again unless you
cycle system power.
Press
Info
to step into the system inspection prompts, or press
OK
to continue. This will take you to the main run screen (also called
the All Helms Active screen). If you press
Menu
from the main run
screen you will see menus available to the user. (The screen shown
is for an Optimus 360 system with joystick – on an EPS system you
will not see the gear selection.)
Note: User functionality is not relevant when using the display as a
setup tool for EST systems.
Figure B-3.
Figure B-5.
Figure B-4.
The Dealer Menu can be unlocked when faults are active. Faults are
suppressed during setup and system updates.
NOTICE


