background image

Rev. 2012.02.27 

11

3.Press Selection Button 2 to decrement the  **.- -  Value i.e shelf selection no (** no. of shelf).                                                


    The LCD will now display the decremented shelf selection no. 
 

The Shelf for which the Negative Counter has to be set has now been decided ; We now need to set the value of the 
 Negative Counter for the selected shelf


4. Press Selection Button 3 to increment the - - .** Value i.e negative counter value (** negative counter setting). 


5. Press Selection Button 4 to decrement the - - .** Value i.e negative          counter value  (** negative counter setting). 


Press button 5 to store the decided  negative counter value assigned to the selected shelf.  

   The Display will show C.set 
 

6. Repeat steps 2 to 5 till all the shelves have been assigned the desired negative counter value. 
 
7.Press Reject Button to exit 
 

Note

Default values of all Negative Counters are factory set as per the No. of spaces in each coil. If the user changes 

a coil to one which has different number of spaces then the Negative Counter pertaining to that coil will have to be 
reprogrammed as per procedure mentioned earlier.


2.

 Negative Counter Display : To see the current status of all the Negative Counters assigned to different shelves , 

enter  the service Audit mode. ( Au- - ). 
 
 In the Audit mode Press button 5 , the Negative Counter value along with the selection no ( **.- - where ** 
represents the shelf that has been selected and the - -   represents the current value of the Negative Counter that 
has been assigned to that shelf.) is   displayed in scrolling mode from shelf 1 to 5. 
 

3

. Sold out Feature: After setting the Negative Counter for each selection, the Negative Counter will get 

decremented by 1 each time that a valid vend is made. Negative Counters for each shelf thus keep on 
decrementing as and when a vend is made, from the set value to zero. 
 
 When the value of any Negative Counter reaches zero, pressing the selection button assigned to that Negative 
Counter will then prompt the display to show 

SOLD OUT. 

No vend can then be made from that shelf. Vends from 

other shelves will not be interrupted and can be made as normal 
 

Note

If a coil has 7 spaces/products, it will show SOLD OUT after vending 7 products. 

 
4. Resetting of Negative Counters of fully vended shelves: 
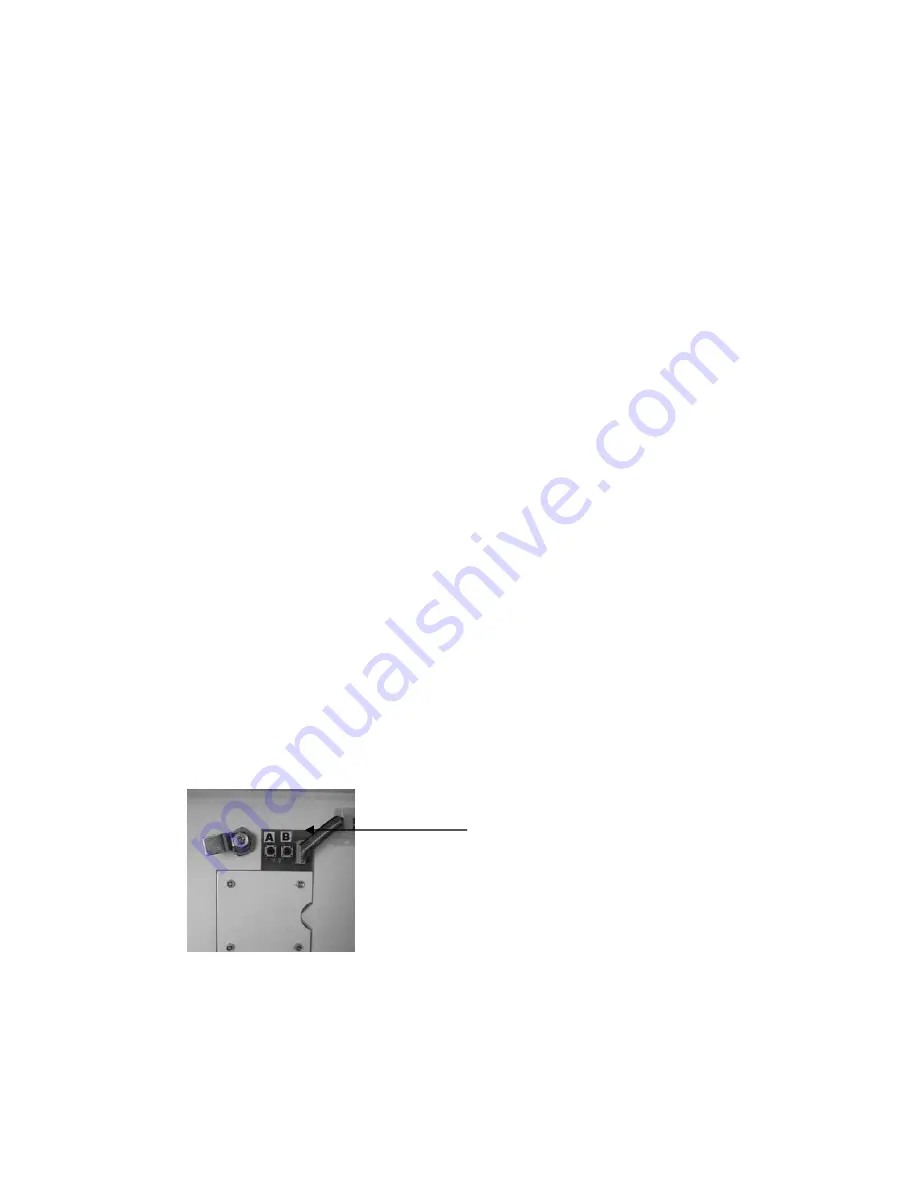
Button no. B 

(fig.2) has been assigned for the resetting 

of the Negative Counter of fully vended shelves. If one or more selection(s)  is /are sold out, then keeping the button 
B pressed for 3-4 seconds will reset all the Negative Counters of the shelves which were fully sold out at that 
moment.  


          Fig.2 


 A long beep with 

r-ld 

will appear on the display indicating that partial resetting has taken place and that the 

Negative Counters which were zero prior to resetting have been restored to set value.


The Negative Counters of all other selections which were not fully sold out at that moment will not be disturbed and 
will maintain the value they had reached. 


Button A & B 

Summary of Contents for SL5000

Page 1: ...Rev 2012 02 27 1 SL5000 Operator s Manual...

Page 2: ...n this process It is important that you keep the original packaging for your vending machine at least through the warranty period If your machine needs to be returned for repair you may have to purcha...

Page 3: ...M The delivery system of your SL5000 incorporates a Selection Pad an LCD Display and helix coils The customer inserts money into the coin slot and enters their selection on the Selection Pad the selec...

Page 4: ...0 seconds When the machine goes to sleep the following messages are displayed under set conditions When Awake When Asleep i 00 00 09 00 0 00 9 99 Decimal points always on ii 10 00 99 99 10 00 99 99 De...

Page 5: ...goes to Sleep 3 Service Mode can be exited by stepping through all the menu options using the Service Button or automatically if there is no activity for 30 seconds On Exit the software version numbe...

Page 6: ...ammed 4 Insert additional coins if required and repeat for other selections 5 Press Service Button to scroll to exit Prices may be set from 00 00 to 99 99 depending upon coin values The default price...

Page 7: ...nd Price Held until power removed Returned when ER pressed or held until power removed 05 Credit Vend Price Held for 60 seconds Returned when ER pressed or held for 60 seconds 06 None Free Vend Mode N...

Page 8: ...til Displays tE 2 Press Service Button to exit In Test Mode pressing a selection switch will operate the selected motor If a coin is inserted its value will be displayed for 1 second ALL MOTORS MODE 1...

Page 9: ...d Replace the battery 73 Battery nearly low Warning Replace recharge the battery soon Soft Errors unit will continue to operate though failed motors will show as Sold Out and be blocked from operation...

Page 10: ...t so an approximate setting of the timing value needs to be set The vend cycle is the time from motor start when at home to motor end return to Home in seconds This translates directly to the timing v...

Page 11: ...as been selected and the represents the current value of the Negative Counter that has been assigned to that shelf is displayed in scrolling mode from shelf 1 to 5 3 Sold out Feature After setting the...

Page 12: ...done to verify correct operation of the machine Further tests are done on Power Up Button Press Coin Insertion and entering exiting Service mode These tests will generate the relevant fault code as n...

Page 13: ...lection 2 for seconds till Displays set The machine will automatically exit from service mode and display Out Of Ord e r 3 Press Red Service Button to re enter Service Mode and re configure settings F...

Page 14: ...ce Exit Service Mode 62 Escrow Return Time out Check Escrow unit Activate Test Sequence Exit Service Mode 70 EEPROM Write Error Check Prices and Coin data 71 EEPROM Read Error Check Prices and Coin da...

Page 15: ...ution and reassemble COMMON QUESTIONS AND ANSWERS Q How High Can I set my Prices A Each selection can be priced individually up to 99 99 Q Can Customers reach down and help themselves to product A No...

Page 16: ...service repair alteration or disassembly has been performed Any defects caused by improper power source poor water quality or pressure an installed water filtration system not fully functioning abuse...

Reviews: