4. Galileo and SmartTRAK (PC interface)
69
English
4. Galileo and SmartTRAK (PC interface)
You can choose between transferring all dives or new dives only (default setting) from
Galileo’s memory. If you choose to transfer new dives only, SmartTRAK will only transfer
dives that are more recent than the most recent dive already saved in the PC logbook.
Once the data is downloaded, a window will show you a summary table of all dives; for the
selected dive, another window will show you its details. From these windows you can add
and edit your dive information.
4.4 Uploading pictures
Galileo’s memory allows you to store up to 100 grey-scale bitmap pictures which can be
viewed on the surface or underwater as described in Chapters 2.10 and 3.4.
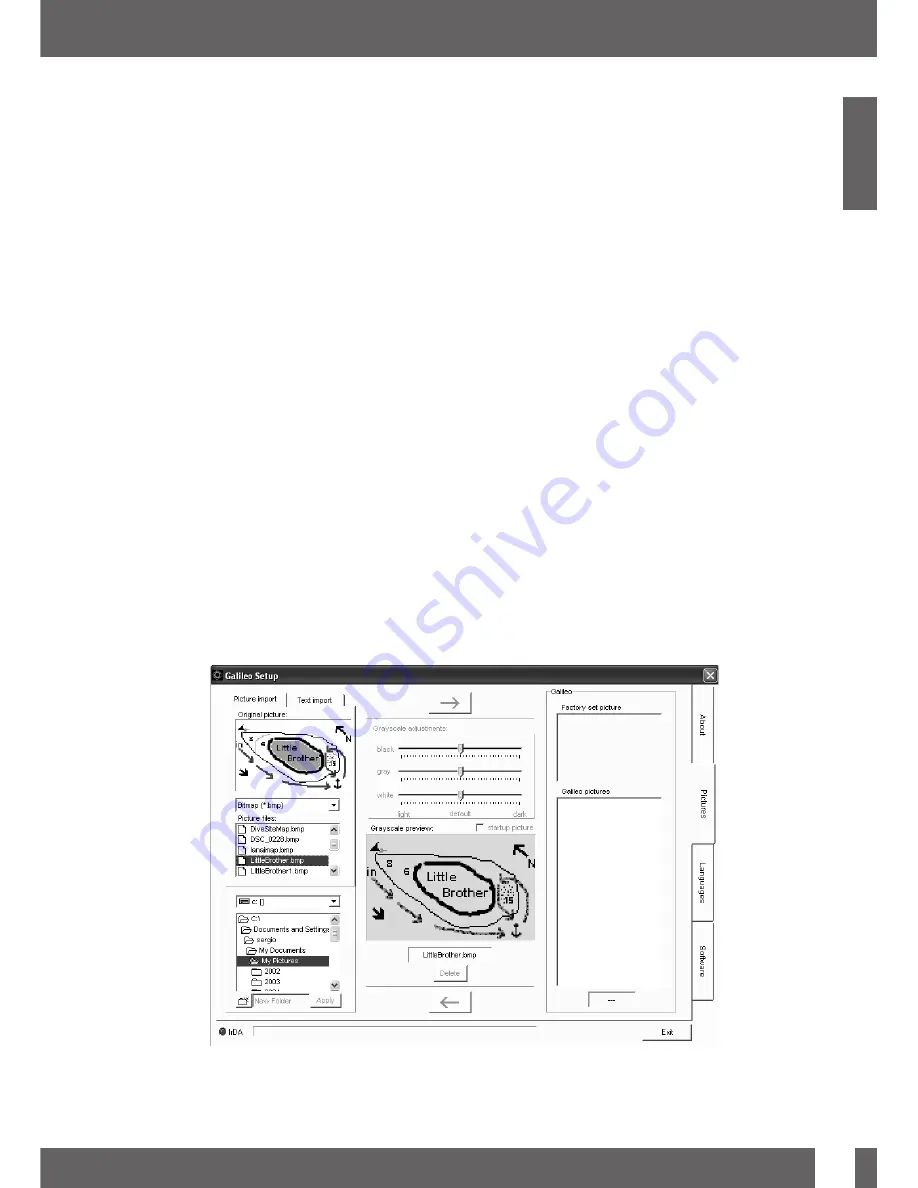
To handle pictures, you need to choose
GALILEO SETUP
under
OPTIONS
. This will
bring up the Galileo Setup window, which has various tabs along the right edge. Click on the
PICTURES
tab and you will see a window similar to the one depicted below.
Pictures already stored in Galileo’s memory will be shown to the very right end of your
screen. Their sequence corresponds to the actual viewing sequence on Galileo’s screen.
The sequence can only be changed by deleting and reloading the pictures. To delete a
picture, select it by clicking it and press the “
DELETE
” button under the preview.
To upload pictures to Galileo, use the dialog box to the left to browse your hard drive and
locate the pictures of interest. After selecting a picture, SmartTRAK shows a grey scale
preview of the same picture, as it will appear on Galileo. You can adjust the grey levels using
the sliding bars above the preview, then click on the arrow on top to transfer the picture to
Galileo.
If you wish to download pictures from Galileo to the PC, select a picture and click on the
arrow underneath the preview window.
English
Summary of Contents for galileo luna
Page 1: ...English English ...
Page 2: ......


